


Roofs are something we cover a lot in our tutorials, but there’s always more interesting roof techniques to learn. This month Henjin Quilones explains the secrets behind a beautiful curved roof design.
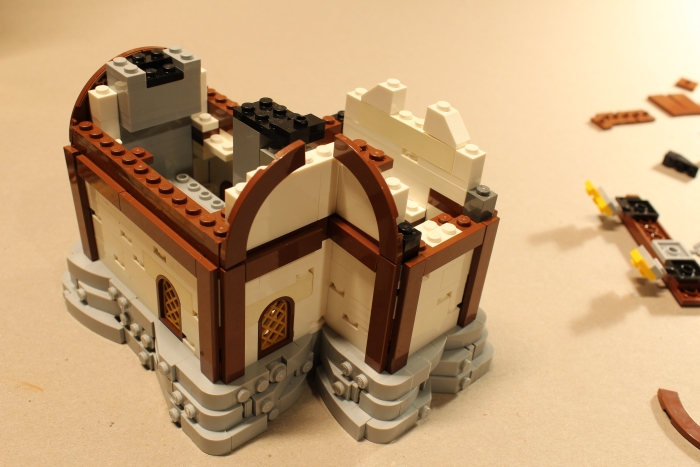
“So to begin with, we start with the base of a cottage. Do what you want for the main building, as far as style and details. Here I have begun with a charming little tudor-style cottage for some farmers in the countryside. There are SNOT bricks on the corners ready to receive 4×4 curved tiles for some nice little curved gables.
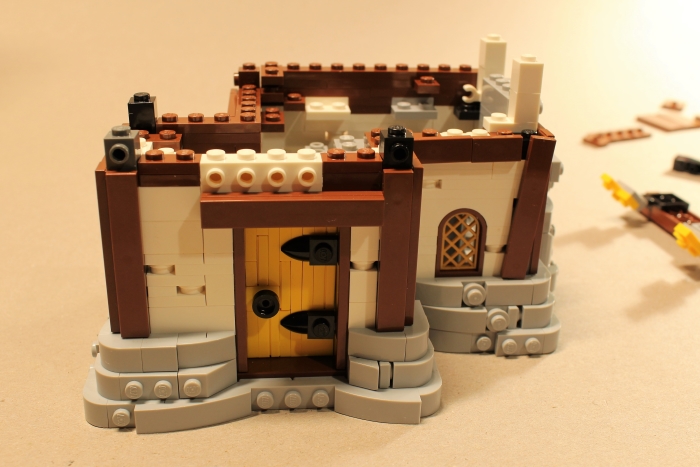
I built up the edges where the roof will hang down with some brown plates, to make them level with the top of the SNOT bricks. This will help to prevent unwanted gaps showing later.

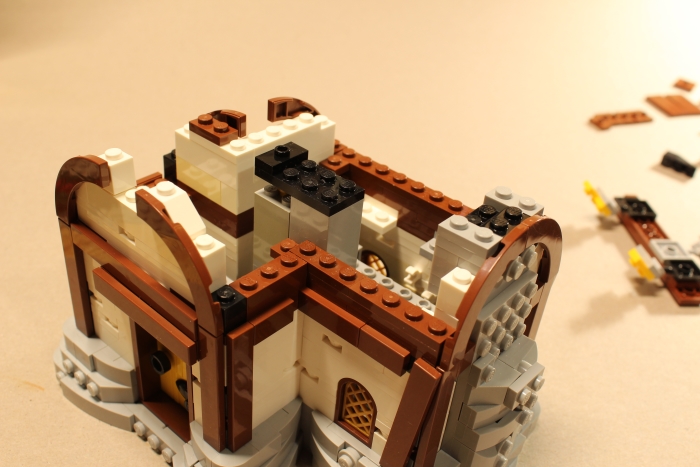
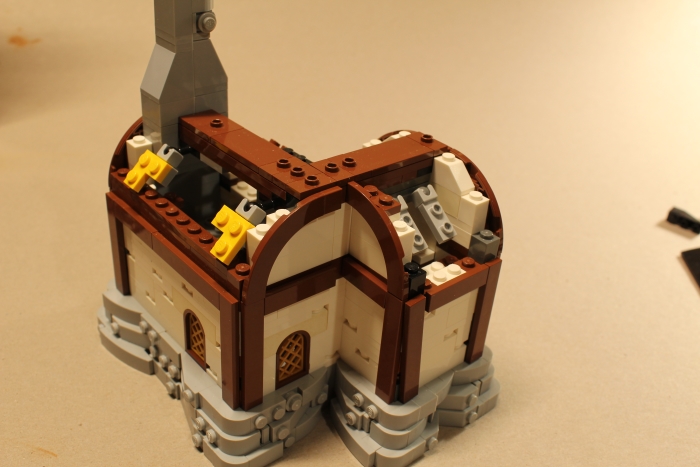
Then I proceeded to build up the ends for the gables. Note the gap at the top; that is where the central beam that will hold up the roof will attach. The back section should be at the same height as the notch, since it too will support the beam. The chimney also has a notch in the back to hold the beam. Once the beam is in place we can finish the rest of the chimney.
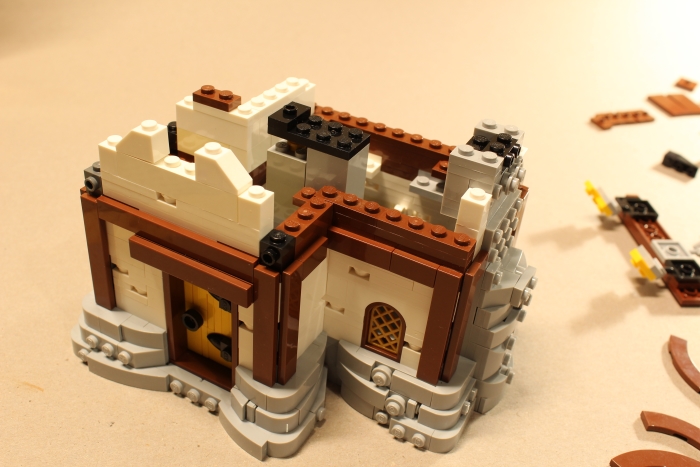
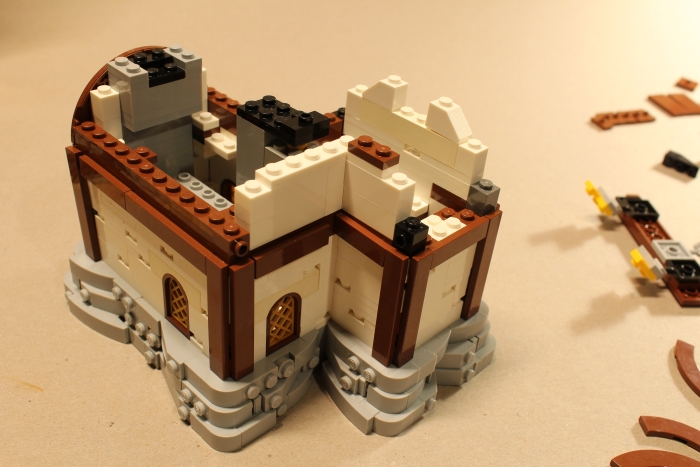
You can attach the 4×4 curved tiles now, giving a pleasant curved shape to the top of the walls.
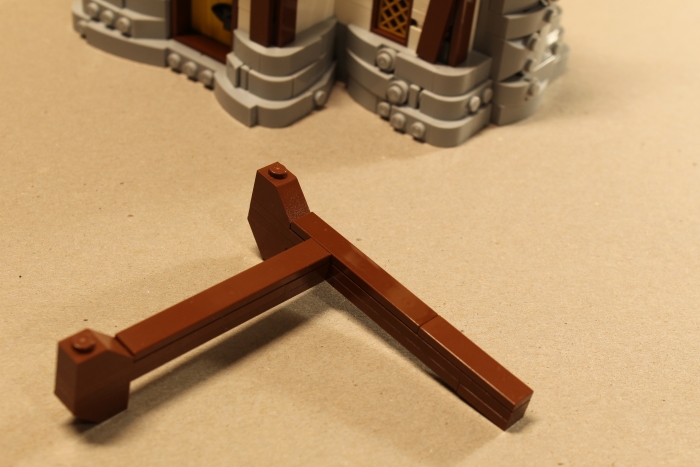
Now it is time to build the center beam. Because the house has the shape it does, we will need to create an L-shaped beam to cross both spans and support both sections of the roof. The beam I created is actually two separate beams, but you get the idea. Mounted under each of them are Mixel joints to attach the roof sections to. On the ends are some SNOT pieces to attach some finishing touches of the tudor trim. The longer beam has notch where it will fit into the chimney.
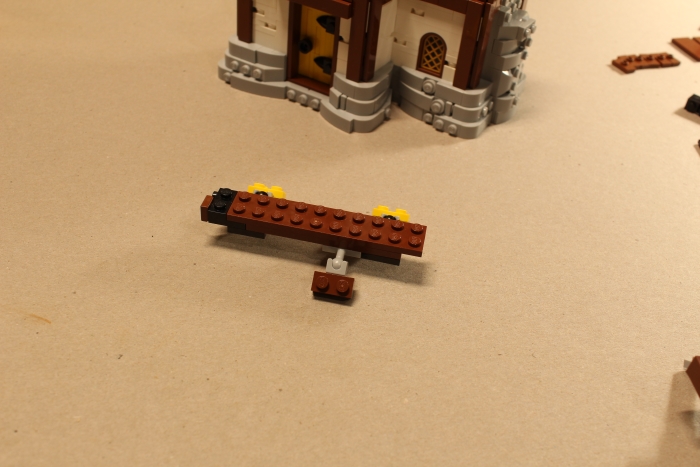
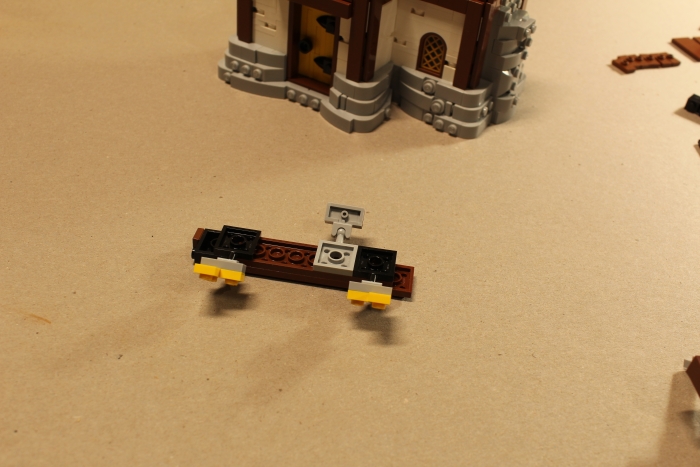
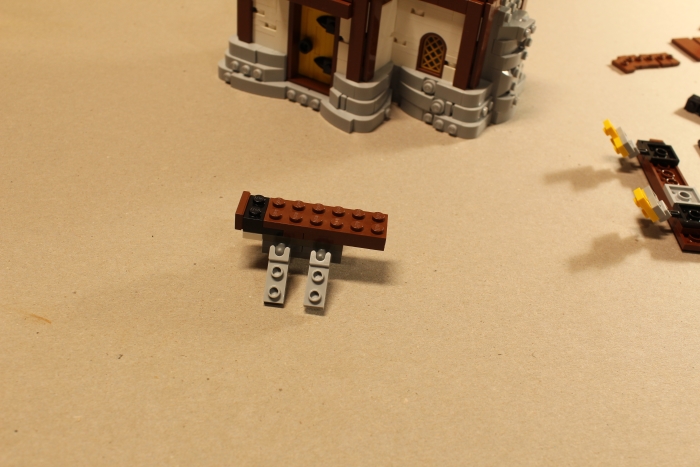
On top of the 2-stud wide beam, we need to mount a 1-stud wide beam, as well. This is what will be visible on the outside, so it needs to look pretty. To get it in the right place, of course, we need some jumper plates on the 2-wide beam.
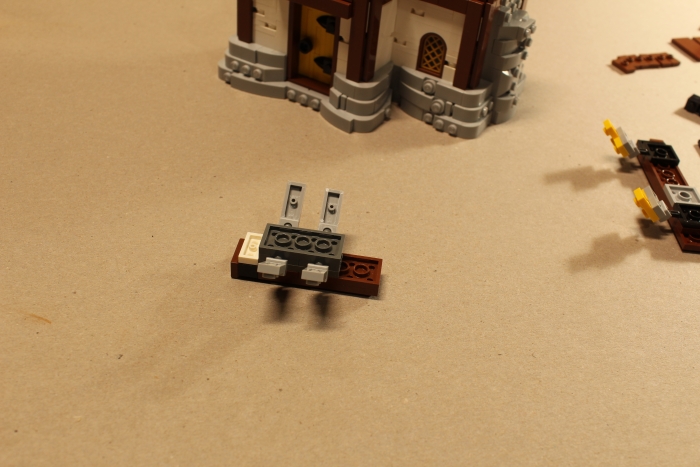
The 1-stud beam needs to be 3 plates high to be roughly flush with the final roof, so two layers of plates plus a layer of tiles should be enough. I added some details at the ends to make it prettier, too.
Then it sits nice and pretty on top. I forgot to press it down for the picture, but it gives you the idea of what it should look like.

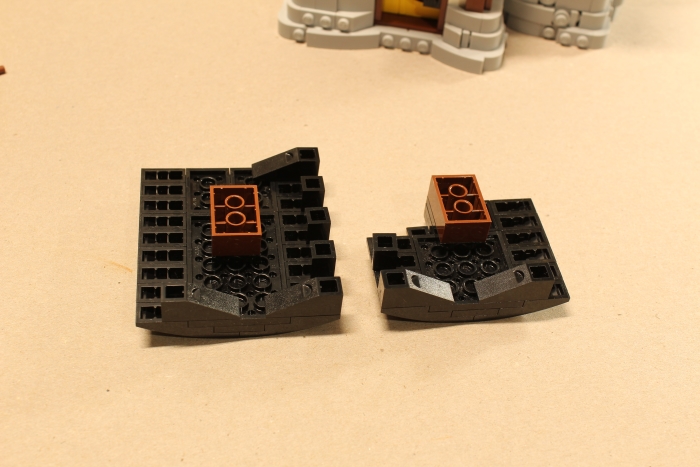
The next step is to make the curved roof pieces. For this roof I need four of them, each of a different size. Two of them will need to be irregularly shaped for the inside corner, and two will need to be rectangular. I used a bunch of 1x4x1 curved slopes with no studs for the roof sections over the door, and then half the same part for the sections by the chimney, and half 1x3x1 curved slopes with no studs, since that section of the house is narrower. Notice the notch to fit around the chimney.
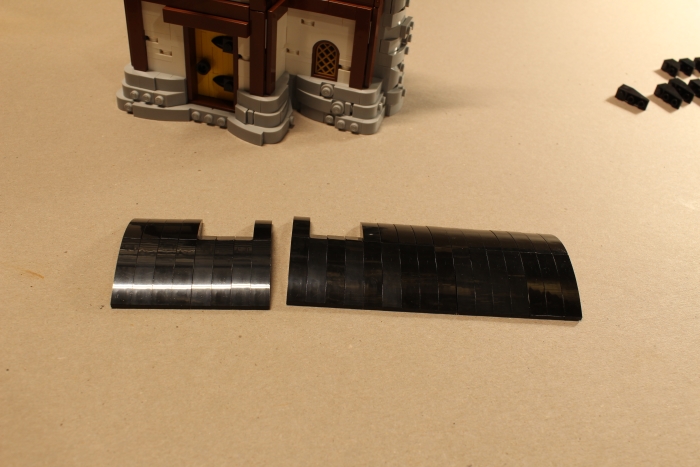
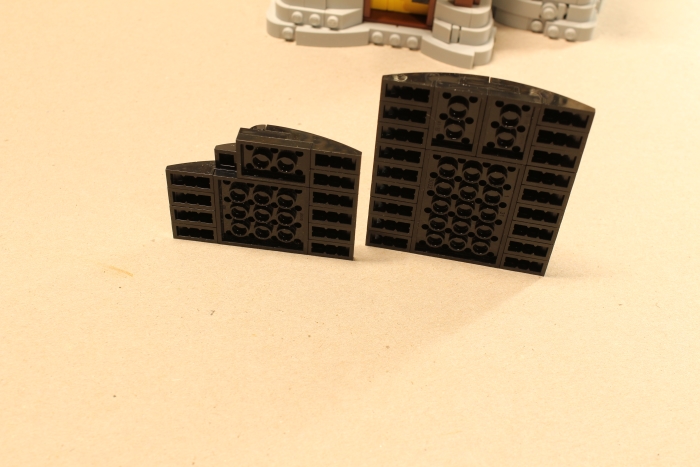
On the ends of the sections, I added some 1x3x1 inverted slopes to hide some gaps and make the ends prettier. On the sections that will go over the door, I also added some 1×1 bricks to simulate rafters under the eaves, in case anyone decided to look that closely at the final build. I’m not sure it is even noticeable, but I did it anyways for my personal satisfaction, at least. To mount to the Mixel joints I built up the undersides a bit with a 2×3 brick and a 2×3 plate.
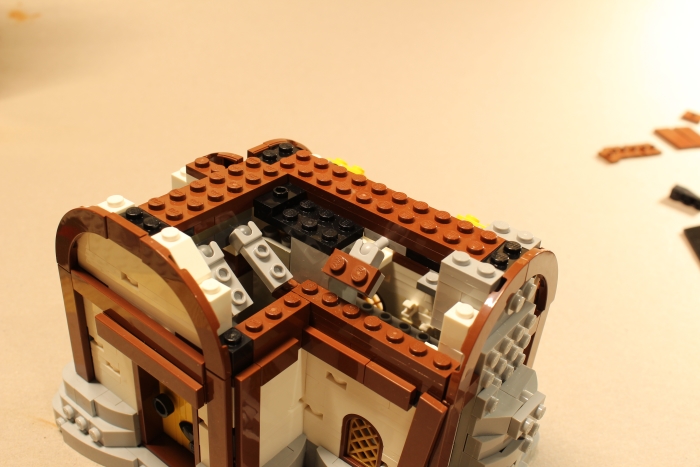
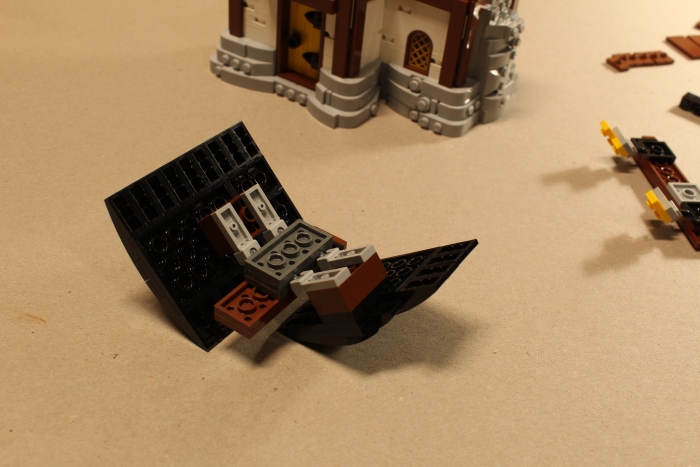
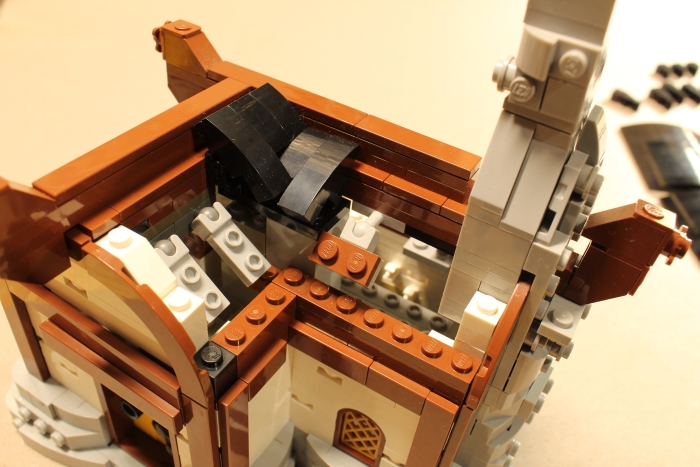
Now the tricky part. This might make you give up and despair, or maybe it won’t. Somehow, it did not for me, despite my short temper and shorter patience. I had to take the whole beam assembly off of the house several times in the course of making the roof, so you might too. To give an idea of how it attaches, I provide the following picture.
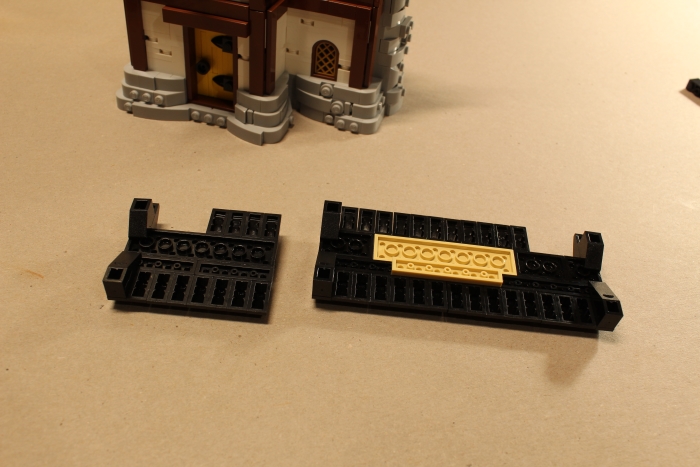
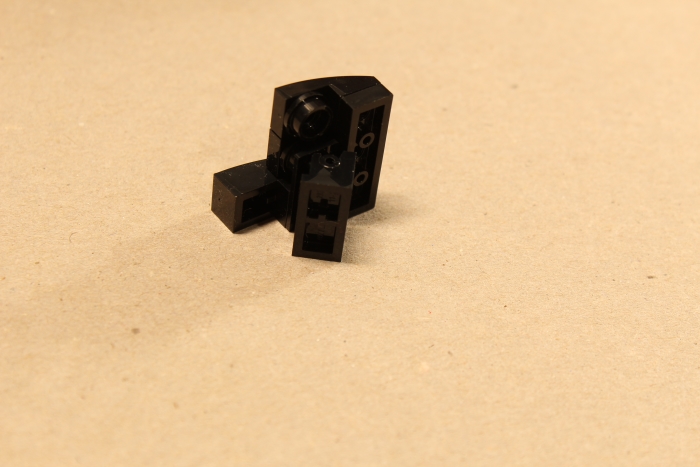
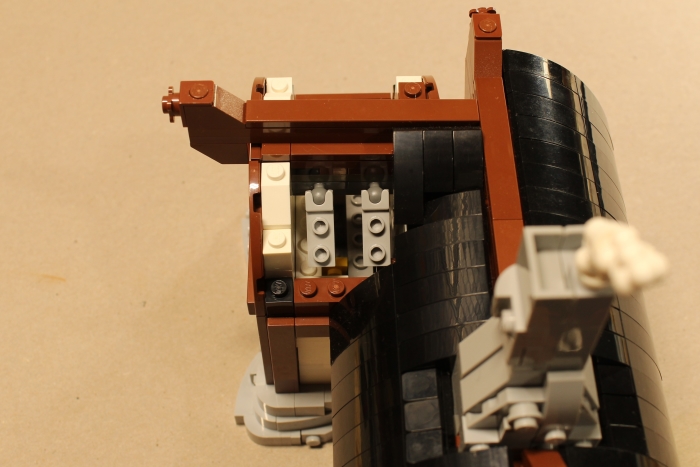
Now, once you have everything attached, you’ll notice, like I did, that you have a 2½ x 3½ stud opening in the corner where the two rooflines meet. You might have been wondering what the random stack of grey 2x2x4 bricks was for in the middle of the house. They are the place I mounted the last little bit of roof material to hide the hole. Those sections look like this when on their own…
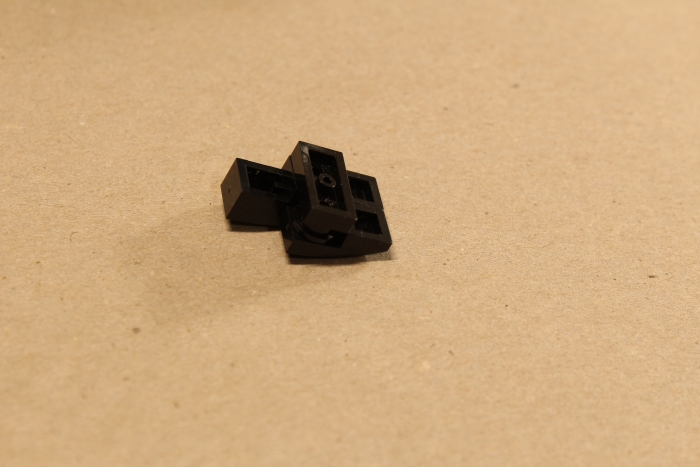
…and like this when on their own in the roof. The larger gap-filling section is on a hinge brick stuck on a jumper plate to get it aligned correctly with the main roof sections. The smaller one is just held in by gravity.
So when you begin to add it all together it should look something like this:
Finally it should look like this. Notice that to fill in a few more gaps in the ends I added some 1×1 cheese slopes, just slid into the holes and not attached by any studs.
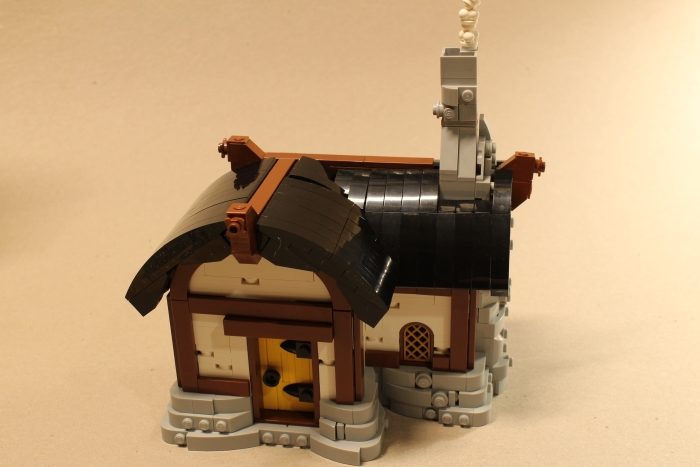
And with a full landscape and everything else, you get something like this:

So now we can all make our own curved roofs! Thank you Henjin for sharing your technique.
