


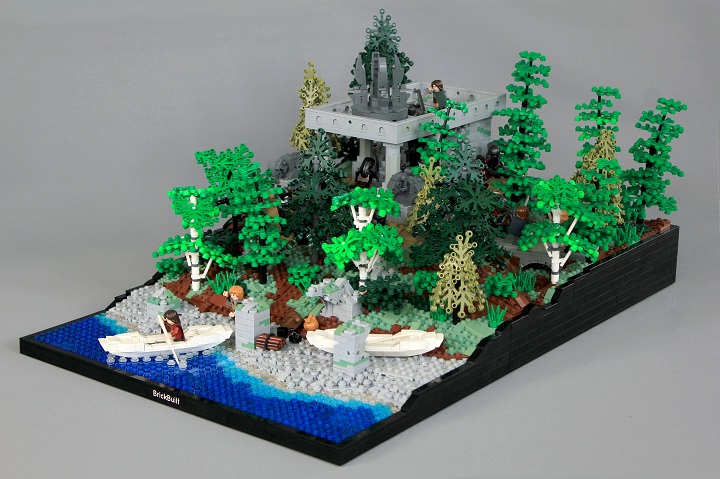
Amon Hen was built for the Middle Earth LEGO Olympics, and is one of my larger creations in some time.
The starting point for this build was the water. I roughed out the shoreline with dark tan bricks, and then started on putting the water down. We didn’t have enough plates and tiles to use those solely for it, so I decided on a mix of round studs with occasional spots of plates and tiles.
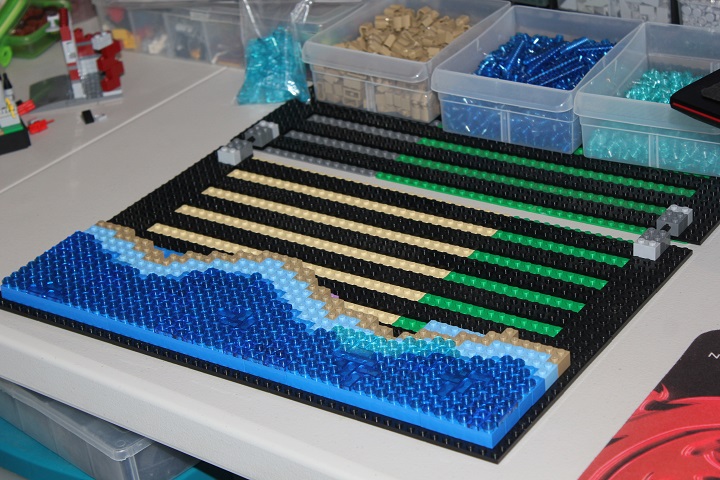
Initially I was thinking the shore would be dark tan; however, after watching a few clips from the movie, I realized the shore was very gravelly. As such, I switched to light bley as the color. To achieve the pebble-y look, I used mostly 1×1 round plates and tiles, as well as a few square plates and wedge plates mixed in.
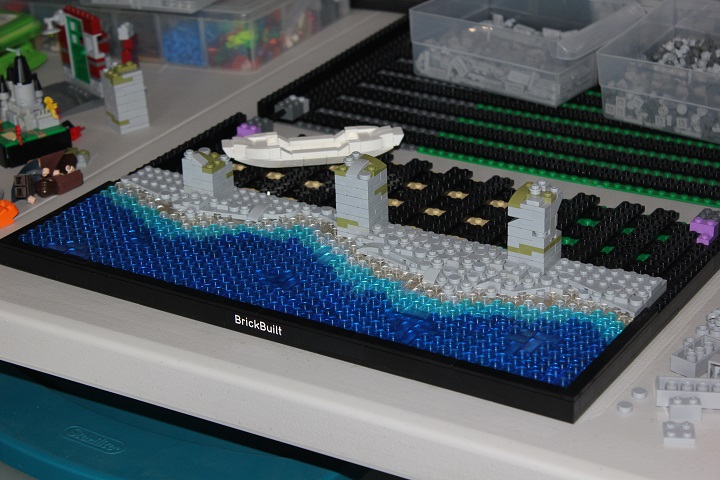
Building the elvish boats was perhaps the hardest part of the build for me. Crafting a smooth, flowing shape in such a small space is not something I generally have to build, but I’m fairly pleased with the result. And once again, I used a color that would end up being switched out for a different color with the dark tan ground, which I changed to reddish brown for a better forest look.
Next came the main ruins of Amon Hen. It took up more space than I had anticipated it would, and I actually ended up lengthening the build by 12 studs to make up for that. Creating the seat on top of the ruins, particularly the statues surrounding it, was definitely the hardest part of this section.
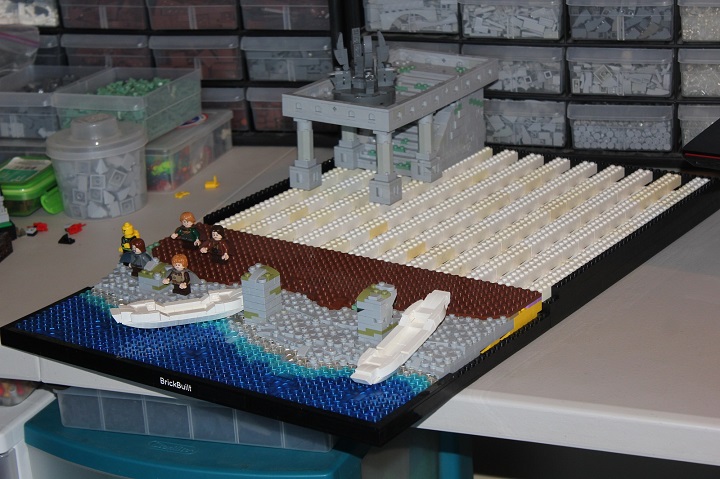
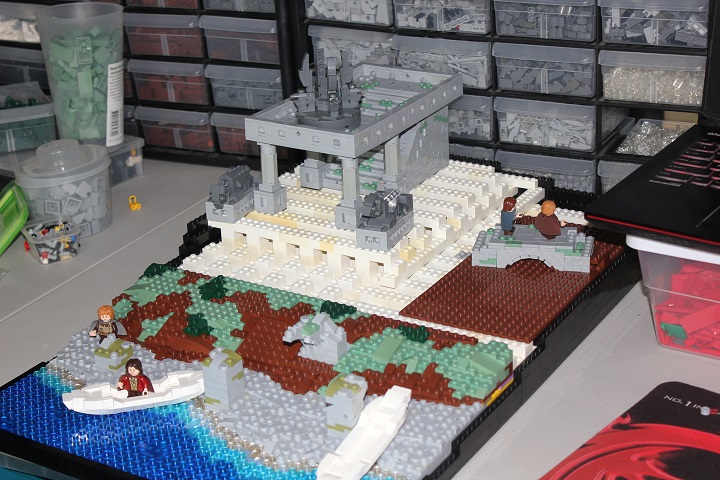
After some more filler-bricking, I made the bridge that Merry and Pippin run across while being pursued by Uruk-hai, as well as the statues around Amon Hen.
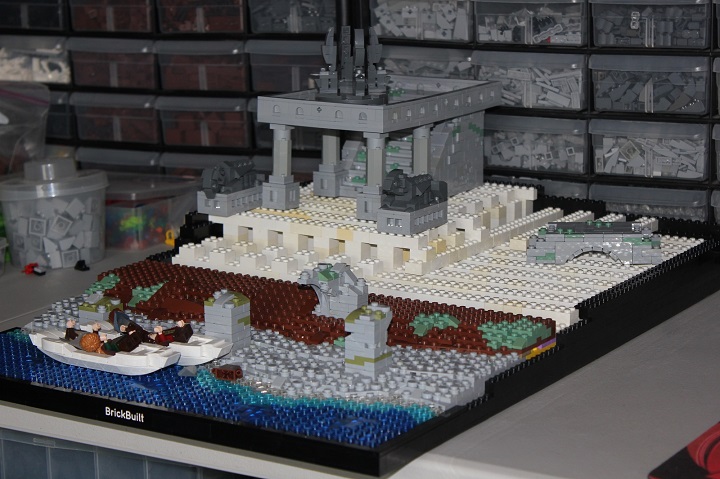
The first module is nearly complete, minus the trees and fig posing! The angled bridge is now in place too.
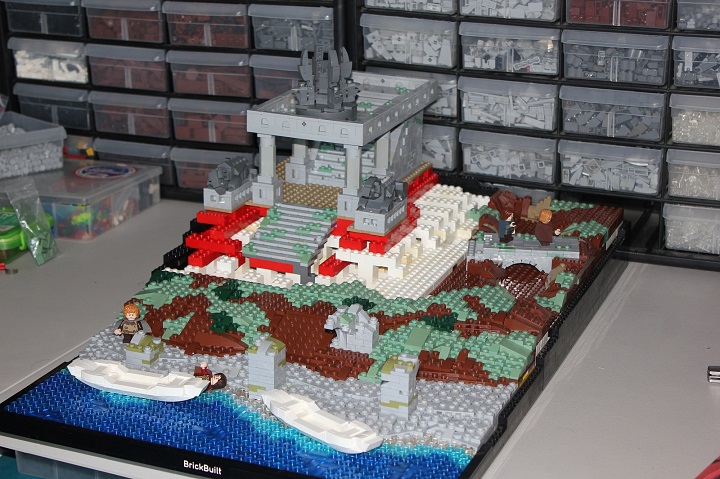
Now the landscaping is really starting to take shape. The small ravine on the right hand side was very fun to make, and ended up being one of my favorite parts of the build, though it’s not easily visible in the final pictures.
The landscape is almost done! I started experimenting with various tree designs, and placed to a few to see approximately how many I would need.
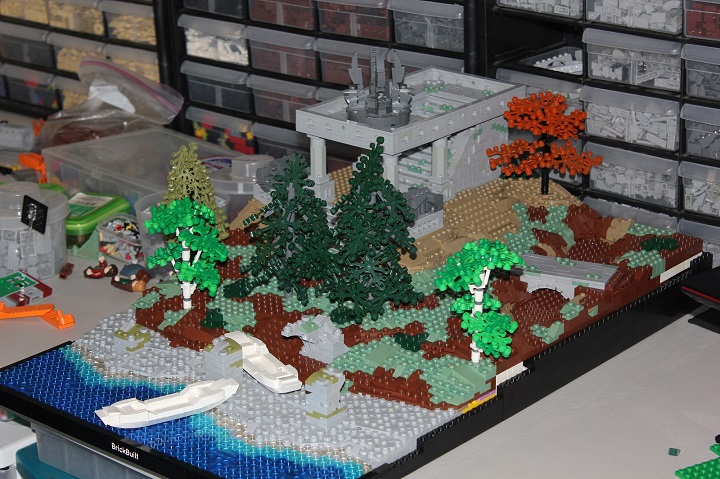
With almost all of the trees on, the scene was starting to look how I had imagined it. The ground still seemed a little bare though, so thanks to the suggestion of Graham Gidman, I added a few bushes, several more grass patches and various supplies on the beach.
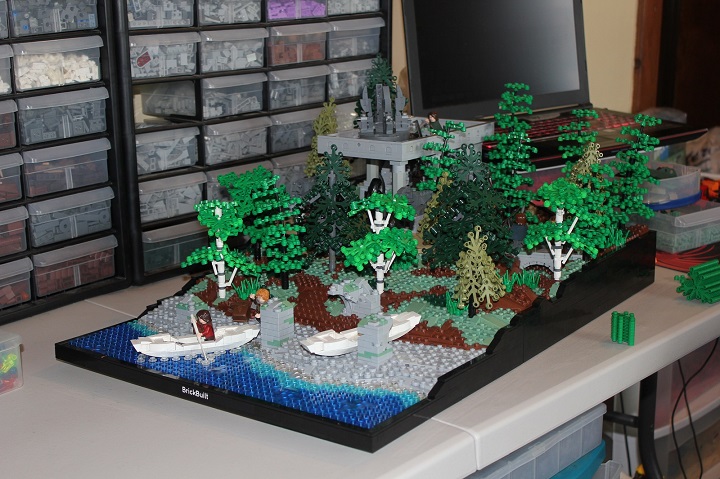
And here is the completed scene!


Awesome! Shows lots more details I didn’t catch before! Like the bridge, and the dk. tan section around the building! Keep it up John! 😀
One of your best builds to date, John! Cool to see some more behind-the-scenes stuff.
I love those Birch trees 😉 My favorite kind of trees. Good job John, You really captured the wilderness well!
Thanks a lot guys! Glad you found it enjoyable 🙂