


In this post we’ll be taking a look at what went into creating my MELO round 6 entry, Minas Morgul: Heroic Rendition. I started off by finding a good source image of the fortress to get an idea of the style of architecture, and what changes I would need to make to clearly show that it was a good location, not an evil one. Initially I was using an almost completely white color-scheme with just a few tan accents, but quickly realized that it looked very plain, and overall quite boring.
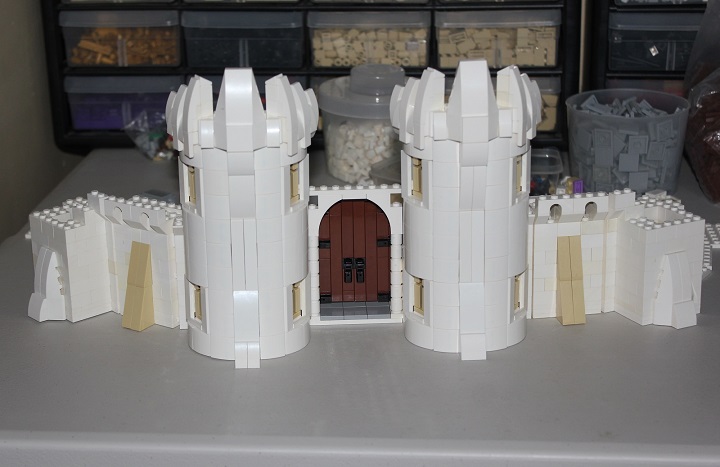
So to spice up the colors, I added light bley on both the top and bottom of the walls. I liked this much better, and progress was quite quick after the change. Since Minas Morgul has a very pointy, angled architecture style, I used buttresses and angled walls to try and keep this effect.
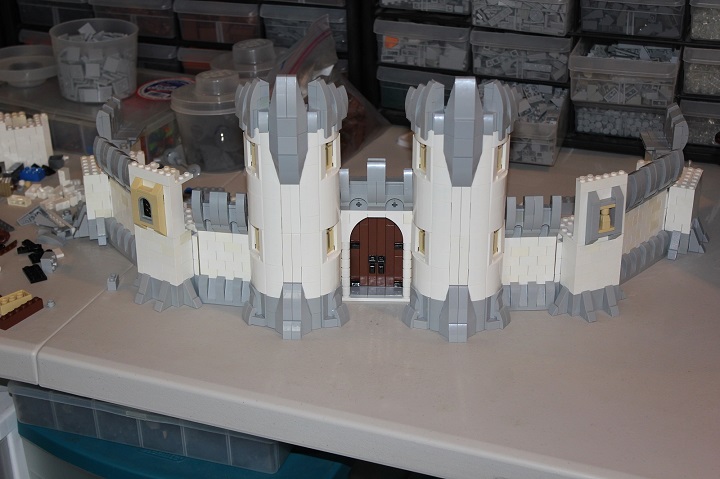
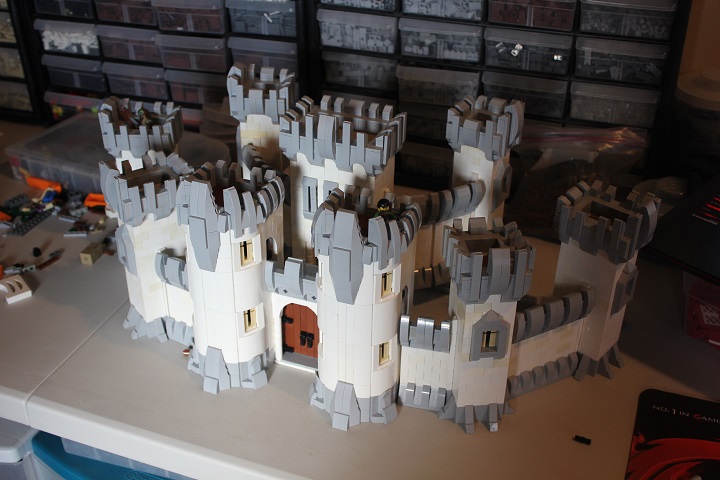
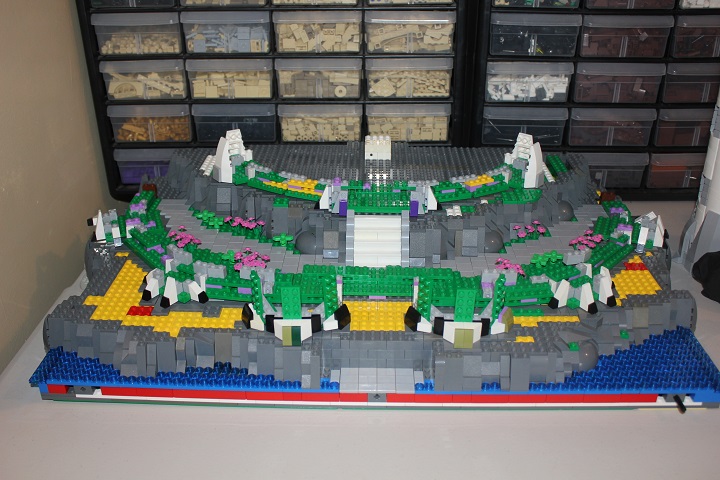
Here the outer layer of wall and towers is completed. As you can see, many of the battlements are made using curved slopes; while the effect they gave was almost exactly what I wanted, we started to run out of them very quickly, because of how big the walls were. As such, I also used tiles in some locations to help preserve the curved slopes.
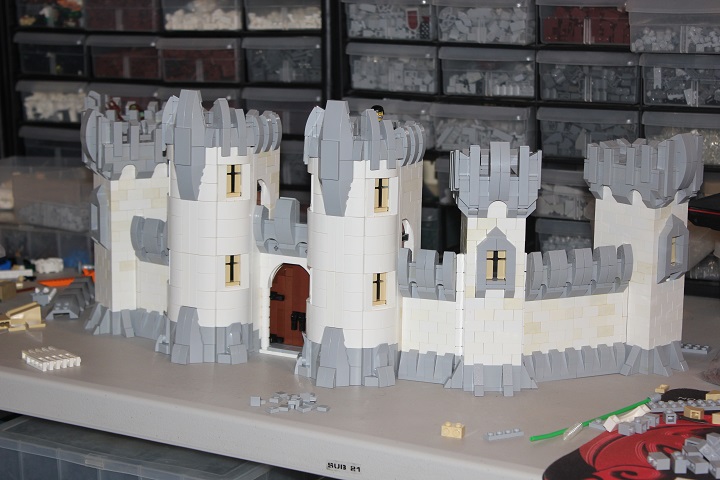
The second layer of wall came together swiftly, and I set them up approximately how they would be once the build was finished to get an idea of how it would look, if anything needed to be changed, etc.
With the two layers of wall finished, all that remained to be built of the castle was the main tower that is placed centrally in the back. Once I found an effective technique for the round shape, it came together rapidly. The hardest part about it was the crenelations, as by this time I had nearly exhausted our supply of light bley curved slopes and wedge slopes. Wedge plates and cheese slopes made a good brick-built alternative though.
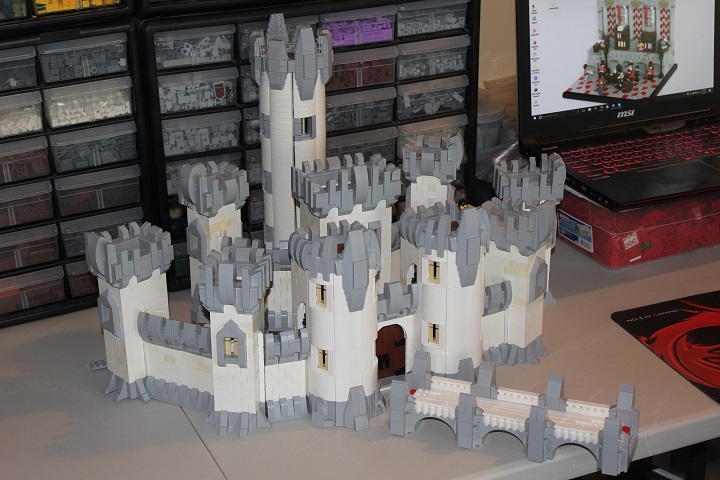
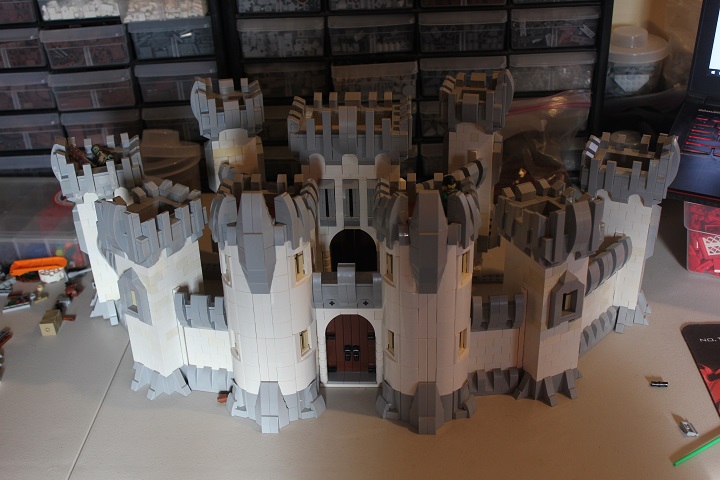
Alright! The castle is already done and I’m only about 5 days in! Oh yea… I still need to make the entire landscape for it…
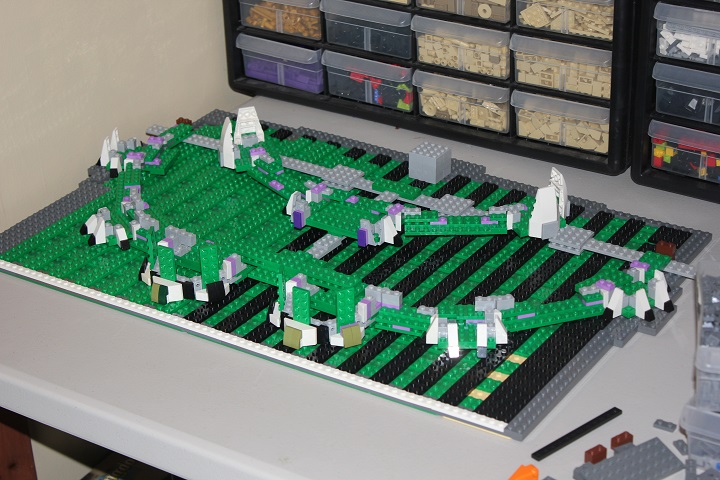
To be honest, I didn’t really think that the landscape would take that long; at least, I didn’t until I saw how big it would have to be to hold the castle. Because it was so large, I split the base into two halves, so it would be easier to work on.

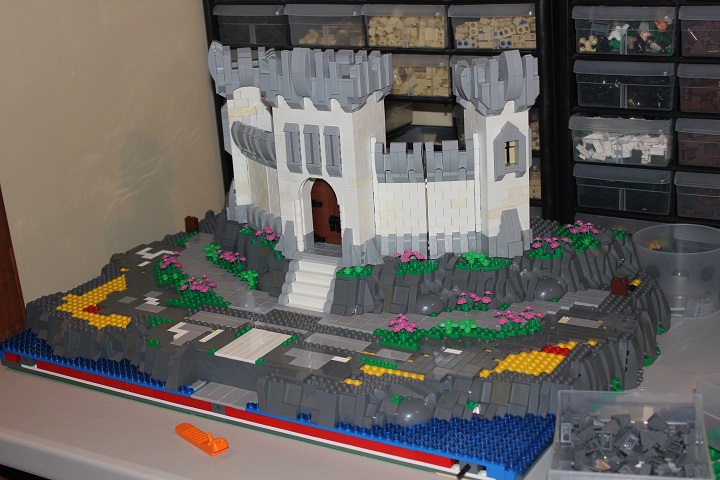
Because lifting around the big chunks of wall isn’t exactly a great idea (due to them not being the strongest walls I’ve ever made), I made an outline of each of the towers and walls with plates. This allowed me to plan where I could have grass, and what would be covered by buildings, without risking destroying my castle.
Here I laid out the interior pathway, and a little bit of grass around that.
And the second layer of wall is in place! Not all of the foliage around it is on just yet, but things are starting to take shape.
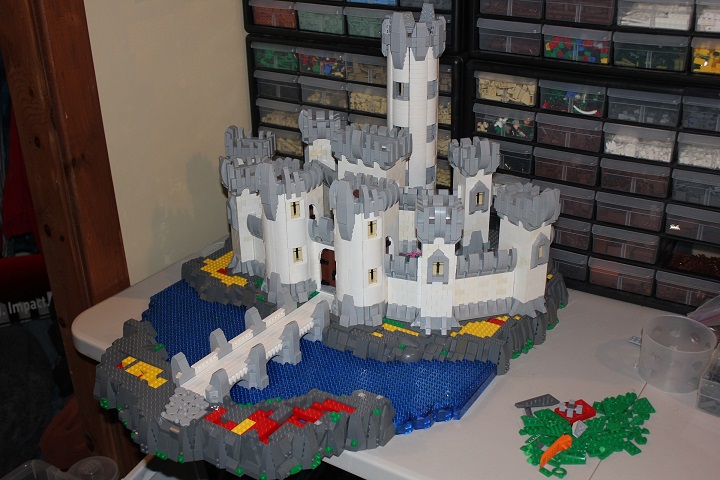
With both halves of the base connected, this build extended about 6-8 inches off the front of our desk. Very glad that I didn’t try to build it as one solid piece.
And the build is nearly complete! All that needs to be added are a few trees, some animals and figs, and a few other last touches.
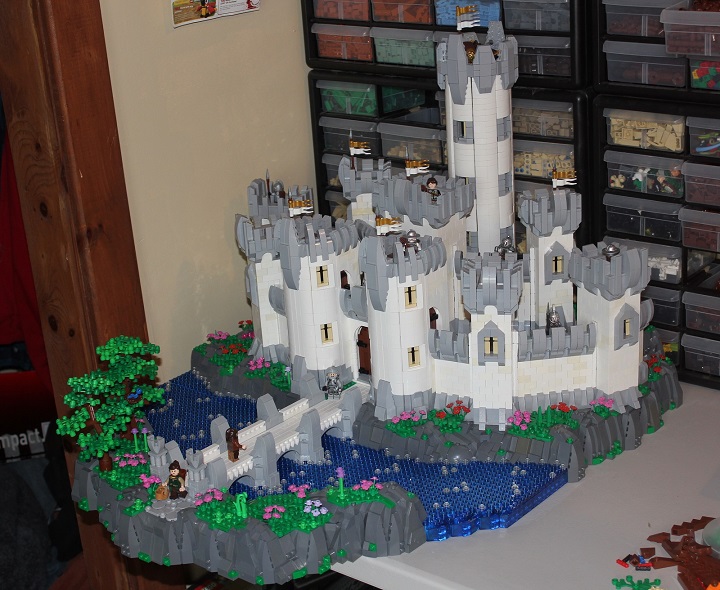
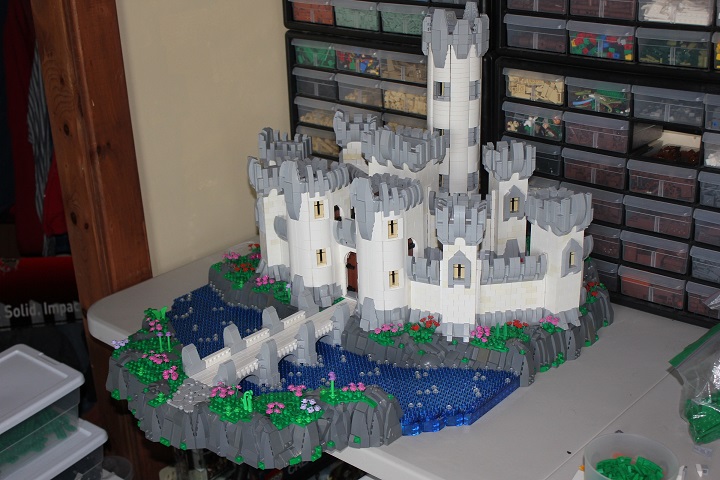
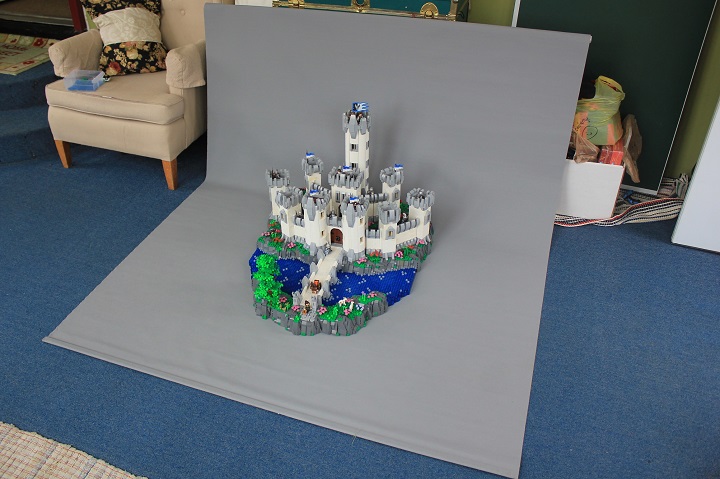
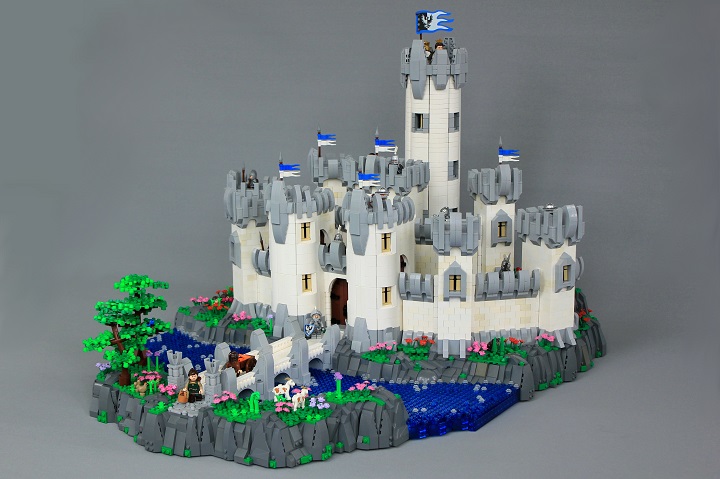
With the trees, figs, flags, and other finishing touches added, it’s done. This is definitely one of my favorite builds I made for MELO, I hope you enjoyed this look at what went into creating it. And finally, here’s one last behind-the-scenes shot showing our photography setup.


Awesome! Gives you a new appreciation of the build! Turned out really well in the end. 🙂 Will you be competing in the CCC?
Thanks Roanoke, glad you enjoyed it 🙂 Yes, I plan on getting at least a few builds done for the CCC! Probably won’t be trying for Master Builder, but definitely will still enter.