


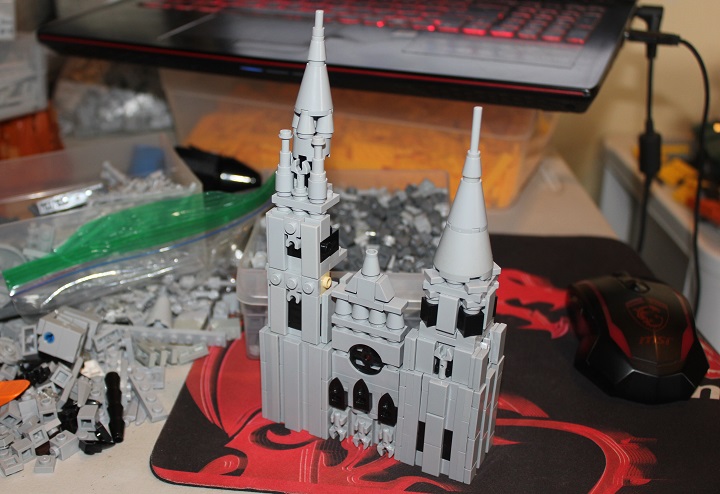
The pictures for this build log are messier than I would like (and also fewer), however since I tend to get more questions about micro-scale models and Architecture buildings than anything else I build, I thought you all still might appreciate seeing a bit of the process of recreating this cathedral in LEGO.
As I mentioned when posting this build, it was done for a college assignment. Fall 2017 was an extra busy semester for me, and so I had been doing very little building, though I had started a WIP you can catch glimpses of in the pictures. This meant my building space was more crowded and messy than usual (John was also building Allanar Forest at this time, which didn’t help matters, but let’s not blame him).
My first step to start designing this building, was finding quite a few reference images of the real building that provided good views of all the sides – in as high definition resolution as possible. I ended up working from 10-12 pictures, and even then it was often difficult to see what exactly was going on in certain portions of the building.
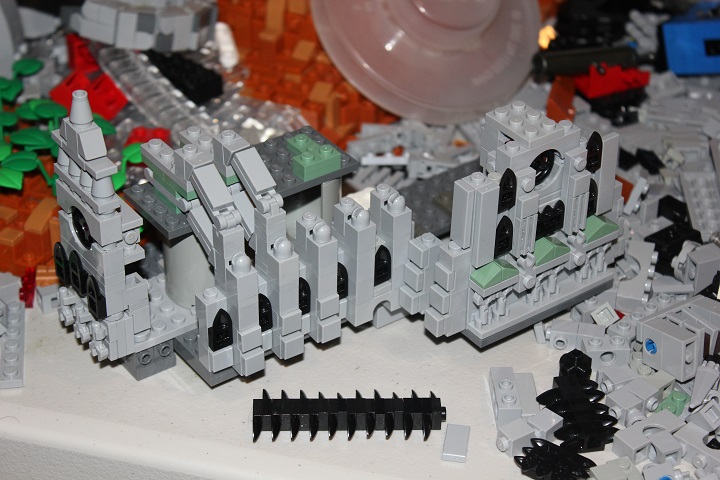
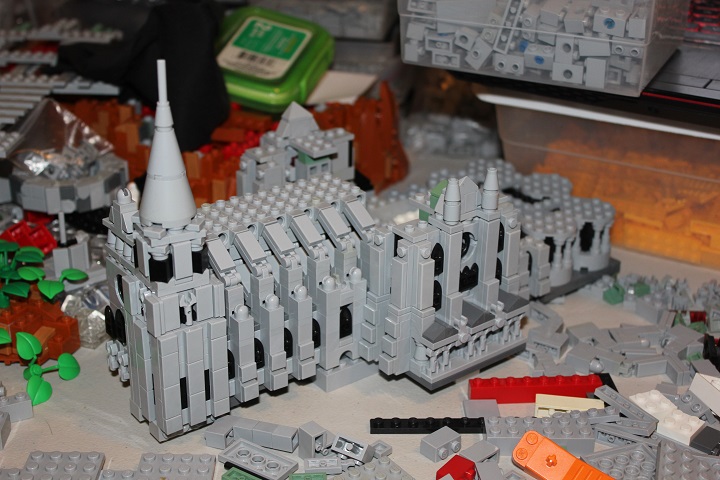
I began with the towers and entrance of the cathedral. Each tower, and the entrance, were separate modules at this point. Starting projects like these is usually the hardest part, and was likely the case again here. Once you have a bit of the building finished (or well along), it is much easier to work on the other parts as you already have established the scale, detail level, and style.
I then began building the rest of the cathedral’s outer walls: these new walls were attached to the front entrance portion I had started with. You may notice some stud reversal was required there, to get the arches to form a perfect circle for the rose window. I used the same technique for the rose windows in the transept. Black tooth plates worked nicely to form the windows and give the proper Gothic arch shape. SNOT 1×1 tiles on headlight bricks, and brick modified with stud were used to recreate the bottom stepping portions of the buttresses.
Since I was only building the outer wall at this point, I used some rough plate sections on top of pillars to give me an idea of where the roof would end up being. The flying buttresses came together a lot easier than I had anticipated: some SNOT cheese matched wonderfully with plate with handles snapped into some clips. The 4×4 round plates for the chapels at the apse of the cathedral ended up being the best solution – though I had tried all sorts of more complicated versions, nothing worked nearly as smoothly to get the proper shape and windows.
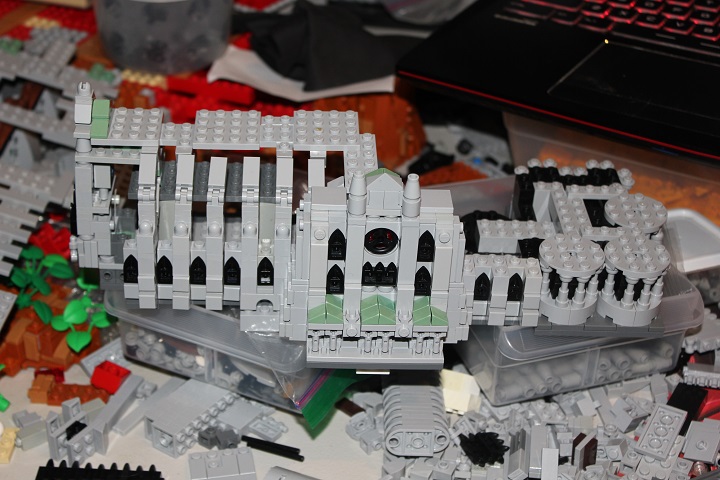
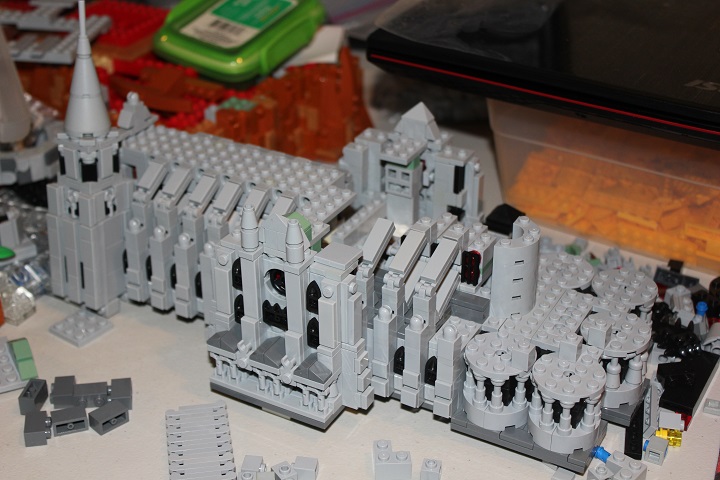
By this time I had most of the designs figured out to finish the model. So I went back a bit, and started building in the inner walls in a more permanent fashion. Basic brick in filler colors used throughout the interior of the cathedral made the model quite rugged.
And once I had more of the walls built, I could put on the lower roof, and upper windows between the flying buttresses.
I really liked how the 1×1 technic bricks looked for the small round windows, and fortunately had enough on hand to complete the build.
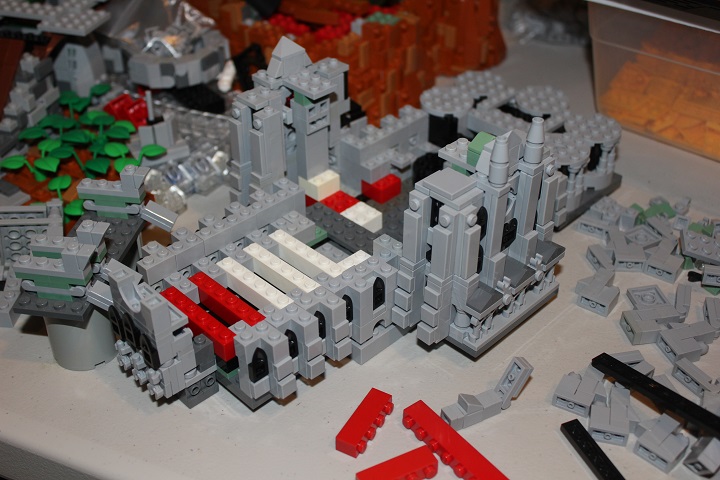
The only major design hurdle left was figuring out how to roof the apse, and build the radiating flying buttresses in that area.
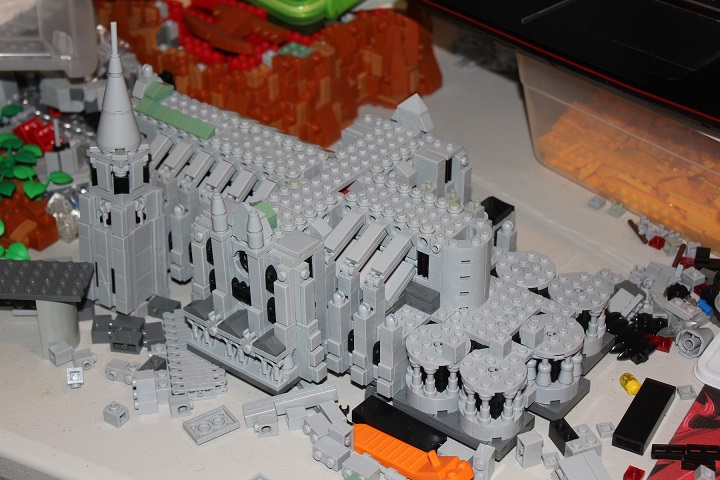
The bley 1×1 bricks on the 4×4 round plates marked where the buttresses should end. Barely visible in the completed model pictures, are the windows between the buttresses, you can see one easily just left of the macaroni bricks below. Grill tiles over trans plates allowed me to give those windows some ‘stained glass’.
While I was still messing around with the design of the apse roof, I continued the other portions of the model. Which got to be pretty repetitive and parts consuming. Unfortunately this is the last WIP photo I have, as I then got a breakthrough on the last chunk and proceeded to finish the model without taking time to get another picture. Those 1×1 bricks did end up working nicely for the flying buttresses, as I just rotated the plates off of those bricks.
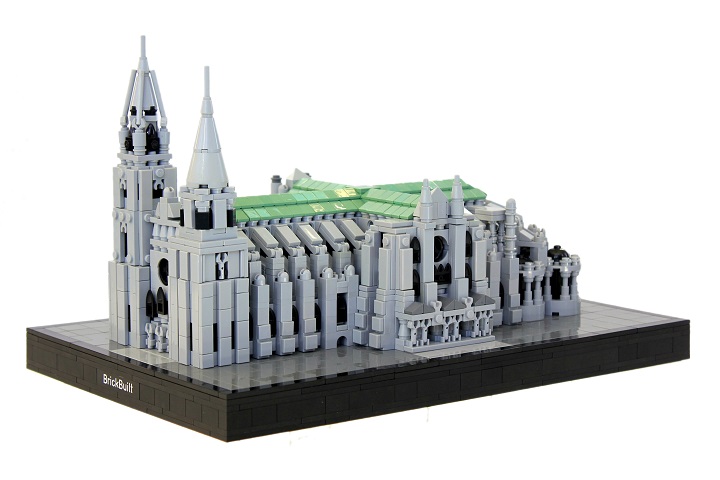
Sand green plates and cheese worked nicely for the main roof, and I then placed the cathedral on a simple base of dark bley tiles with a typical black Architecture border.
Hopefully the messy build area didn’t distract too much, and as always, we would love to hear your thoughts on the model, and any suggestions you may have for future build logs or tutorials.


Nice work! My favorite part was easily the buttresses. 🙂 Keep it up! 🙂