


My third and most complex Architecture styled model so far, Lichtenstein Castle had plenty of design challenges.
After finding plenty of good reference images, I was ready to get onto the actual building!
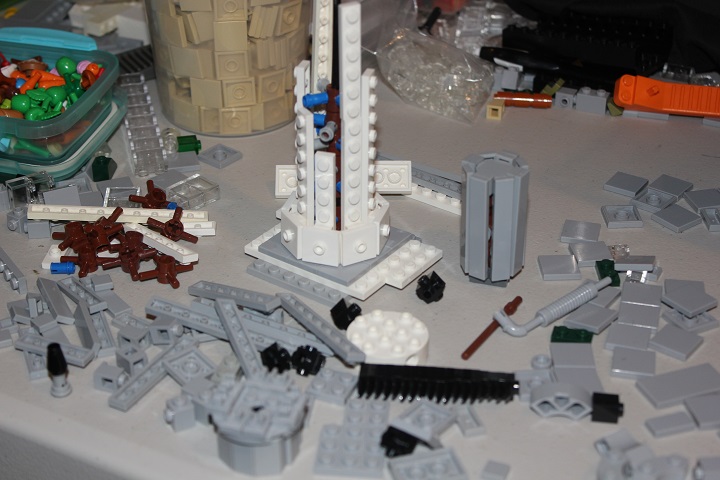
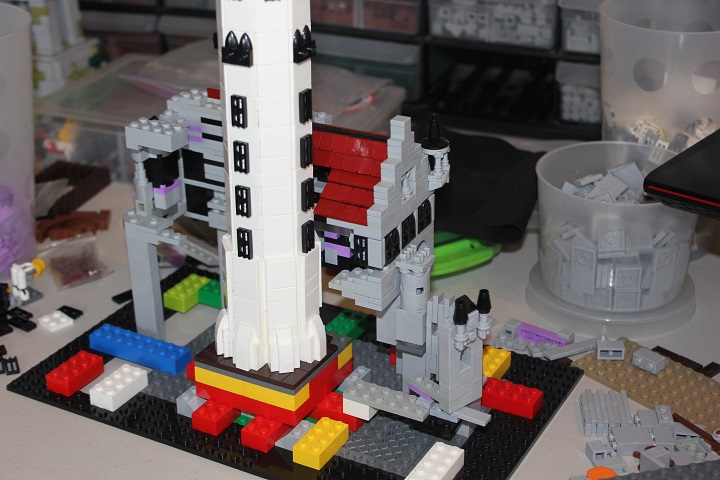
I started off with what I figured would be some of the trickiest portions: the large white round tower, and small round corner tower. Fortunately I was able to find a good design for the big tower pretty quickly, and you can expect a tutorial on that technique in the future. I used a variation of the same design for the smaller tower, to start with, though I ended up changing that later on.
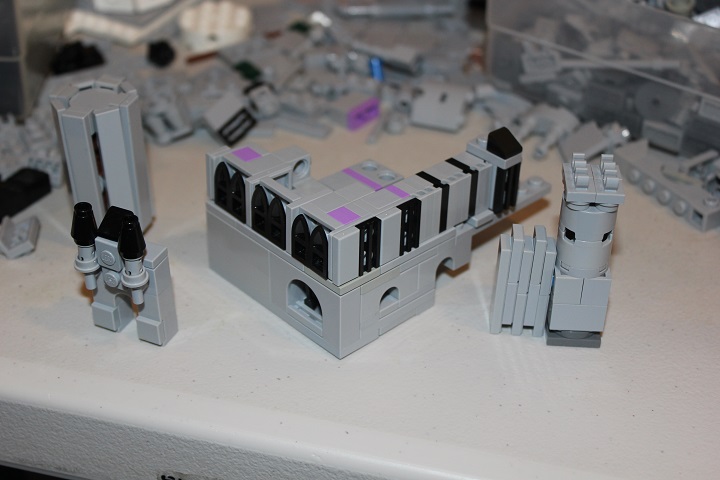
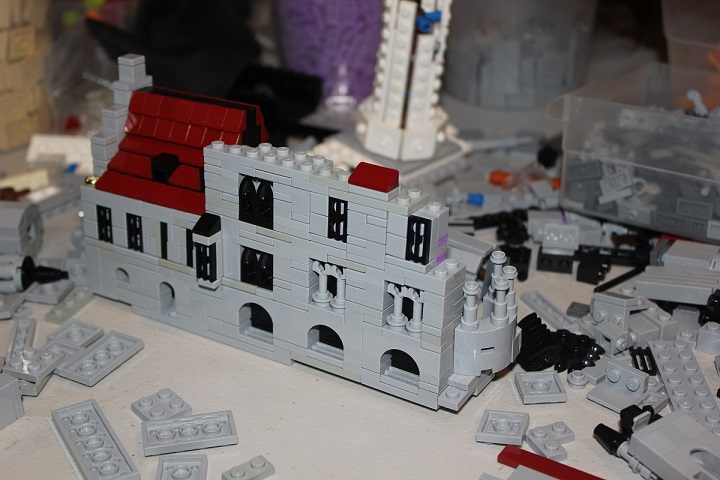
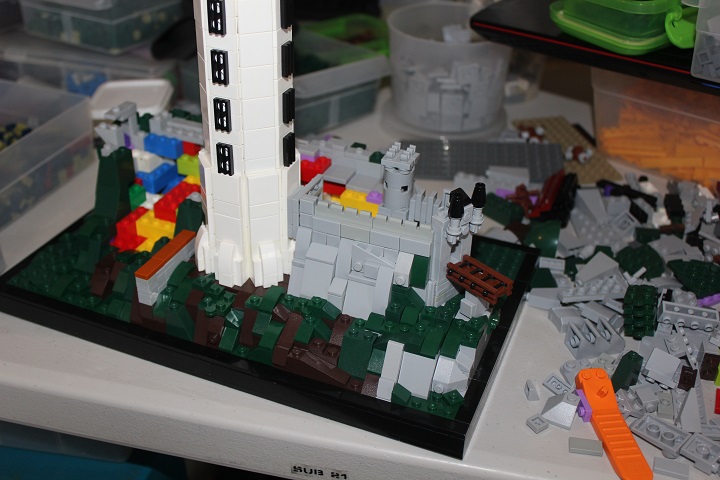
After I was confident that I had a satisfactory design for the main tower, I moved onto the rest of the castle. I tried a large number of different designs for the gatehouse with its round turrets, but ultimately settled on the one shown here. Plenty of SNOT was needed in the main castle walls, to allow the numerous windows to fit properly. At this stage, I would just fiddle with the various components without needing to worry about solidly locking everything together.
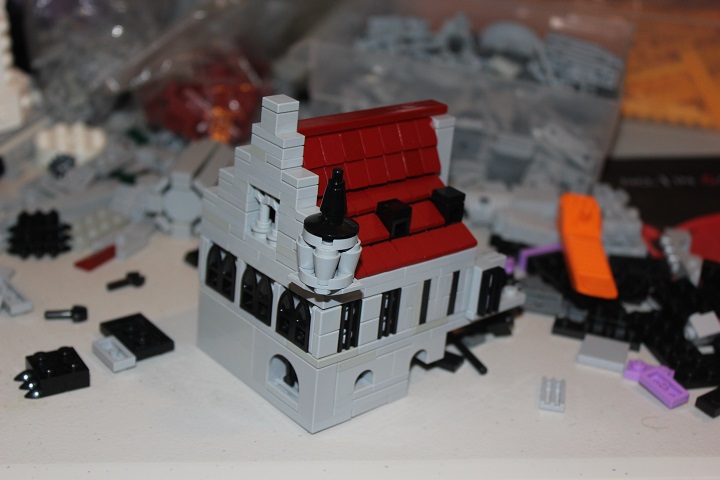
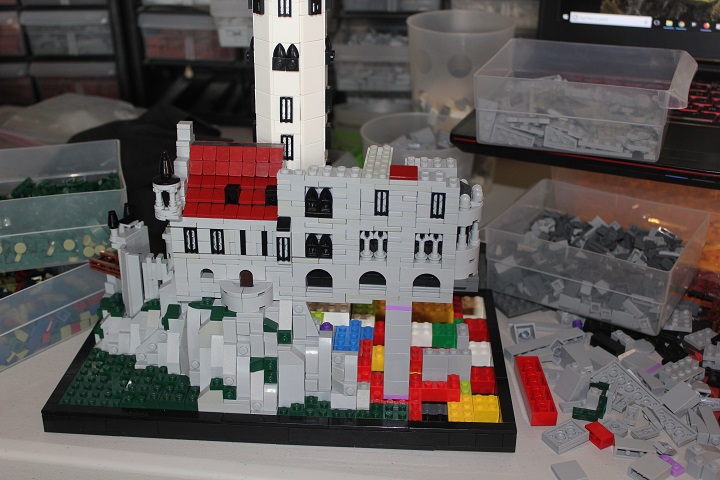
I switched back to mainly studs up building for the first roof, and was super pleased with how the cheese slopes transitioning from studs up to SNOT gave an accurate representation of the real castle roof pitch. The tile used to cap off the roof line was attached by embedding one stud of it into what would eventually be another of the castle walls.
Once I had this section finished, I knew I could complete the rest of the castle.
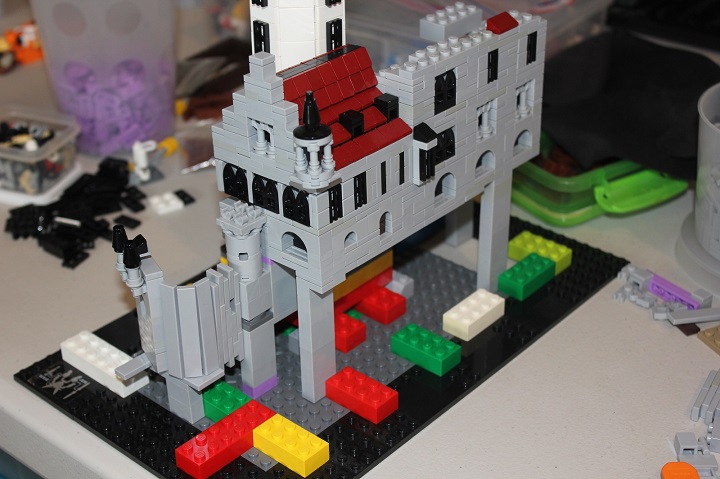
I used as many small elements for the stone walls as possible, to fit better with the scale and give a good stone texture: primarily 1×1 and 1×2 plates, 1×1 tiles, and 1×2 jumper plates.
As you may have noticed in the picture above, I used 1×4 arches for the largest windows. A grill tile below the arch then allowed me to use lever handles to recreate multiple window panes. The only issue with this design was that I didn’t have the bley lever handles I needed for the design. I was a little surprised to find how expensive they were on Bricklink, but ended up ordering the 8 I needed for this model anyways.
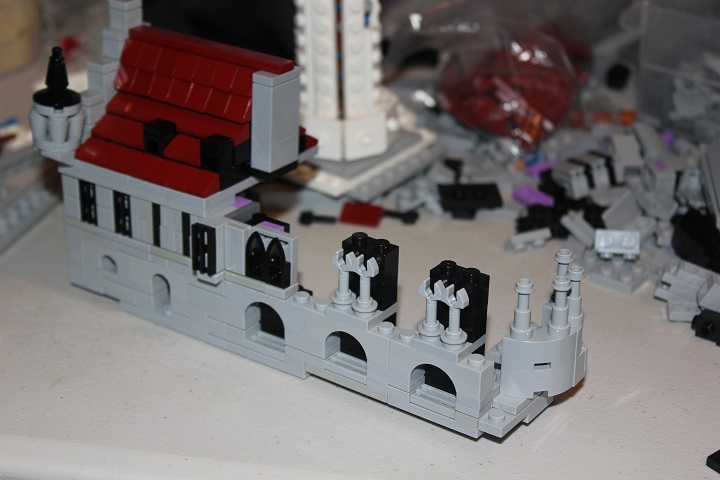
Most of these window designs I have used before in other models, but I was pleased with how smoothly I could incorporate the designs here. Both the reversed tooth plates and grill tiles sit exactly flush with the rest of the castle walls. If you look closely, you can see a subtle difference between the 2 windows made with tooth plates here. The top window has a black 1×2 tile under the tooth plates to make it slightly taller than the window below.
This section of the model went pretty quickly, but I still had pretty much just one outer wall of the castle done. And it was arguably the simplest one at that!

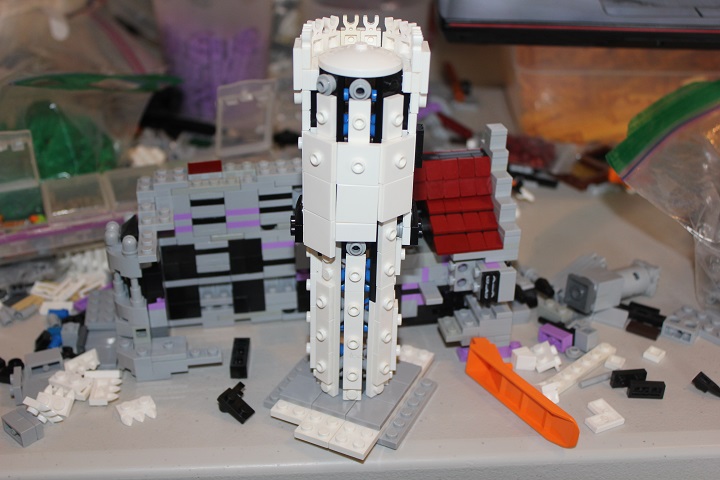
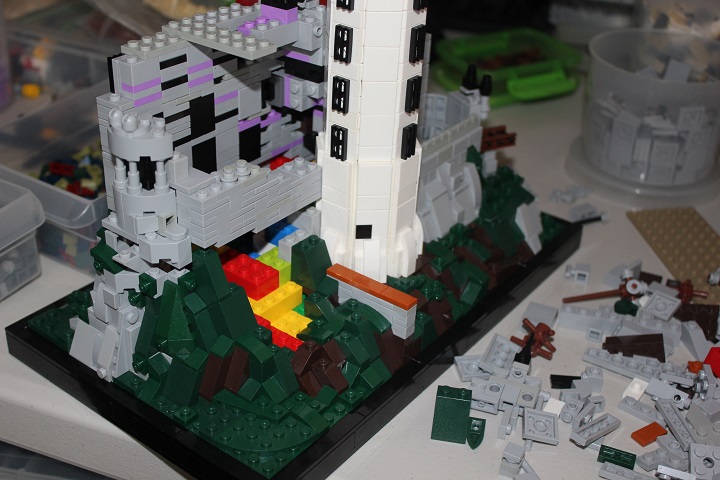
The other side of the castle would need to incorporate the big tower, so I switched back to working on that. Figuring out a good solution for the tower’s crenelations took me way longer than I would like to admit, but eventually I realized that plate with clip gave a good representation. And a 4×4 dish fit well at the tower top.
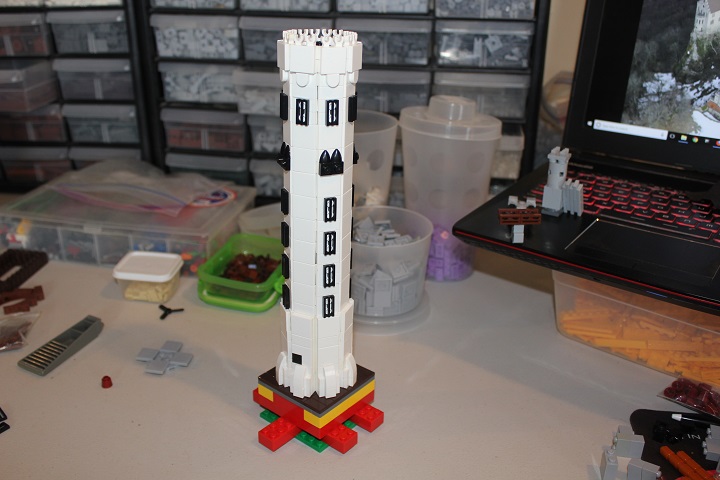
Cladding the tower was easy enough, though the bottom is a little less repetitive with some buttresses added. One of my reference images is shown on the laptop screen, I almost always had some source picture up when working on this model. I wanted to be sure the tower was not likely to break off from the rest of the castle, so I ran a long flex tubing from its core down through several 4×4 round bricks contained in the base underneath the tower.
Now that the tower was complete, I could figure out how it would fit into the rest of the castle. Which was largely a matter of trial and error.
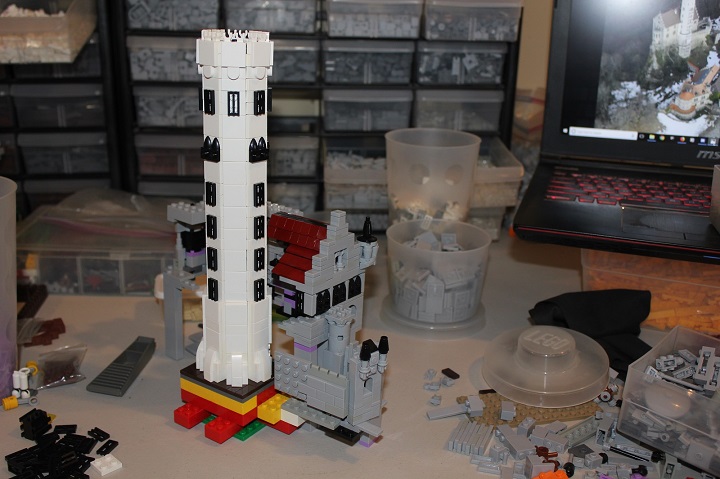
Then the real fun began! Or not so much…
Since I started with the castle itself, I needed to build the actual base and landscape underneath what I had so far. I left the castle mostly unattached at this point, just sticking it on some stilts so I could easily move it out of the way when working on the landscape.
Around this point I switched the cones I had used for the windows of the small turret at the corner of the roof with lightsaber hilts. The hilts made the windows more pronounced, and made the turret look slimmer than before.
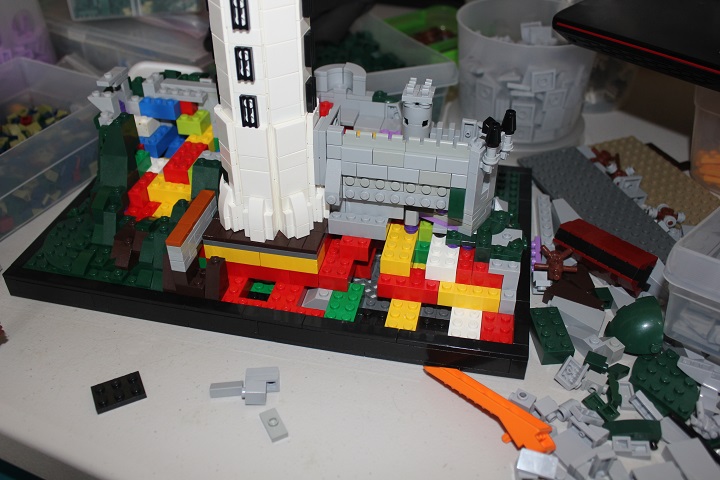
Well I had originally planned on using dark bley for the cliffs the castle sits on, I ended up switching to light bley after realizing that the real life castle and cliff are very close in color. Adding some dark green moss to the rockwork was both fairly accurate to the real landscape, and also a good way to help differentiate natural rock from the shaped stone of the castle.
The little bridge leading to the castle was something John came up with, and I was amazed that he was able to get good looking railings at such a small scale.
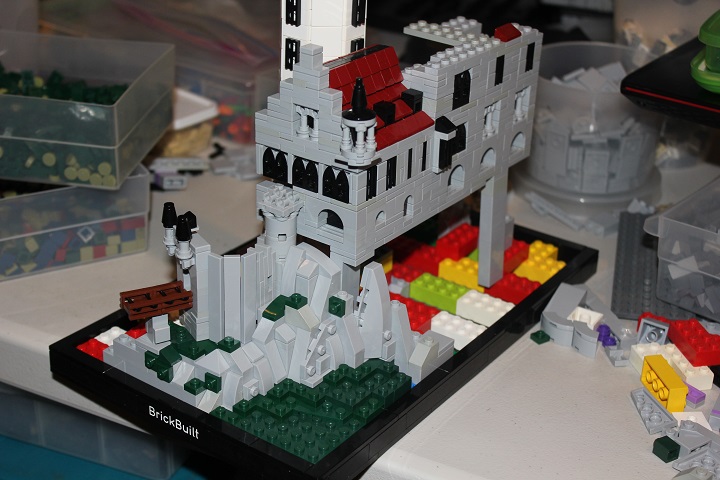
I just built the cliffs up to the bottom edge of the castle walls. Which left a fair bit of open space under the castle. I used some filler bricks and tiles later to fill that in some and give a nice base for the castle to rest on.
The rockwork progressed pretty quickly, though it was challenging at times to be sure to follow the castle outline and still try to keep it relatively accurate to the real cliff.
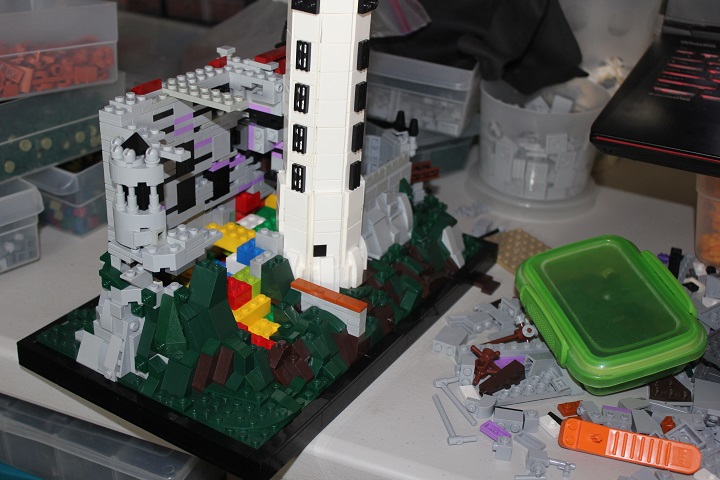
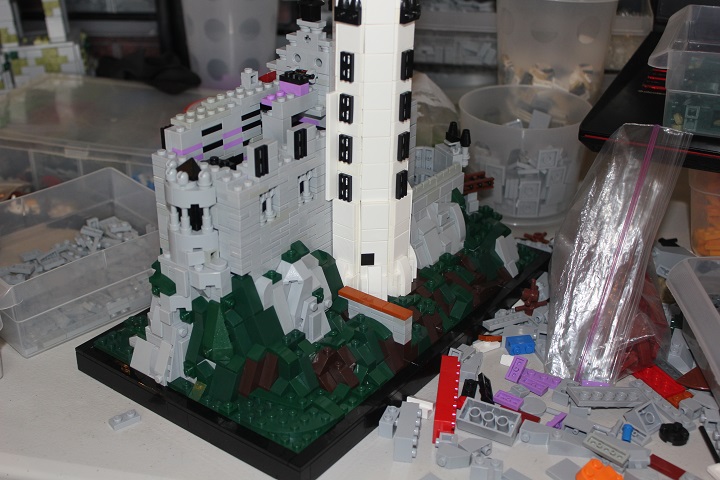
It was really exciting to see the model shaping up, and from this side it almost looks done!
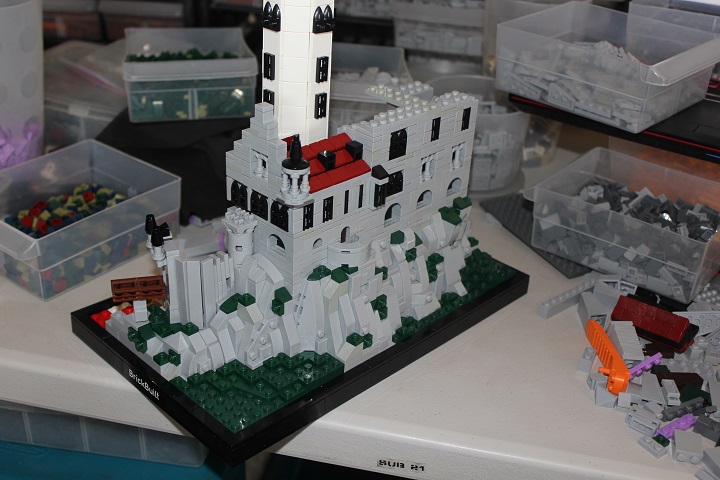

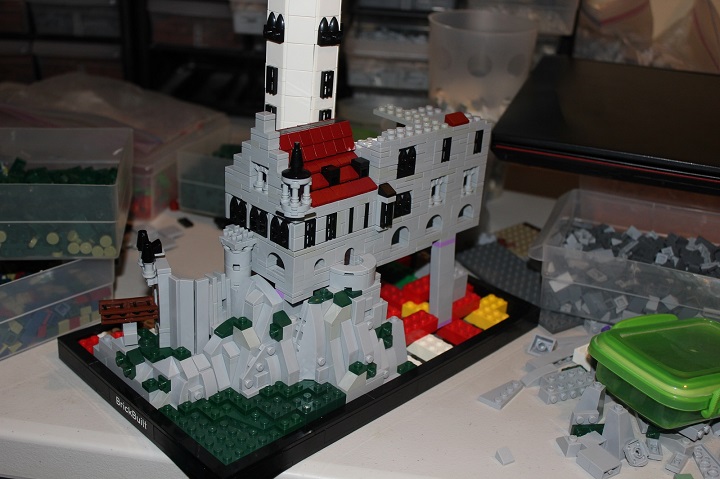
The other side still had a very long way to go. Here I was able to use some dark brown to add a bit more color and show some exposed dirt.
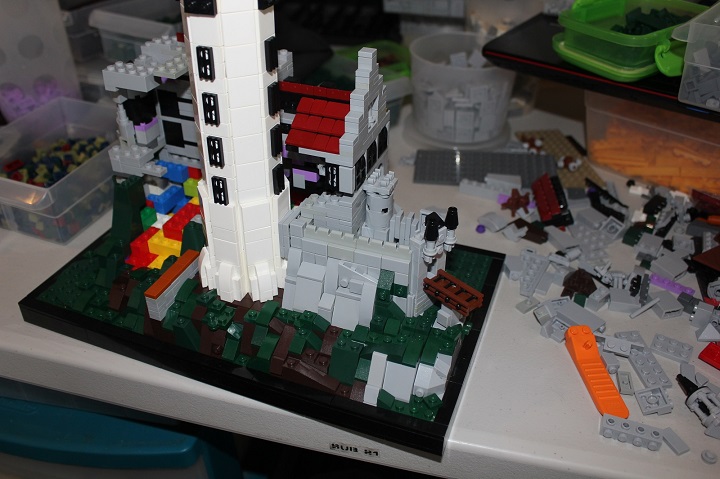
As you will see in the next picture, I decided that dark orange tiles looked better than plates for the roof of the adjoining wall.
Some old vehicle roof elements worked perfectly for the crenelations on this side of the courtyard. I didn’t need the full 4 stud depth for the castle wall, as that would have been unrealistically high, so I just used the bottom 2 studs to attach more rockwork.
A few SNOT plates and tiles were used to fill the gap between the tower and wall. Then I could finish off that portion of the landscape easily enough.
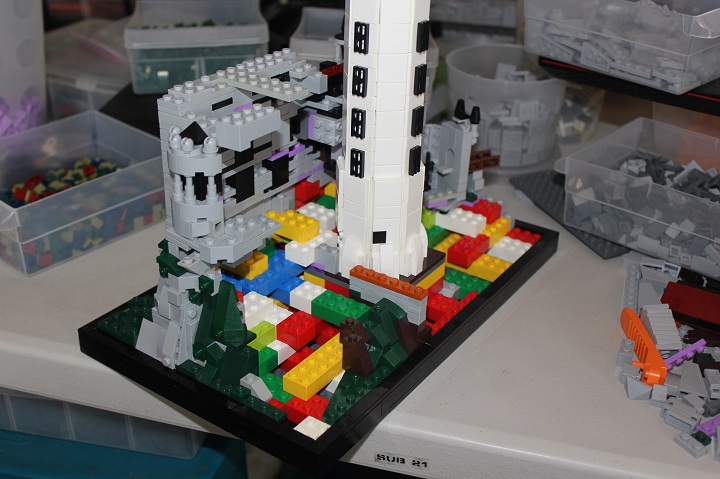
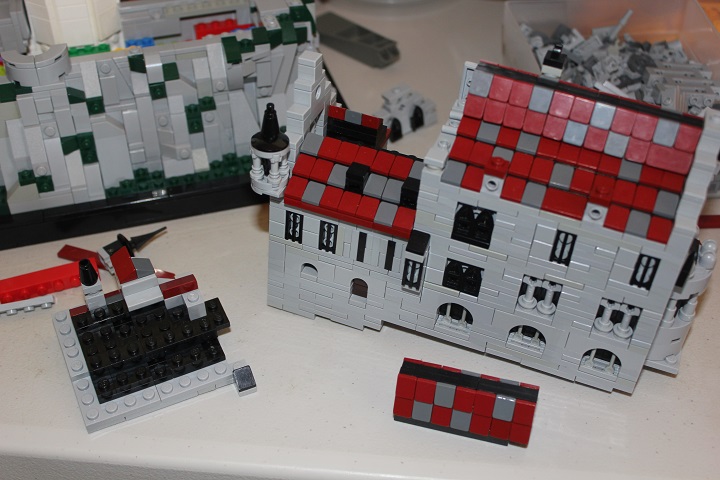
You may notice that something seems to missing in this picture – the castle! As I mentioned before, it sat on a base of tiles and was attached by just a few studs so I could easily take it on and off. Which proved to be very useful later.
Castle back in place, time to finish off the stone walls on this side.
Again I used SNOT tiles or slopes to fill in around the tower and then was able to put the roof in place. I missed some details from the real building in that roof area though, and ended up going back later to rework that.
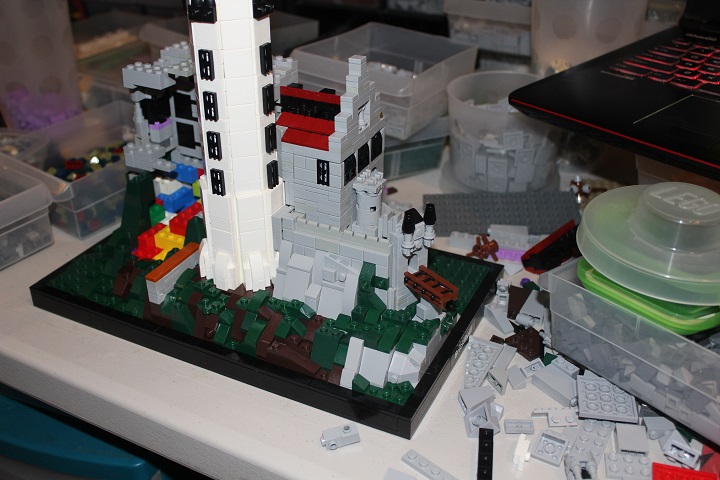
The back corner of Lichtenstein was the last part built. This picture also gives a lovely view of the castle’s lavender, black, and bley interior. Black bricks were used to give depth behind some of the windows, whereas lavender plates are something we have plenty of from the PaB wall, and so make a convenient filler element.
Due to being built mainly from plates, the castle itself is quite strong. Especially as I could lock everything together solidly with the roofs.
Remember the dark red 1×8 tile that made the ridge of the first roof? It needed to be centered over the roof, so I simply attached it to a jumper plate in the wall behind it. Which works beautifully! Except for the two 1/2 stud by 1 plate tall gaps left on either side of the tile. I was able to fill those by using some bar with clips attached to a plate modified with handle.
Finally done! Or so I thought.
I realized the roofs sitting flush with the outside wall looked very flat and didn’t match the real castle which has some overhang.

A full stud overhang would have been way too large at this scale, so I wanted a half stud offset. I wasn’t sure if I could manage this for the lower roof where the area below the roof was mainly SNOT, but fortunately it did work out. Here you can see the lower roof already adjusted to have the half stud offset while the upper roof has yet to be fixed. Again I was very happy that I could remove the castle for modifications.
After which, I was really done. This model likely took significantly more time than either Chenonceau or Chartres, but I’m quite happy with the result. And just recently I made another refinement in the design by figuring out a way to have the two dark red tiles on the upper roof peak actually be attached.
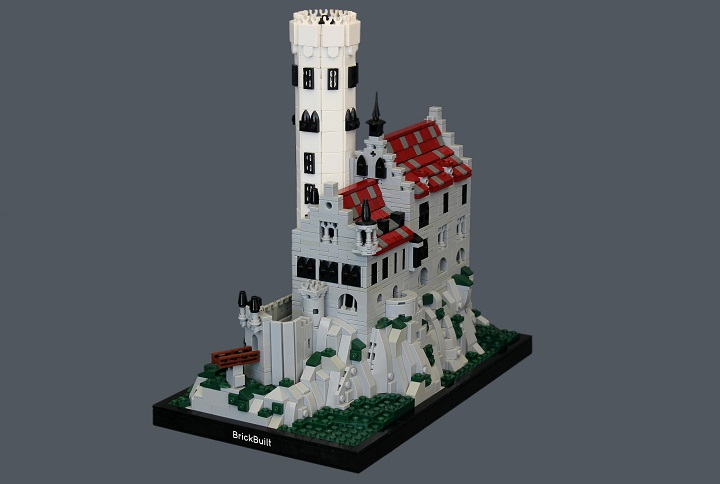
I hope you enjoyed that look into my most recent Architecture model, and if you have any questions or feedback, let us know!


I must say that from the three (Lichtenstein, Chenonceau and Chartres) I like this one the most. Especially the blending between the landscape the the actual walls, the geometry of the roof that worked really well. Of course the main tower looks really nice – I just like everything that’s round so I can’t wait for the tutorial 🙂 Hiding these half stud gaps can sometimes be a pain and I have never seen a bar been used for that, really neat. And last but not least John’s bridge is very effective with the use of a grill tiles for the railings. It looks like it took some time but definitely it was worth it.
Thanks for taking the time to make such a detailed comment!