


It’s been far too long since I’ve gotten around to writing a build log, so this one will be extra long to make up for that!
SHIPtember is always a super fun month, but also a bit of an intimidating project to dive into. Due to other distractions and general procrastination, I didn’t get started until a few days into September. It may also have been a bit of false sense of security after managing two SHIPs last year – doing just one should be no issue, right?!
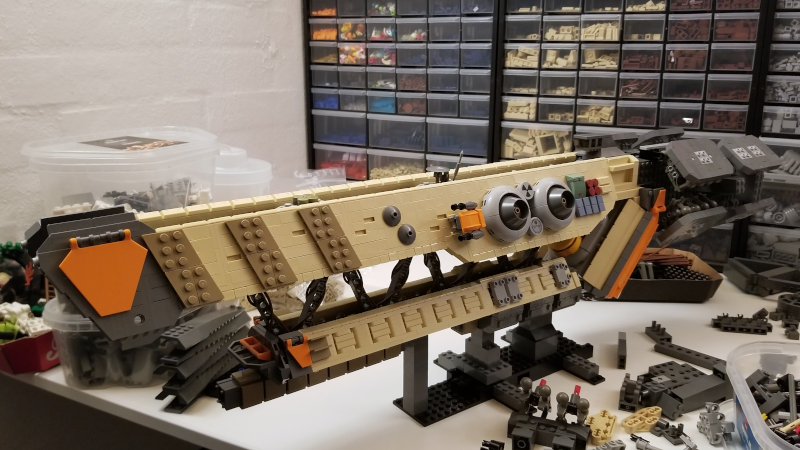
I always start SHIPtember by looking at old SHIPs from other builders for inspiration and to get an idea of what general shape I will be developing. For this year I decided on basing the shape off Pierre’s COMARCA CLASS BATTLESHIP.
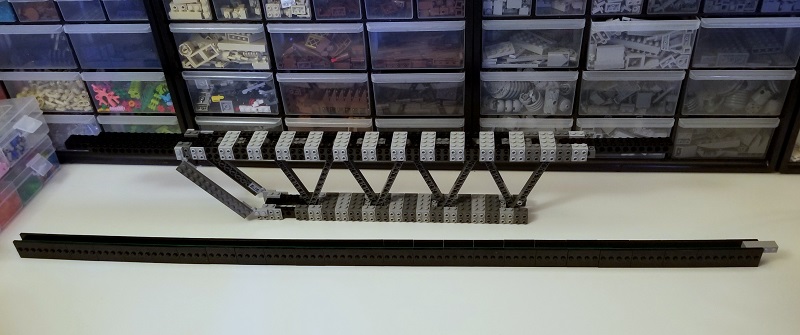
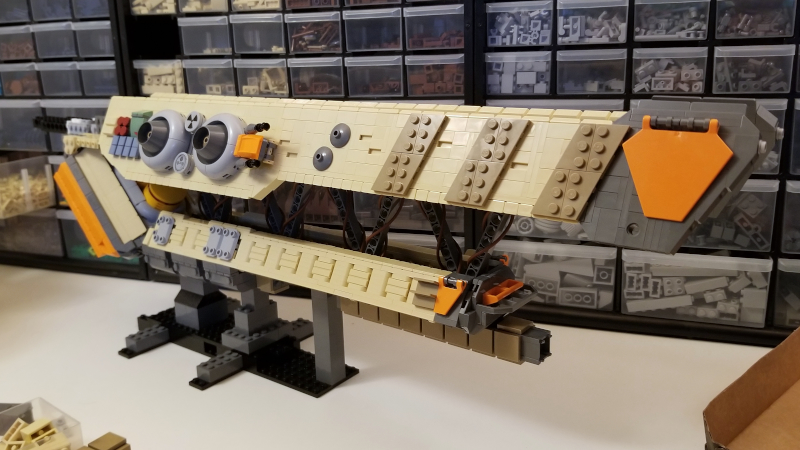
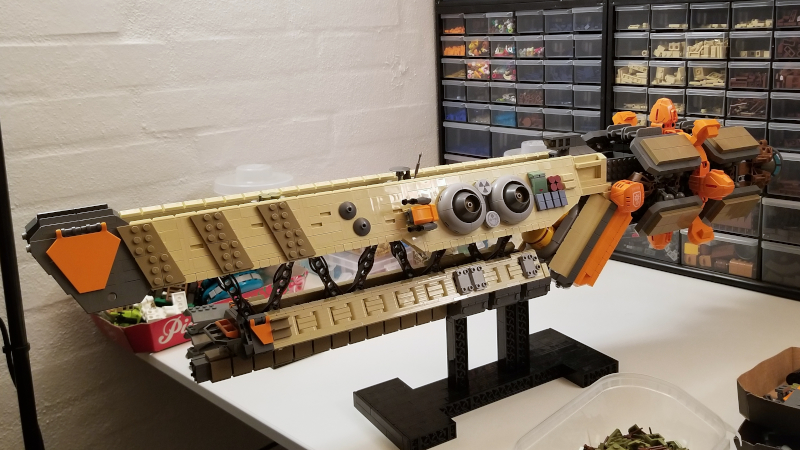
And in typical SHIPtember fashion, started off with a technic frame. Some technic beams worked well to create some triangular girder shapes, and were also a super solid setup. With about 2/3rds of the SHIP length framed up, I moved onto the upper body panels. While obviously borrowing heavily from Pierre’s work for the shape and proportions, I tried to make my rendition unique with different colors and detailing. One day saw a lot of progress, but I wasn’t happy with the mid portion of where it changed to two studs depth.

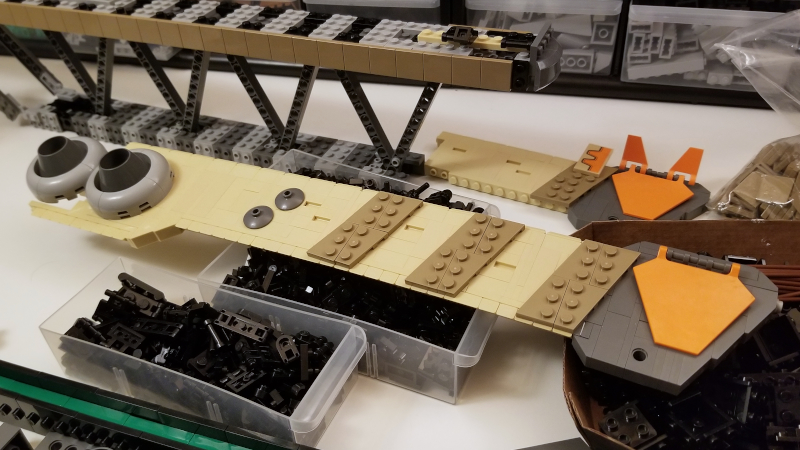
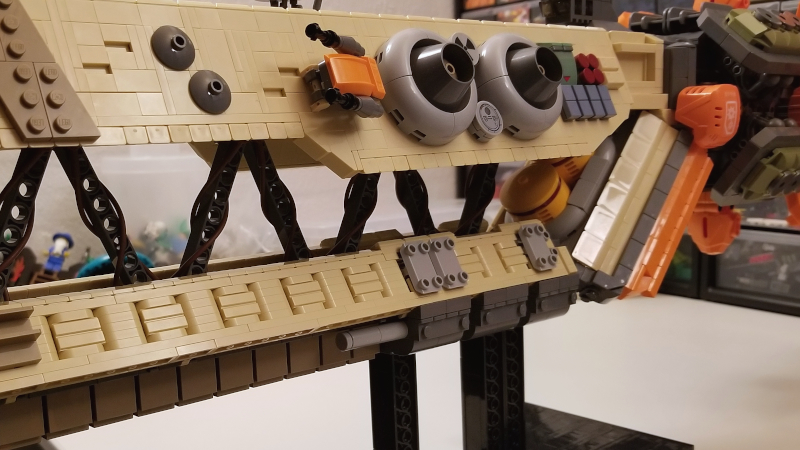
I did want to maintain some significant depth change to keep the panels from being very flat, and these round assemblies using the new 3×3 quarter circle bow ended up looking much better.
2×3 wedge plates in dark tan were something I had gotten in LUGbulk, so I was looking to find a place for them if possible, and these stripes fit the bill nicely.
By this point the panel was about 60-70 studs long, which was roughly where I wanted it. Behind the cylinder details some refinement was needed, but this gave me confidence the color scheme would work out, and a good idea of the space I had to work with for the other sections of the SHIP.
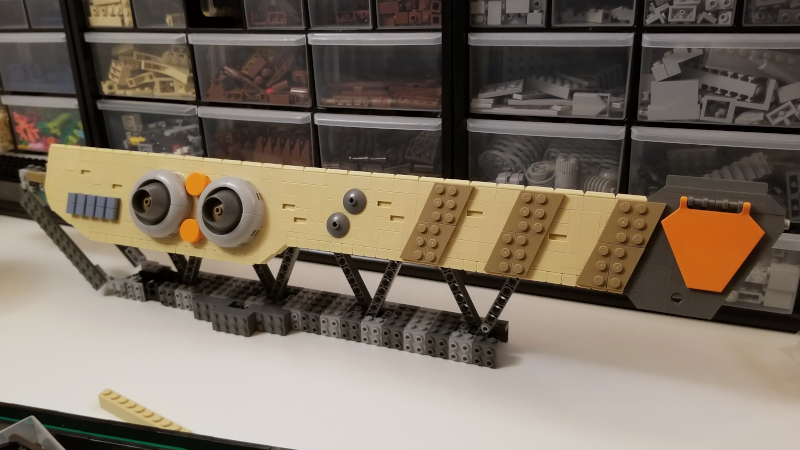
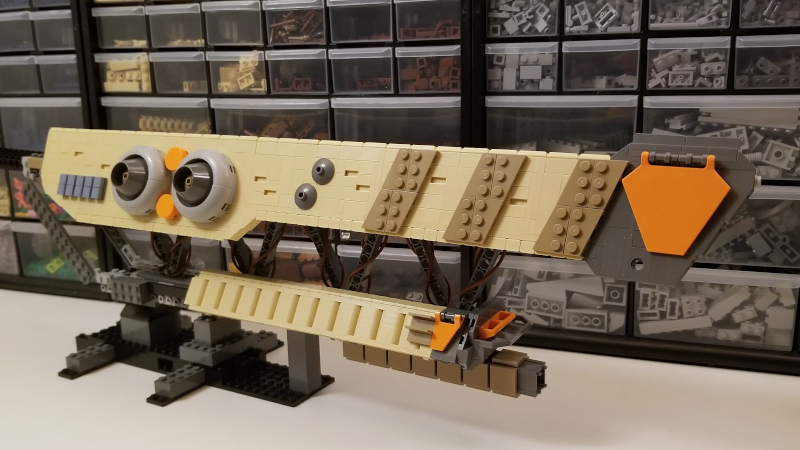
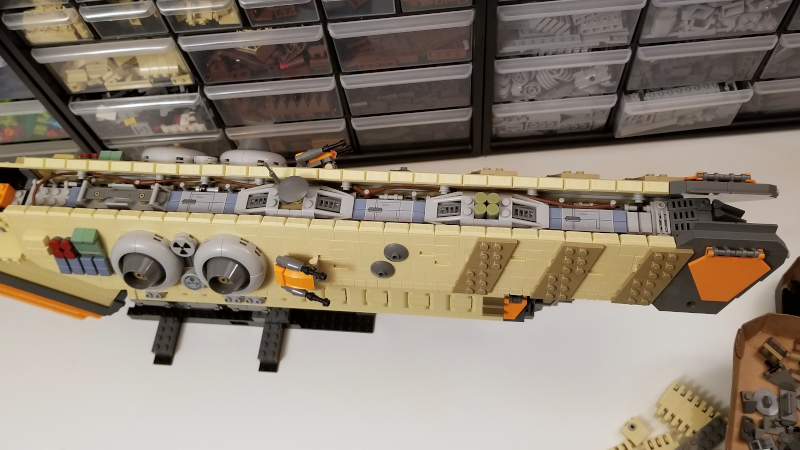
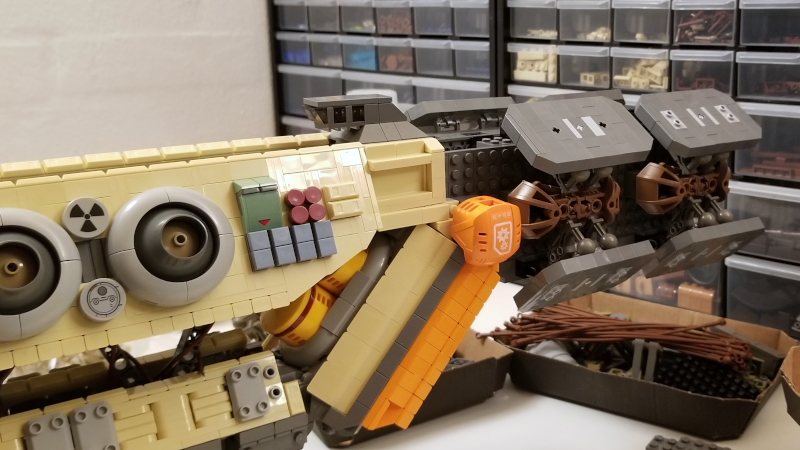
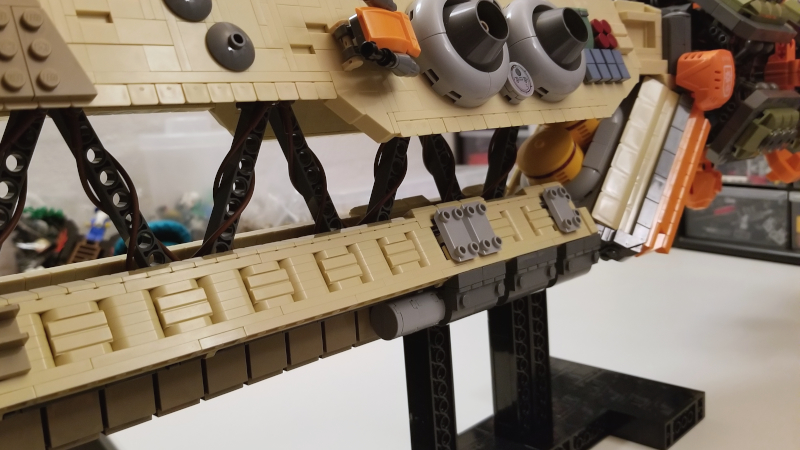
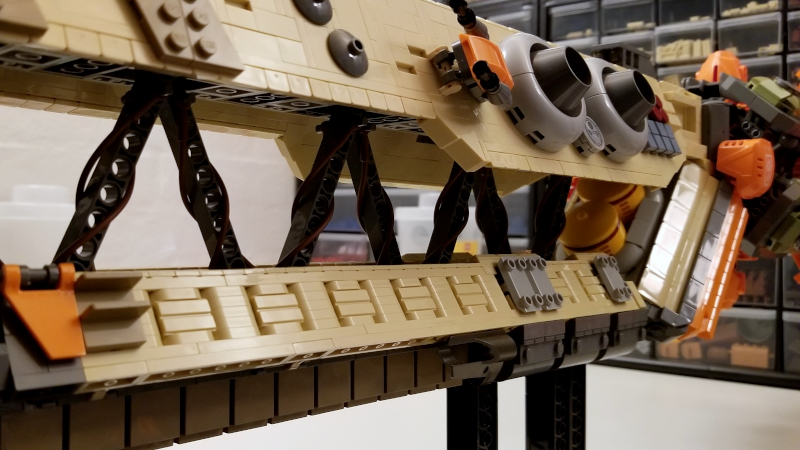
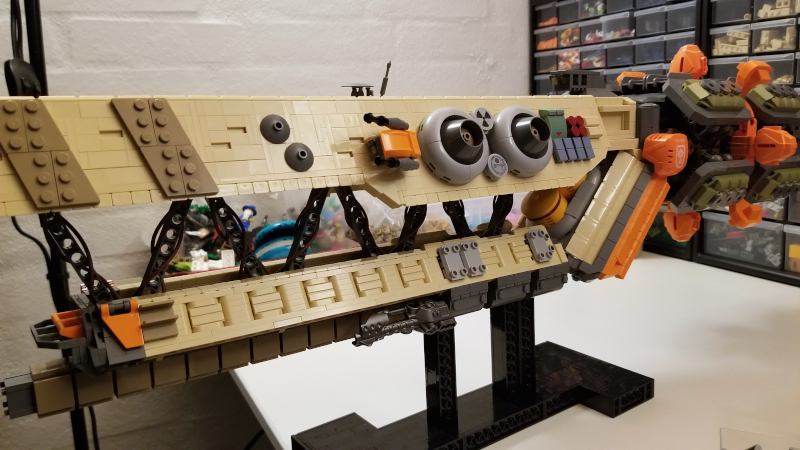
One new addition I wanted to incorporate was some sort of large cannon or rail-gun mounted just under the lower prong. After quite a lot of different attempts, and a few good suggestions from John (who I should add was an invaluable source of feedback throughout the entire SHIP design process), I found this simple pattern of repeated SNOT 2×2 tiles in dark tan.
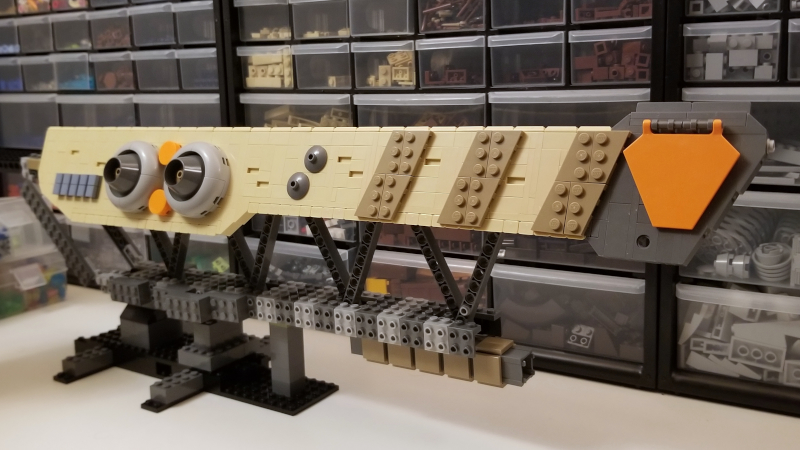
For the lower panels I needed something that would conceal the bracket core cleanly without covering up too much of the girders. 1×2 rounded plates in tan were another LUGbulk element that I was only too happy to find a use for.
Both the upper and lower and panels are attached via clips to allow for a slight angle.
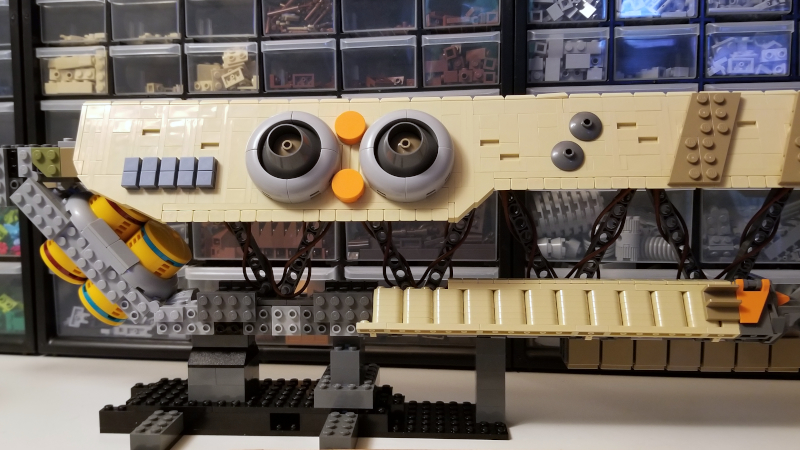
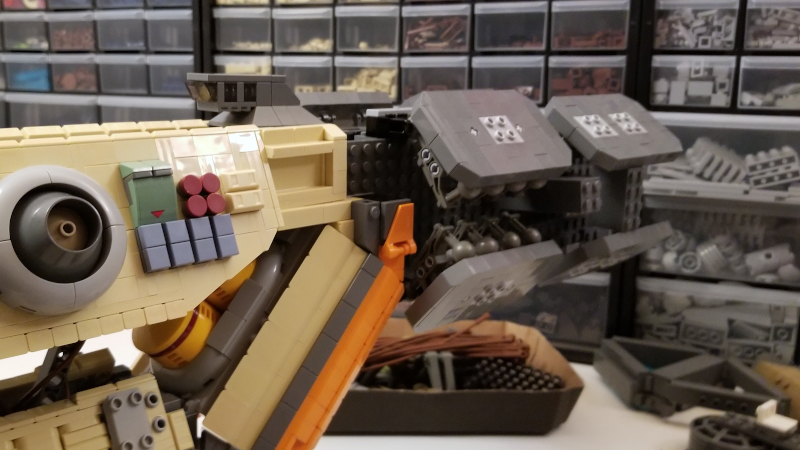
With the tan body panels coming along well, the next item on the agenda was figuring out a good use of the area where the two prongs transition back into one main body section. I thought it would look funny left as negative space so tried some large canisters in that void. Which filled it in rather nicely and used every single one of my 4×4 round plates in bright light orange. Later I decided to have both canisters’ stripes be dark red, as the teal jumped out a little too much for my liking.
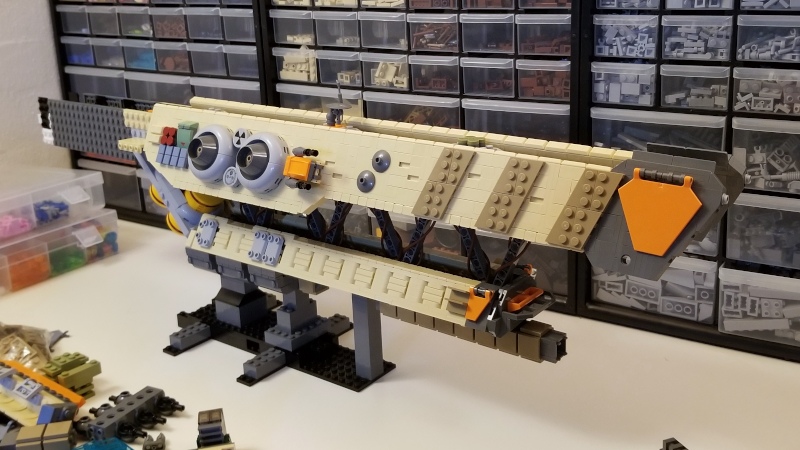
My collection of tan elements was starting to run low after building the front panels, so at first I was a bit stumped with trying to build the small diagonal panel that fits around the canister area. And then in my miscellaneous tan box I found I still had quite a few chairs whose shape proved perfect for this situation.
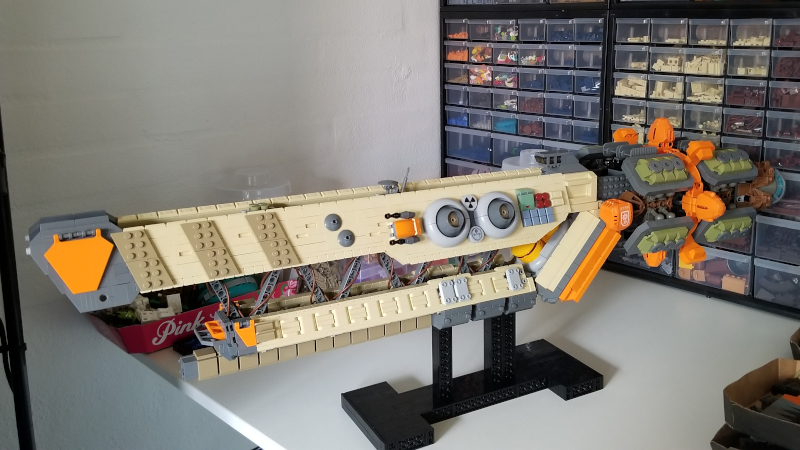
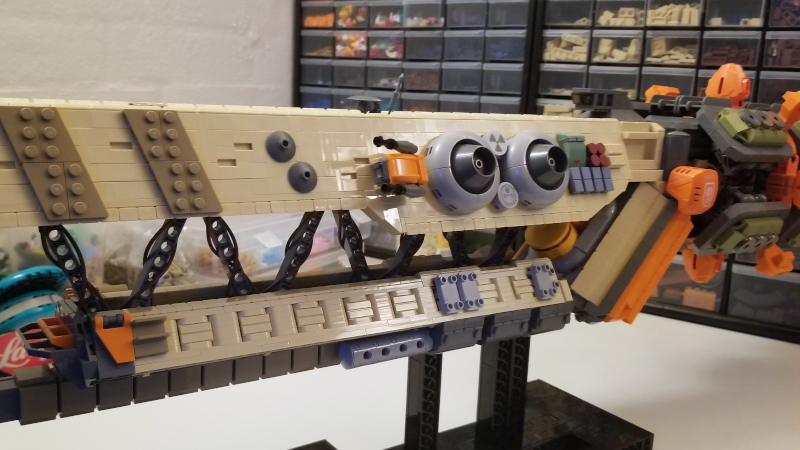
Happy with that setup, I transitioned back to working on the panels and trying out some different detailing combinations. The upper one I was very happy with after the adjustments. Though I loved the pattern using dark tan masonry bricks in the lower panel, and how it combined with the shadows between stacks of 1×2 rounded plates, I thought it might be too distracting overall.
So I switched the masonry bricks to tan, which maintained the texture but made it much less eye grabbing.
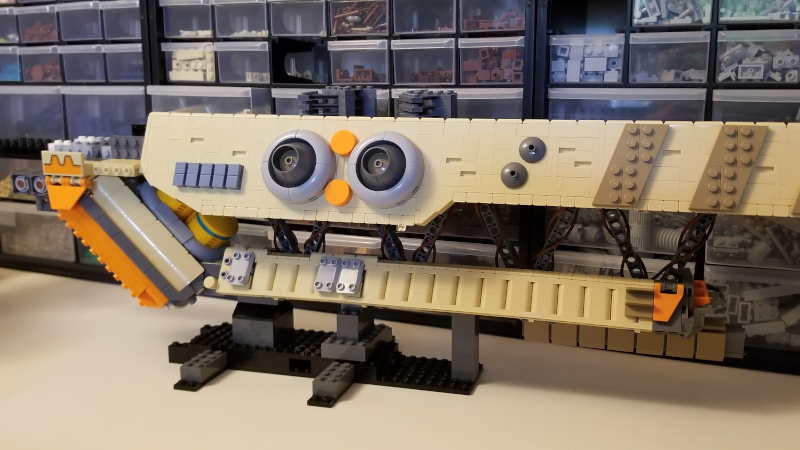
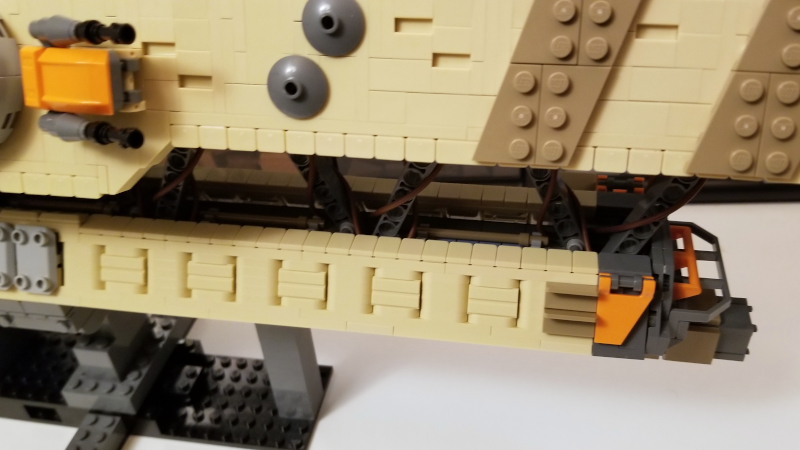
Then some new dark bley sections were added under the bottom prong to smooth the transition with the angled panel of chairs and main cannon.
I had put off working on this space between top panels for a while, but at this point needed to tackle it. More of the reddish brown flexible tubing elements were threaded along the outer edges, though mostly invisible in photos. I knew I wanted a few details to poke out enough to be visible from more standard viewing angles, though most I wanted a bit below the panel edges almost like negative space.
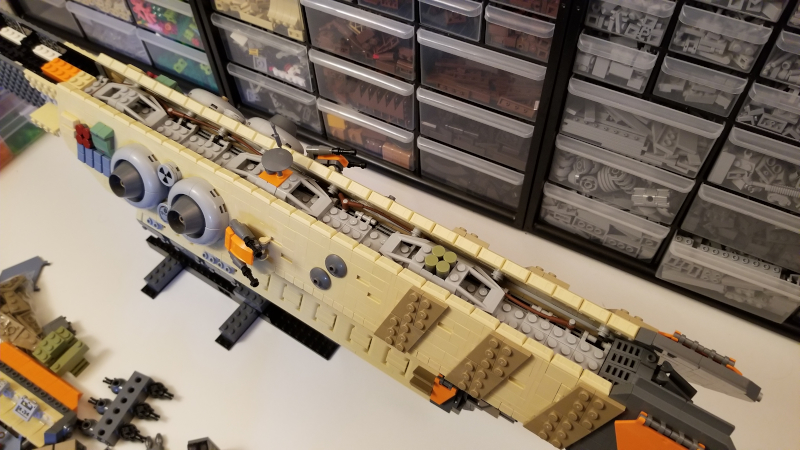
Which made things a bit tricky, because I had very little depth to play with.
Around this time I also came up with this front grill setup which is one of my favorite details on the whole SHIP. Especially because I had tried some different things here and there and didn’t like any, before stumbling onto this which I felt fit in perfectly.
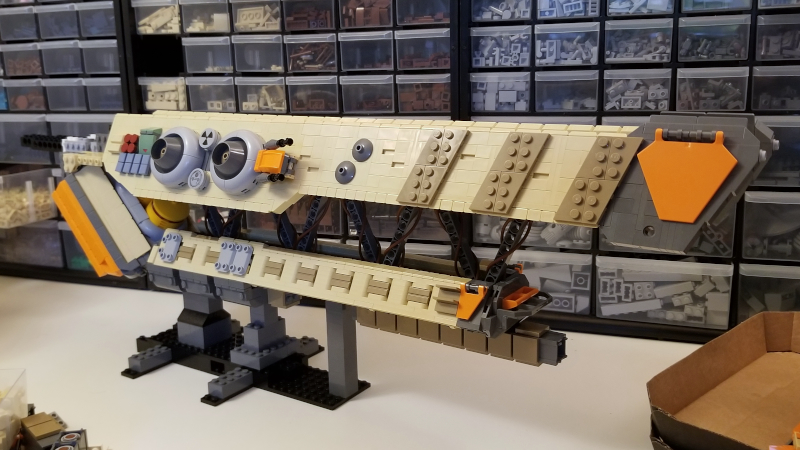
Going back to the top level detailing, I eventually realized stickers could be a huge help. I also liked the addition of some sand blue courtesy of 1×1 tiles found on the PaB wall.
Between the lower panels I did something similar though also incorporation some dark tan bars over the bley and sand blue. Again mostly invisible unless you are viewing the SHIP in person but it made me feel better when looking at it 😀
More than halfway done! Right?
Going by volume, yes, but the rear half of the SHIP seemed to take far longer despite being smaller.
Construction stalled there for a little bit as I tried to figure out what I was doing for the rear third of the SHIP and waited on a BL order that included a bunch of constraction elements I thought could be useful. Work up to this point had been relatively straight forward thanks to Pierre’s SHIP as reference. But for the engine area I wanted to do something different.
When the BL order did finally arrive I started playing around with some large panels over more mechanical looking details. This first assembly was rather ugly.
But I soon found a much more effective connection setup.
From there it was a question of figuring out placement and how much bulk I wanted from these sections.
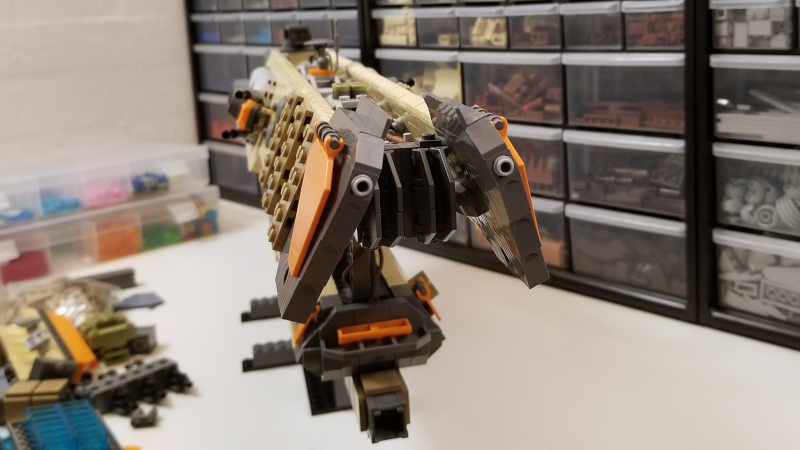
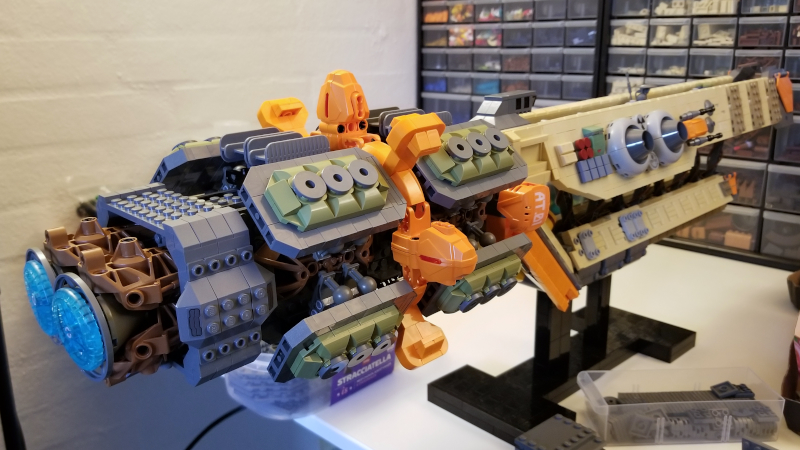
I tried quite a few different spacings before settling on this option that fit around the Bionicle parts and also used fewer arms per panel to give me enough for all 8. Around now I started feeling a definite time crunch as I realized the last weekend of September was Skaerbaek which would leave me with basically no build time that Friday, Saturday, and Sunday, which were usually when I was able to make the most progress.
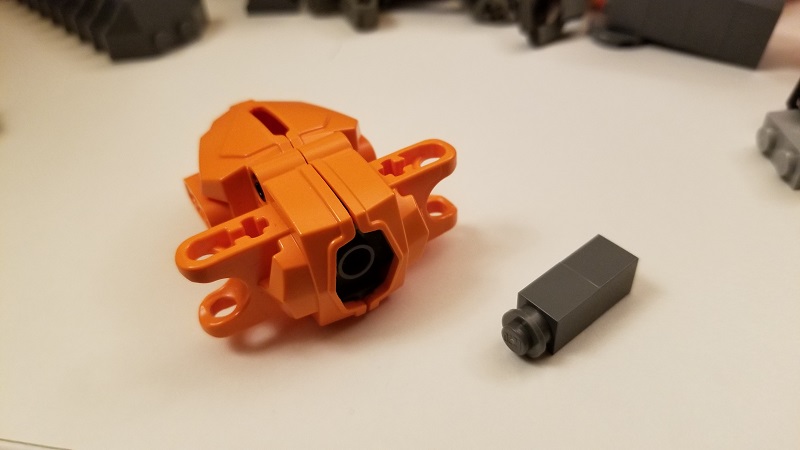
These orange feet were more parts from my order, and I wondered if there was a way to incorporate them. Back to back they make a nice canister shape, but how could I then connect that to the primarily system SHIP easily? After a little fiddling I found that 2×2 round plates fit inside.
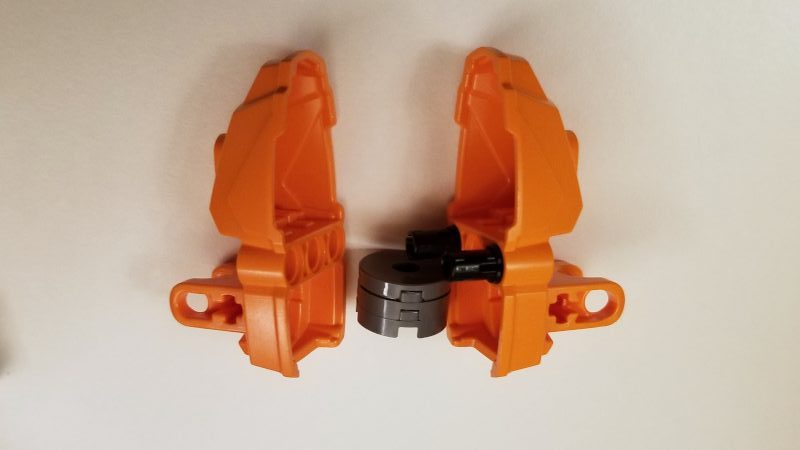
And then give a system connection out the bottom.
I tried placing a few of these new canisters around, and John then suggested connecting them all into sort of a giant gear shape. Which sounded amazing! But I only had enough of the feet for four canisters, which wouldn’t be enough for the shape we had in mind. Fortunately I realized later I could simply build an assemblies of normal system elements to alternate with these canisters.
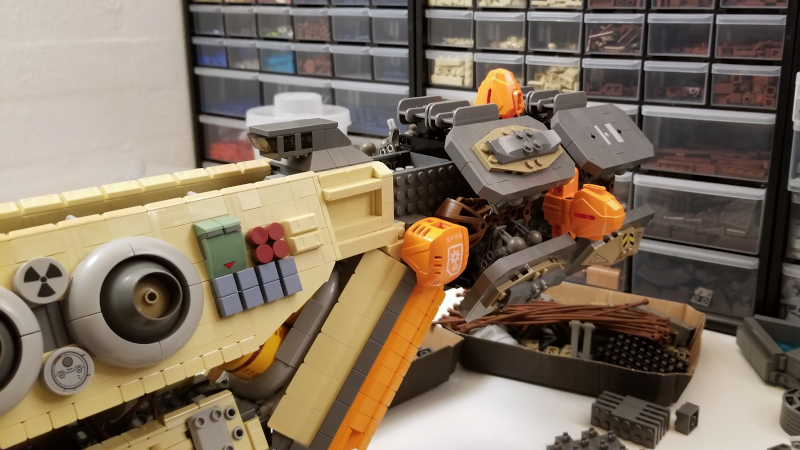
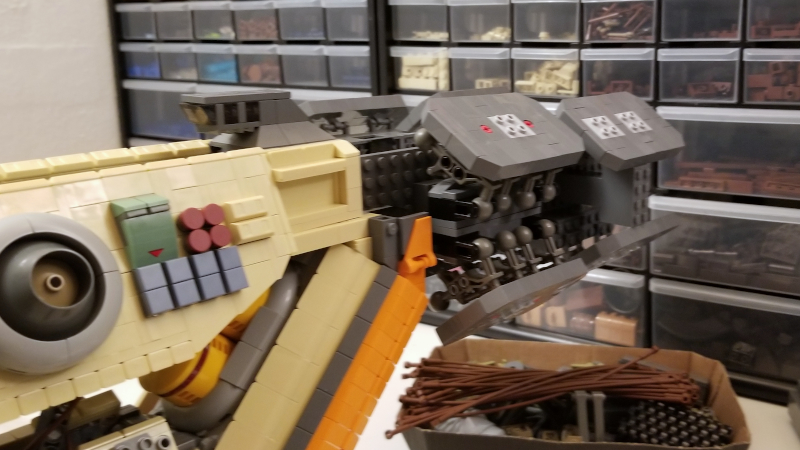
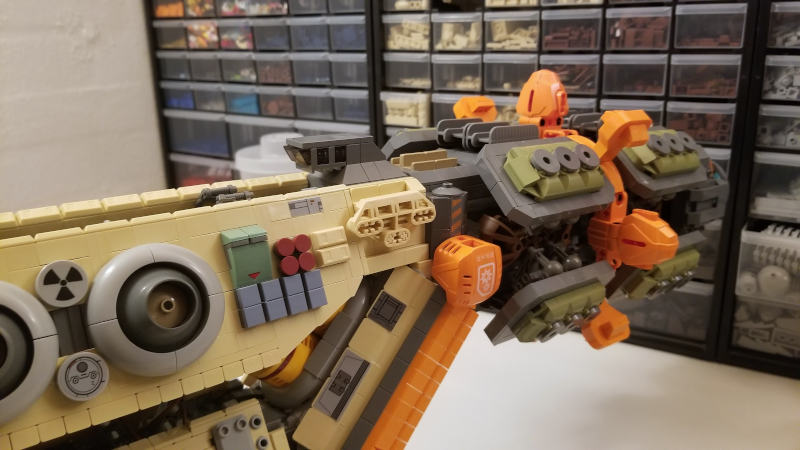
By now I was really having fun using constraction pieces. And wondered if I could use some torsos as the engines to tie in with the other medium brown elements. The 4×4 cones were attached using a similar method of trapping system elements inside like I did with the feet.

Potential engines in hand! But how to configure them on the SHIP?
Horizontally?
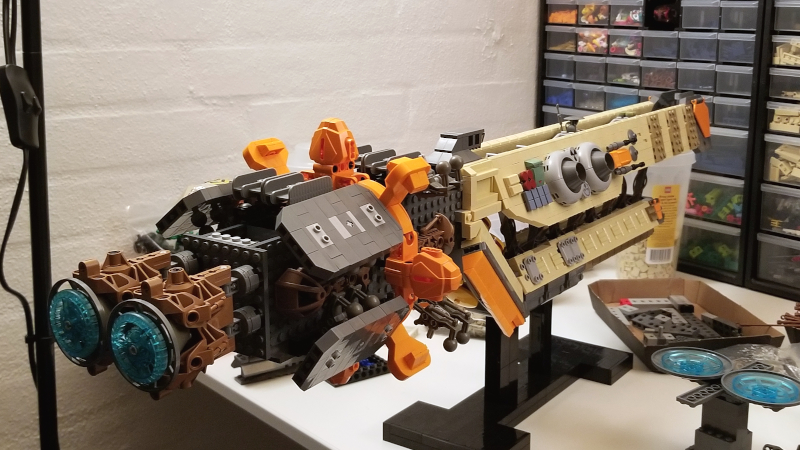
Vertically?
Horizontally ended up winning out, but I wasn’t certain they would stay yet. I wanted some sort of engine housing to transition to them and it was a bit hard visualizing how the SHIP would look without that in place. Getting a bit tired of fiddling with engine placement, I went back to refining details. This time focusing on the outer face of the small panels.
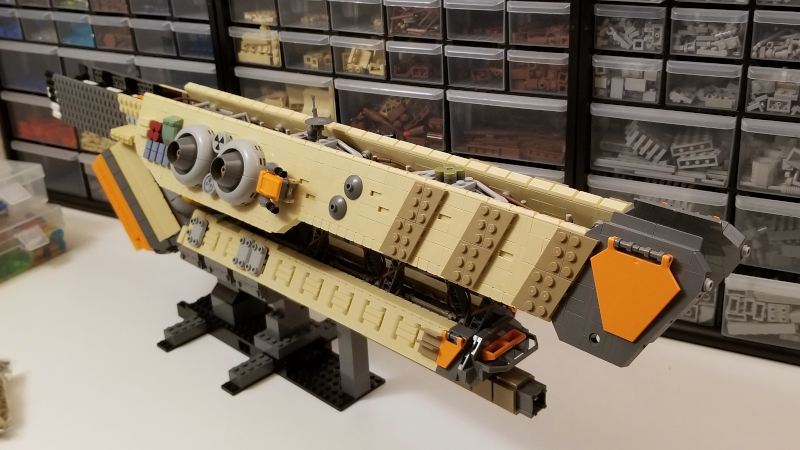
Through the whole SHIP I had been trying to find a place for these 2×2 olive green modified slopes, as it was one of the few elements I have decent quantities of in olive green. Finally it clicked here, and I was totally sold on the color combo with olive, dark bley, and orange all in close proximity. This was the SHIP status before leaving for Skaerbaek, and after getting this far I felt far more confident in finishing on time.
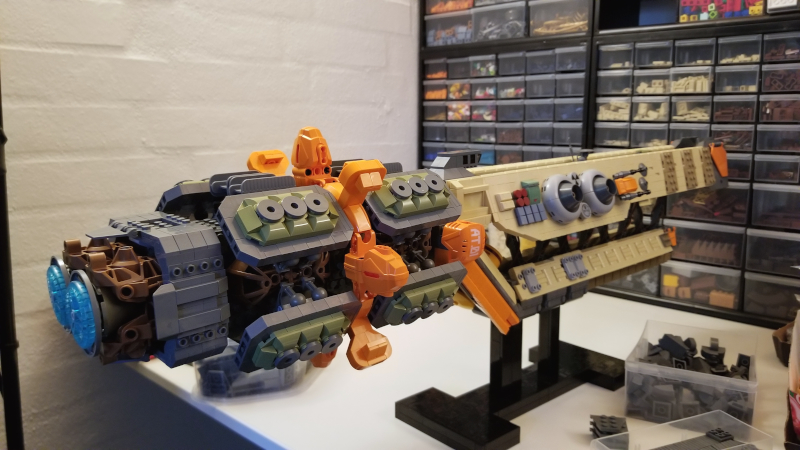
So then I had to go back to working on the engine housing. Some simple studs up and SNOT building made a nice layer of plating around it.
And after I found this combination of spoiler and half stud offset tiles to add some texture and detail to the sides, I was super happy with how it was shaping up.
There were a few areas I still felt needed work however.
One of which being where the sideways bley tube is (below and left of the 2×3 shields). I felt some sort of detail was needed there to keep the cannon start from looking abrupt and out of place.
Light bley seemed like the right color, but shape wise I was a bit lost.
So I tried any sort of random element that remotely fit that space – even this funky panel.
And an even stranger cannon that looked so out of place I wondered what I had been thinking to even try it 😀
Something about the simple bley cylinder seemed appealing. So I kept trying different variations on that theme.
Before settling on this one.
Another small area I wanted to refine was by the bridge (which itself went trhough quite a few of different iterations). There’s a small section of perfectly horizontal tan paneling before it transitions to the dark bley mechanical bits. Above you can see a simple wall panel, while here I tried another unique part recently acquired.
And then numerous plate with rail.
Eventually some SNOT ingots were selected as I had already been using those in lots of places throughout, and liked their texture again here. At this point I also added some stickers for small pops of color or detail in areas that felt too plain. John also suggested adding a few more details poking out between the upper panels so some dark bley blasters, ski poles, and so on were attached.
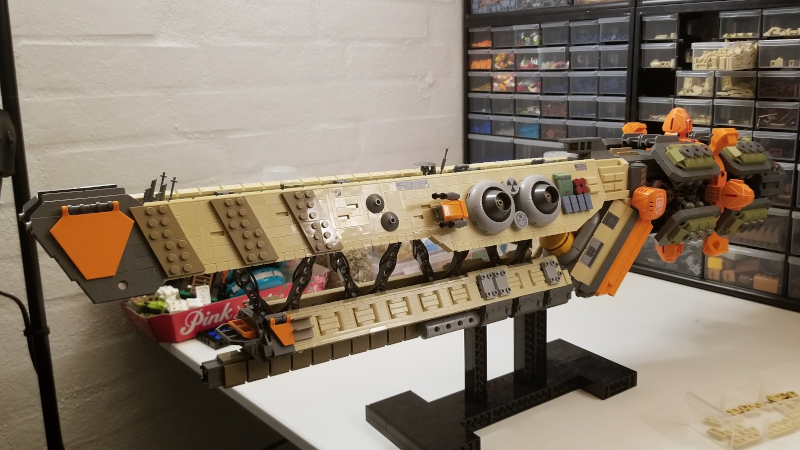
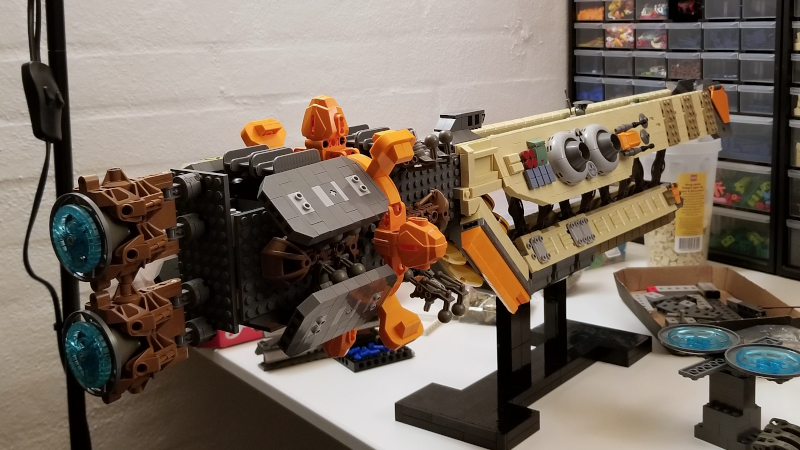
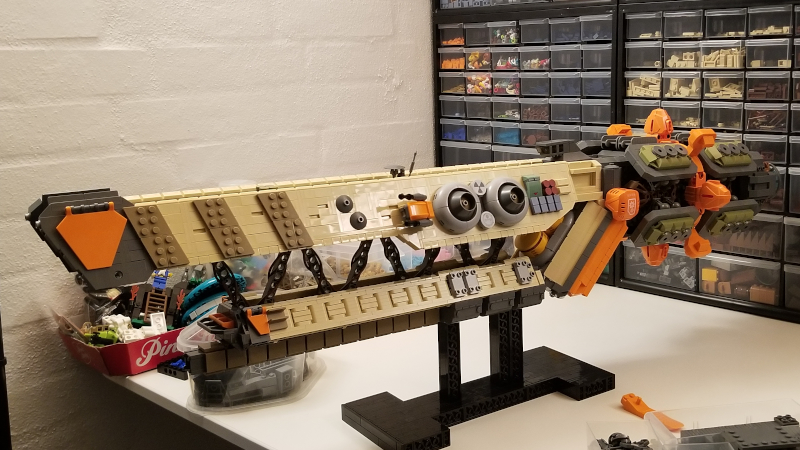
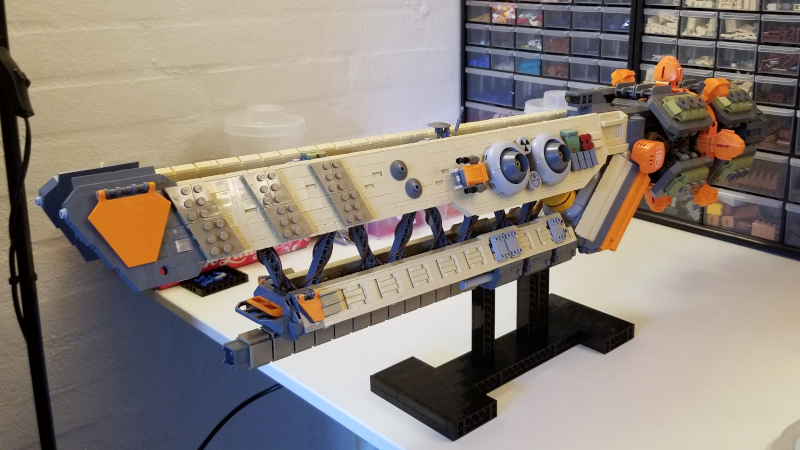
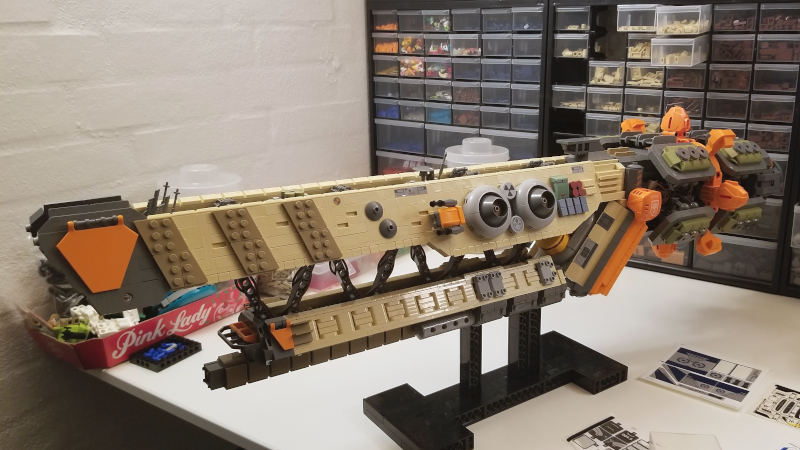
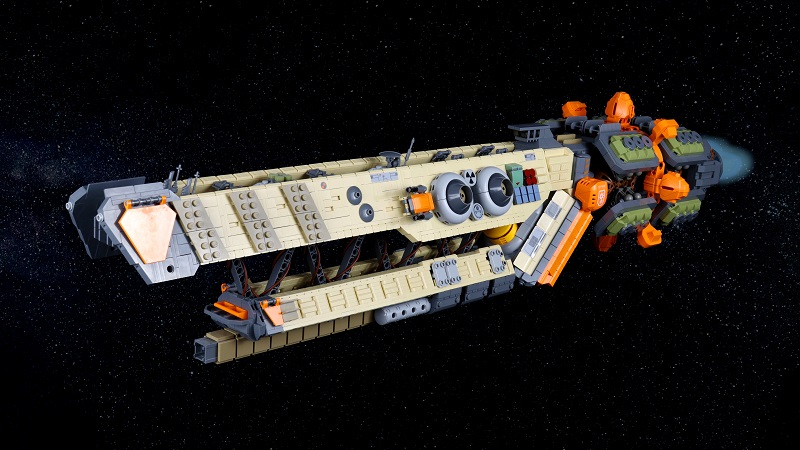
At which point all that remained was photography and editing. Always a challenging task when working with large models, and I found out my black backdrop was not nearly big enough. Fortunately my couch is very dark grey and the edit went pretty easily.
Overall I’m very proud of the final result, and think this is my best SHIP yet.


Love build logs!! So glad to see this one and always looking for more. Thanks!
Thanks Mark! It did feel good to post one again 🙂