


Technic Rockwork Tutorial:
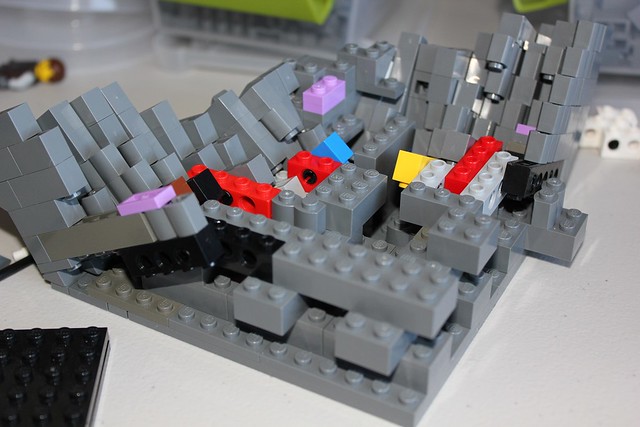
You’ll notice that I built the rock sections upside down here. At the time, I thought that would work better with the selection of slopes and inverted slopes I have. It didn’t end up making much of a difference, so upside down or normal is fine.
You’ll want to have a good variety of technic brick sizes, and plenty of technic pins when building this style of rockwork. Technic 1×2 bricks with 2 holes are quite useful to give 1/2 stud offsets, and you also want to change the angles of each section slightly, when possible. Using brick modified with stud on one side, or headlight bricks, to attach SNOT tiles can also help produce small offsets. One thing that is useful about this technique, is that you can mix in normal studs up sections in as well.
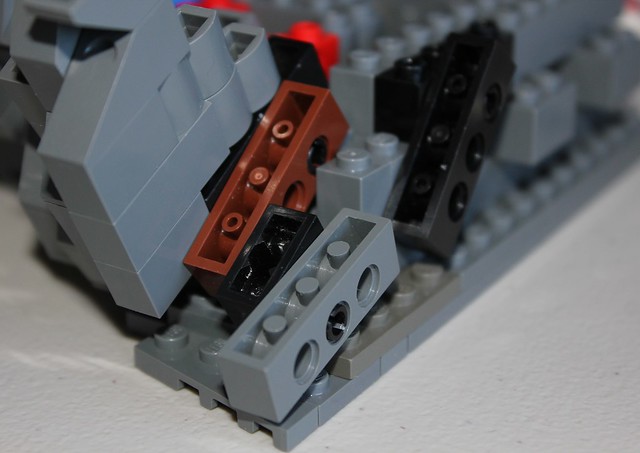
By locking everything together well on the inside, the finished rockwork should be quite stable.
I made all of my columns one stud wide for this build, because of the small scale, but you could use wider sections if you preferred.

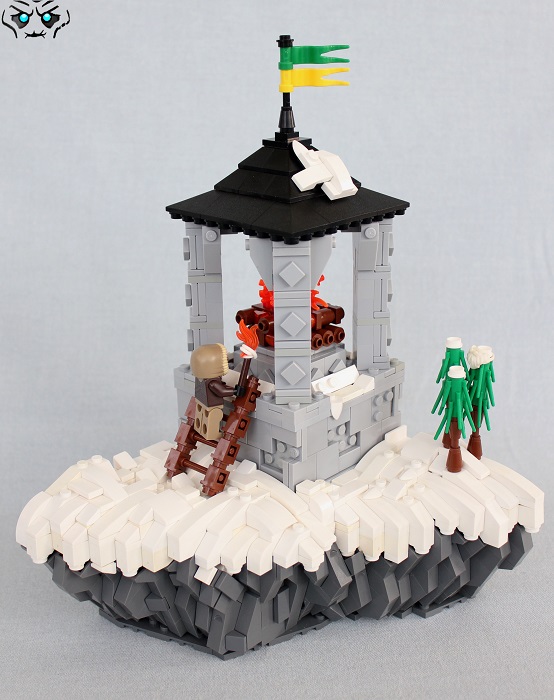
Once you have your cliff built up to the desired height, use a method of trial and error to cover the top with foliage, snow, or whatever else you want your particular scene to have. What it looked like from the side in my Daydelon Beacon build, once the snow was added:
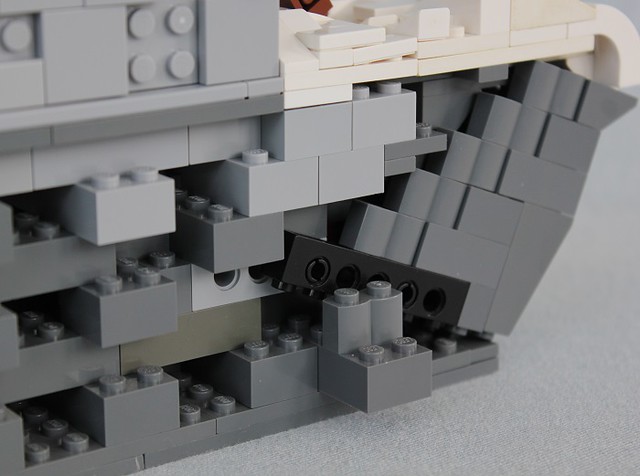
Here’s an example of what the finished rockwork looks like in a build:
And that’s the basics of how to create ‘Technic’ Rockwork. As always, if you have any questions, feel free to let me know!


Hey, I am a huge fan of your work, and use some of your ideas for some of my builds, anyways, I have one question, How are connecting the technic bricks to the baseplate? I am not seeing many connecters over the entire build, so I was wondering that. Thanks again! I am still jealous of your piece selection! 😉
The angled technic bricks are attached to studs up technic bricks that attach to the base.
Ok, I see it now, keep up the good work! Will always follow your excellent builds!
Thanks, good to hear the tutorial was helpful 🙂