


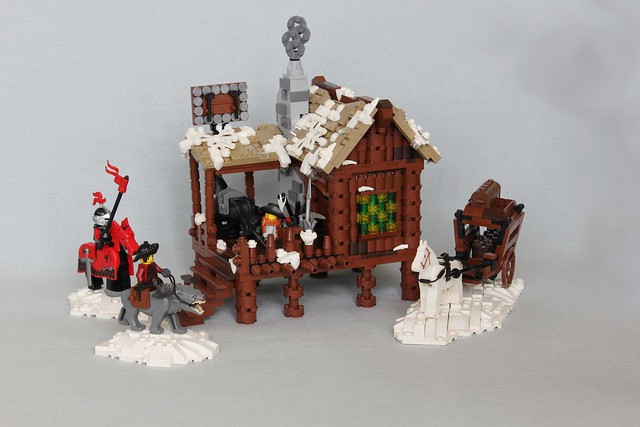
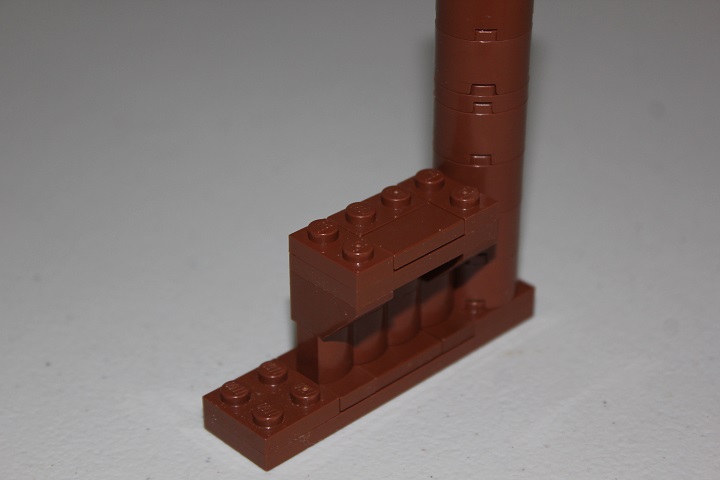
I’ve used this design to simulate wooden buildings quite a few times, for example:
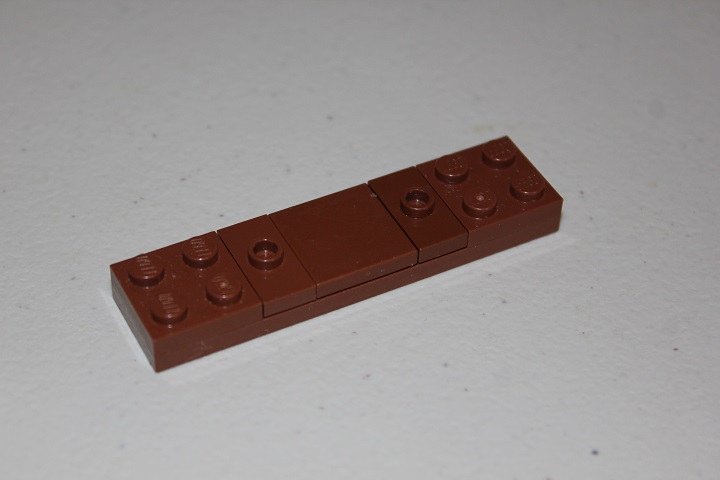
The design makes use of 2×2 round bricks, palisade bricks, and half stud offsets to achieve the final effect, and is view-able from both sides. A plate with some 2×2 plates and jumpers sets up the base of the wall. The 2×2 plates mark where the 2×2 round bricks will go, while the jumper plates and tiles area will hold the palisade bricks.
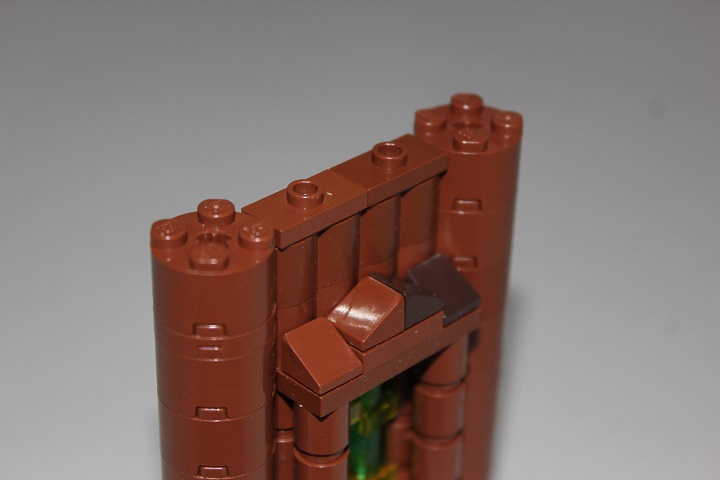
I’ve added some inverted slopes in the palisade section to frame a window.
A 2×4 plates serves as the bottom sill and gives a nice solid foundation for the window.
Some plates and tiles mark where the frame and window go.
1×1 round bricks add to the wooden wall look, though palisade bricks turned sideways would also work well.
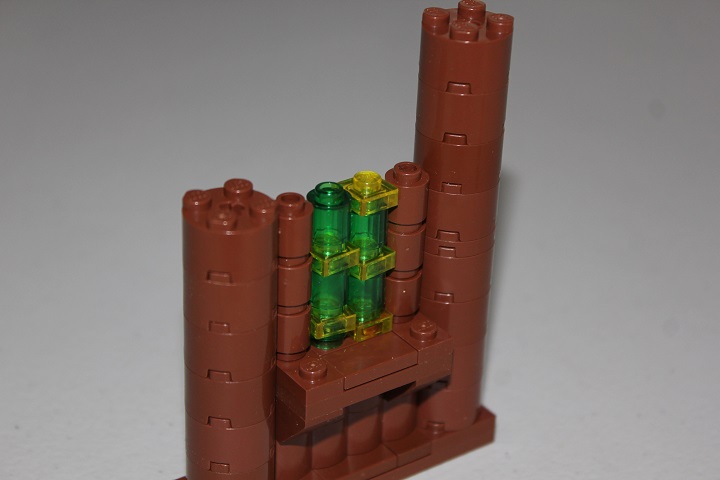
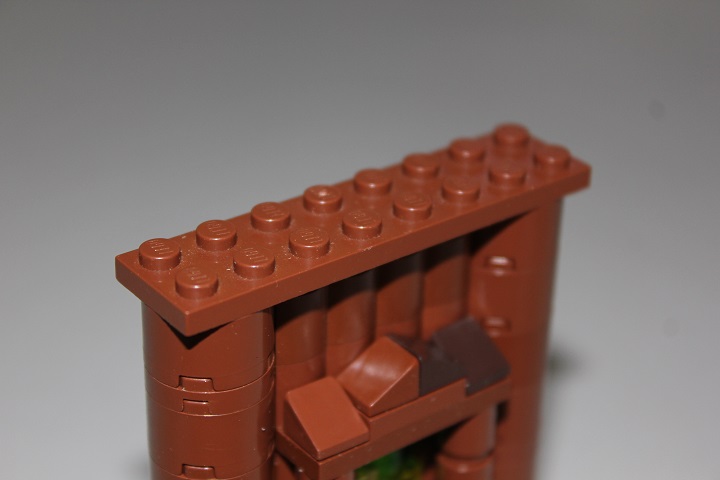
Another 2×4 plate caps off the window.
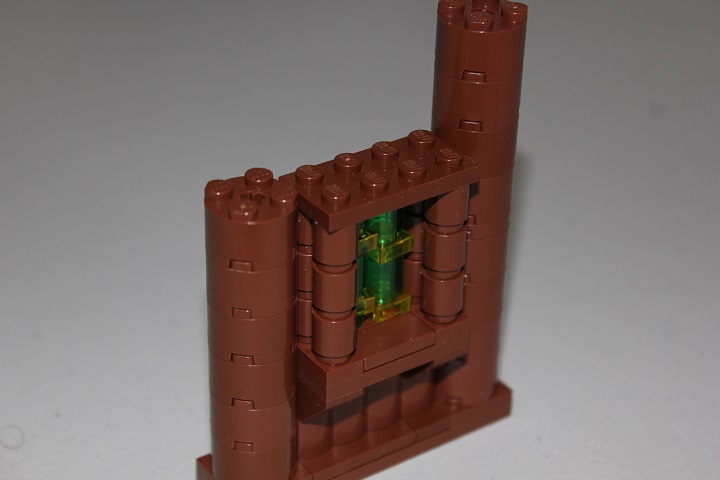
Some cheese slopes add a bit of decoration to finish the frame.
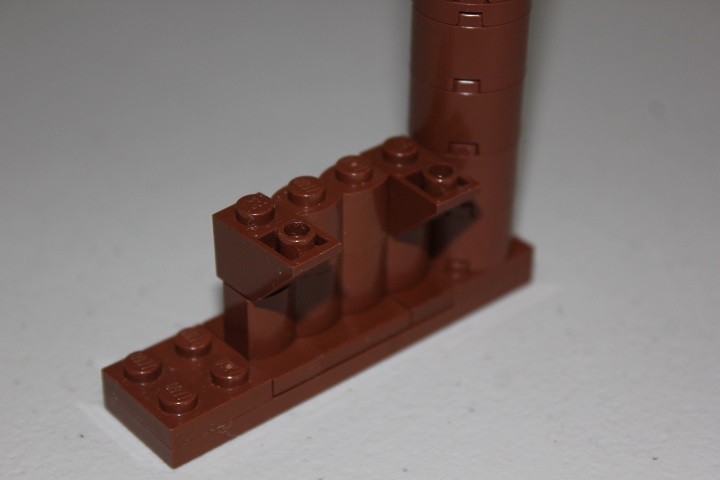
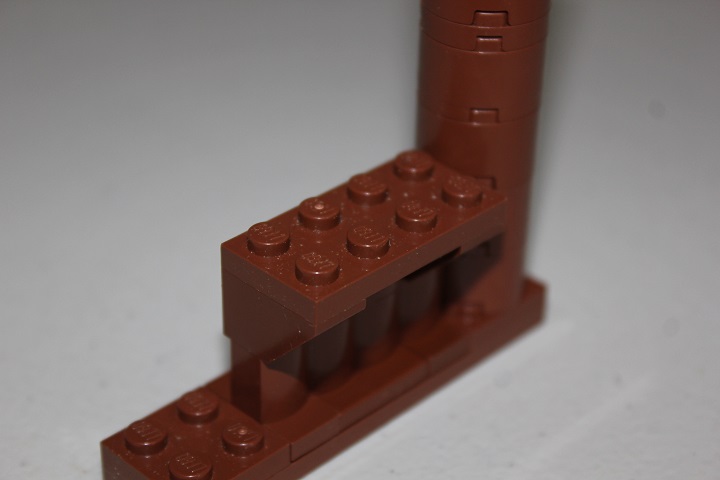
And then some more palisade bricks and 2×2 rounds raise the wall section to the desired height. To lock things together solidly, we’ll need some jumper plates on top of the palisade bricks, level with the 2×2 round columns.
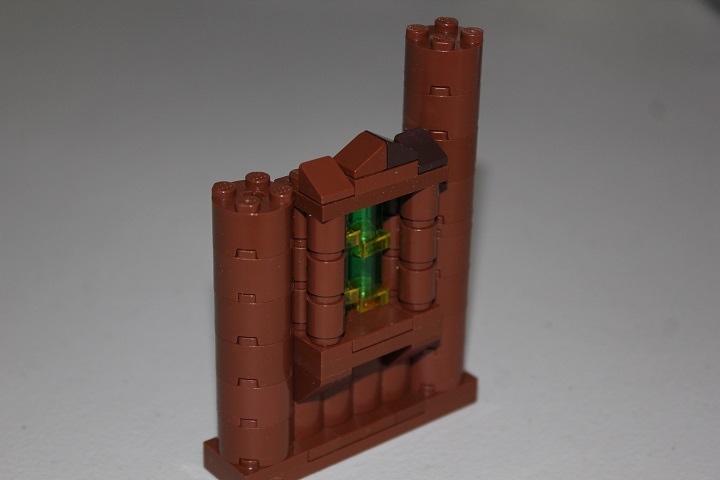
Then a plate connects the whole wall. If you wanted to add a second story, you could repeat the previous steps on top of the plate.
I’ll just add some tiles to finish it off.
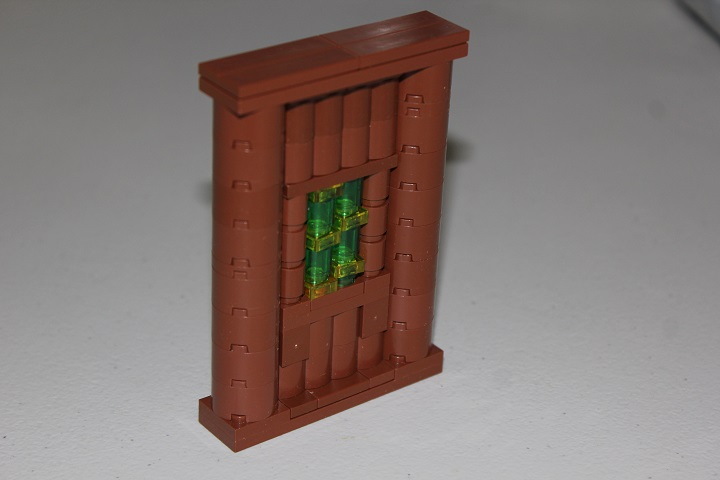
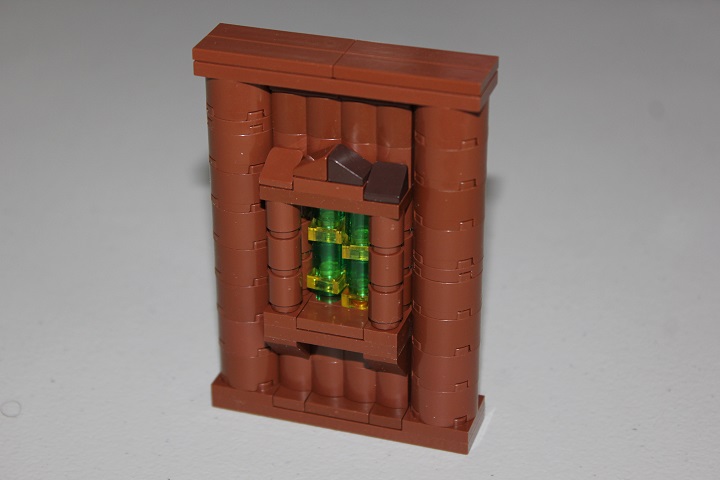
And there is the completed wall section! There are lots of variations you can make with this design, but hopefully this tutorial gets the basic technique across.
Thanks for reading, and as usual, if you have questions or suggestions for future tutorials, let us know!


Nice! I’m sure I’ll find a place to use this…
Thanks! It is a pretty handy technique because of its simplicity, and being able to fit it in tight spots. When I do SNOT tile wood walls, I often switch to this design for under the roof line.
Okay, yeah. I think you did a little bit in your Green Goblet build 🙂