


Snowy landscapes are one of my favorite things to build, and they are something you don’t see all that often in the LEGO community. Keep reading to see how I generally build my snow-scapes.
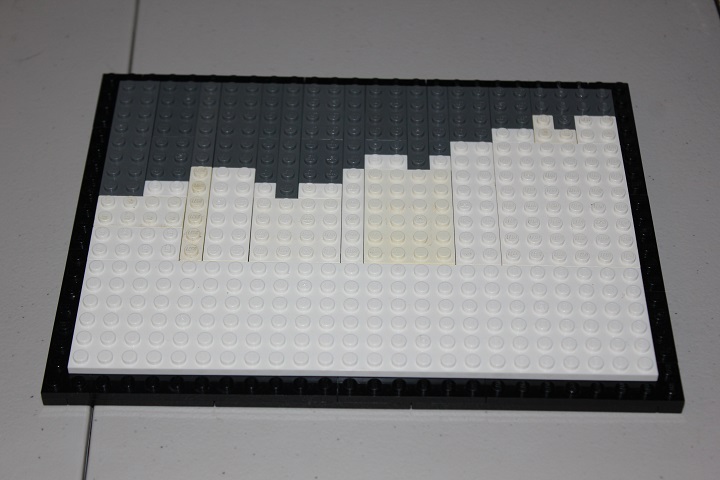
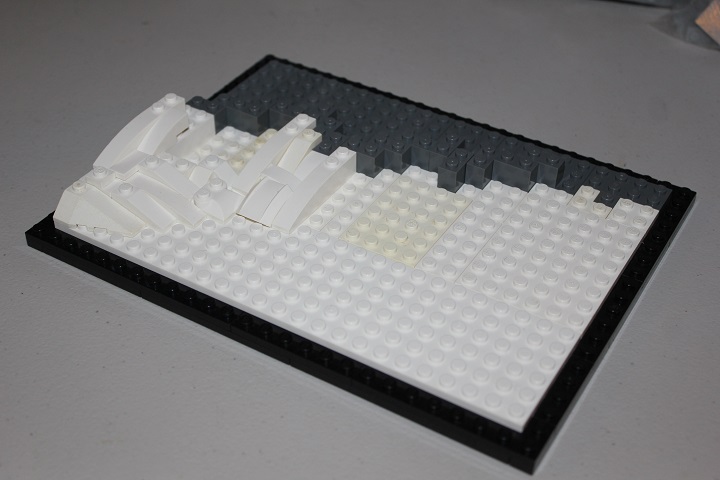
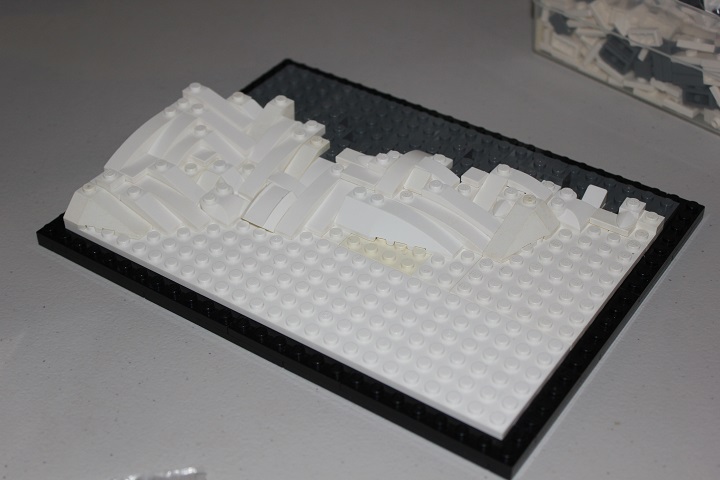
For this example, I’ll show 3 different techniques for snow that I often use. Here’s a simple base to work off of, the dark bley marks where some rockwork will go, and naturally the white plates indicate snow.
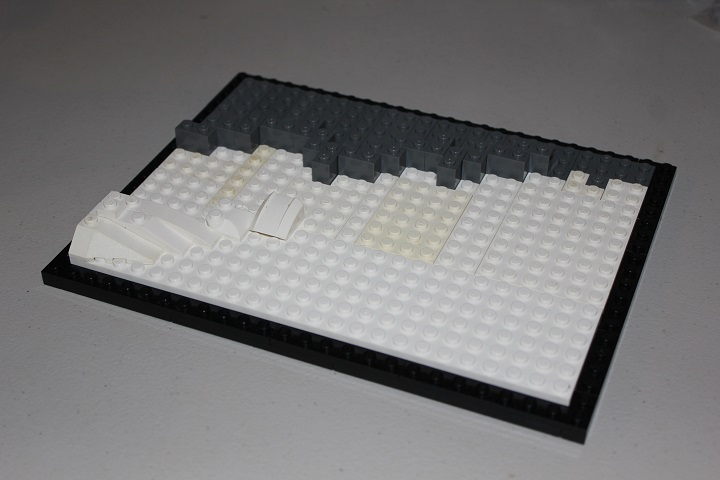
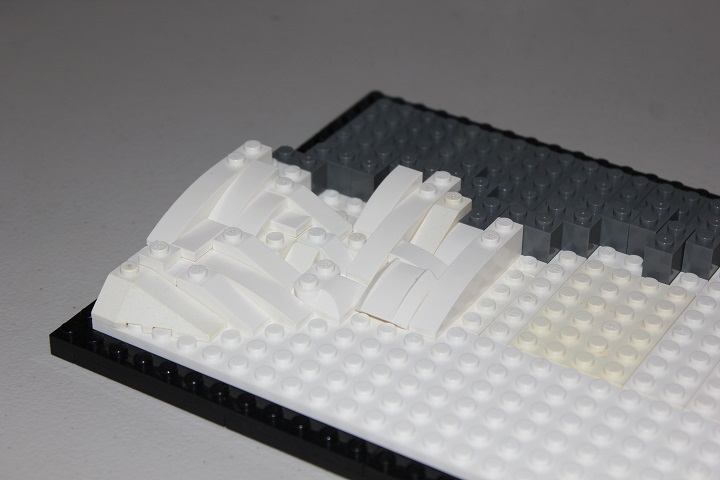
Now the snow construction begins. I want a good sized drift in the back corner so I start laying out some slopes marking its edge. You want subtle stepping going on between each slope, and you can see that on the right I’ve oriented a slope perpendicular to the others. Its good to do this occasionally to break up monotonous patterning. That particular 2×2 curved slopes is especially useful in snow-scapes as the front lip hangs over one half stud, giving a nice change from all the whole stud steps.
Not only do I step slopes forwards and back, I also raise them slightly when appropriate. For instance, the 1×3 slope on the left here is raised 1 plate to continue the snowdrift. I like to include a mix of studs and tiles in my snow, and using a jumper plate to center 1×1 plates can give a nice offset. This is visible on the left, just above the 2×4 wedge slope.
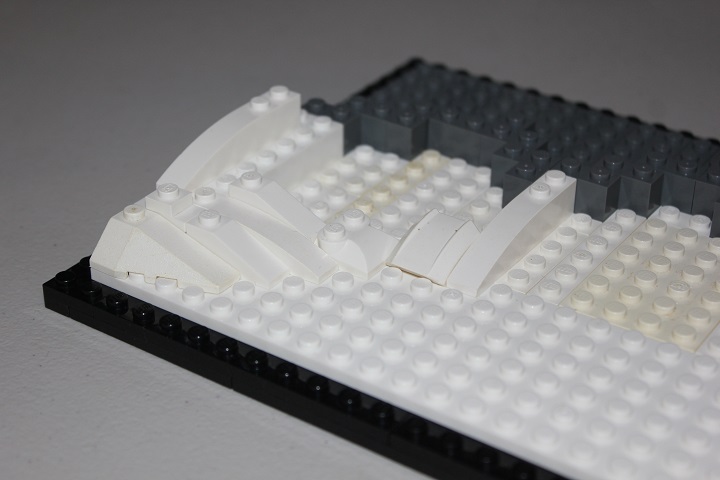
A variety of curved and regular slopes in different sizes are useful to have, but you can make do without lots of fancy parts.
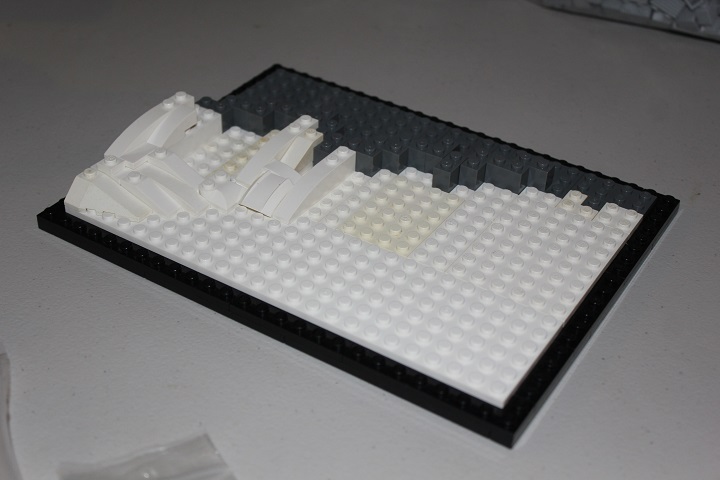
I’ve begun to step the 2 perpendicular sections together, creating a bit of a convex slope, but trying to keep it nice and smooth.
More subtle stepping, and the first section of the drift is nearly completed.
There we go!
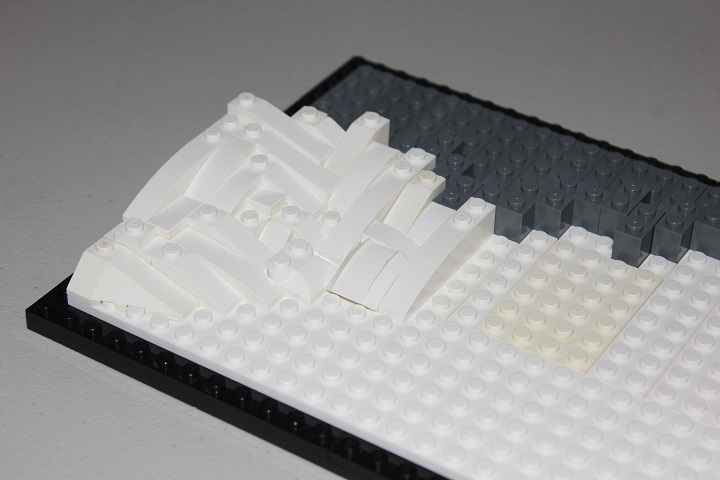
Now let’s finish off the slope on the right side. 2×4 and 2×6 wedge slopes are really nice parts for snow, and another combination I like to use is horizontal tooth plates over tiles or wedge plates. I’ve used that design on the far right here, and also just left of the rightmost 2×4 wedge.
Some small curved slopes, plates, tiles, and cheese finish off the bottom drift.
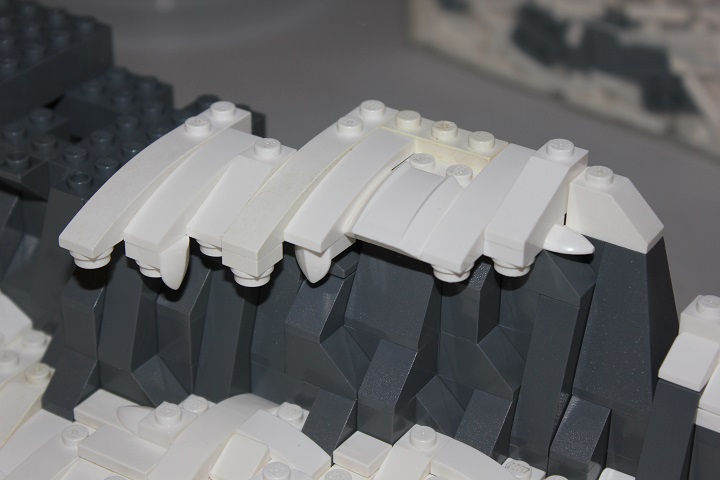
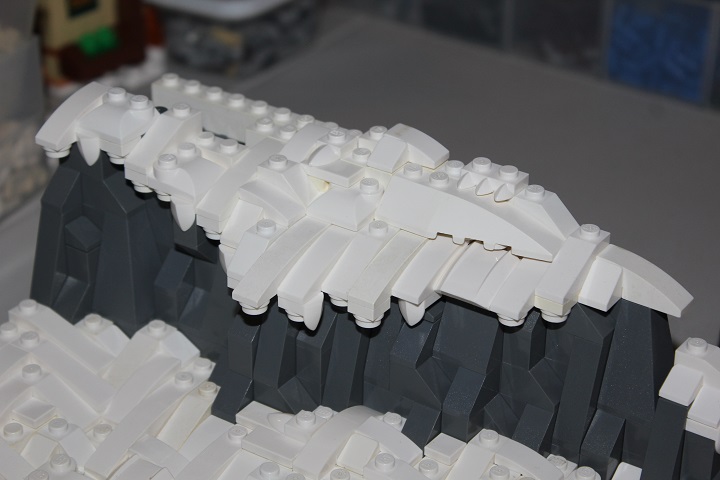
So lets progress onto some deep drifted snow coming over the top of the rockwork.
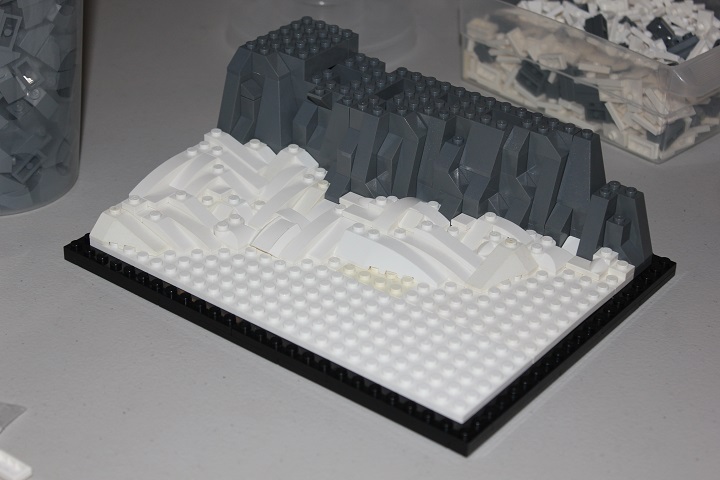
I generally overhang slopes a full stud or two past the rockwork, and then use 1×1 plates and 1×1 round plates to give the hanging snow look. 1×1 plates with downwards hanging vertical teeth also work really well in this design.
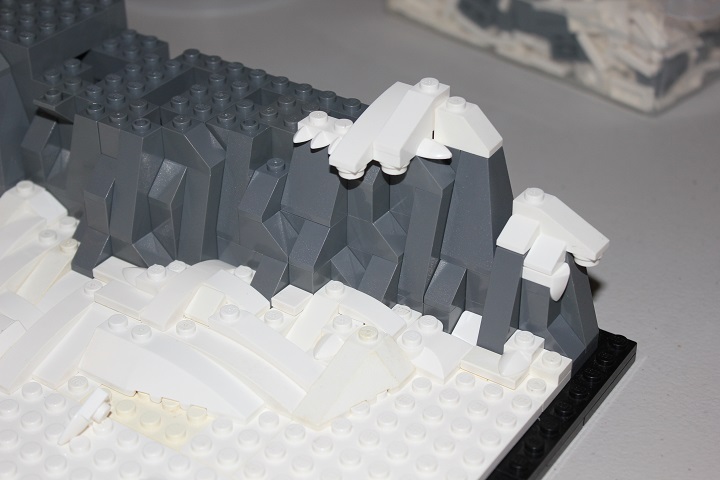
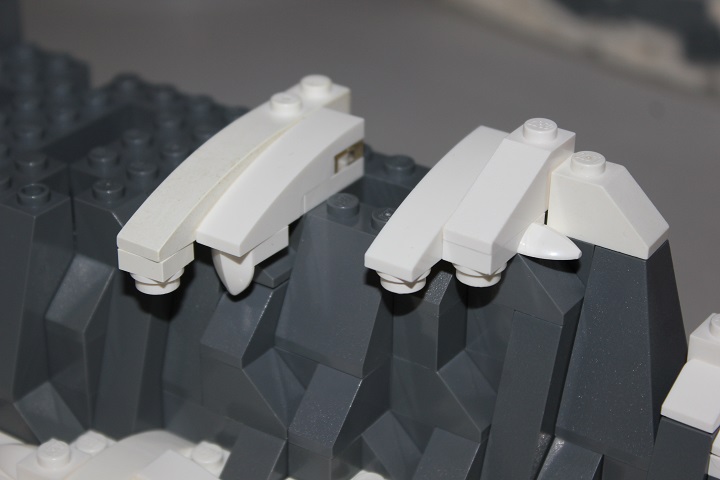
Here you can see clearly how a few of these slopes are attached. The curved slopes allow for parts to be attached at 1/2 stud offsets along the bottom which I utilized here on the 1×4 slope.
Just like with regular drifts, slight stepping is done throughout.
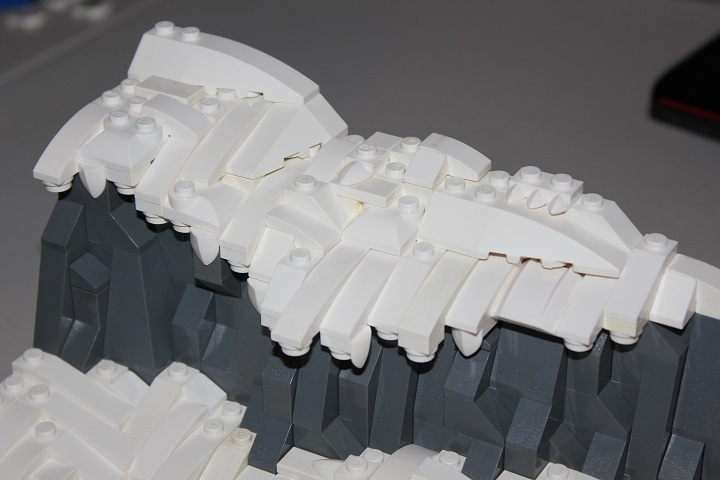
White bricks fill in behind, and now I start to step up the end giving some height difference.
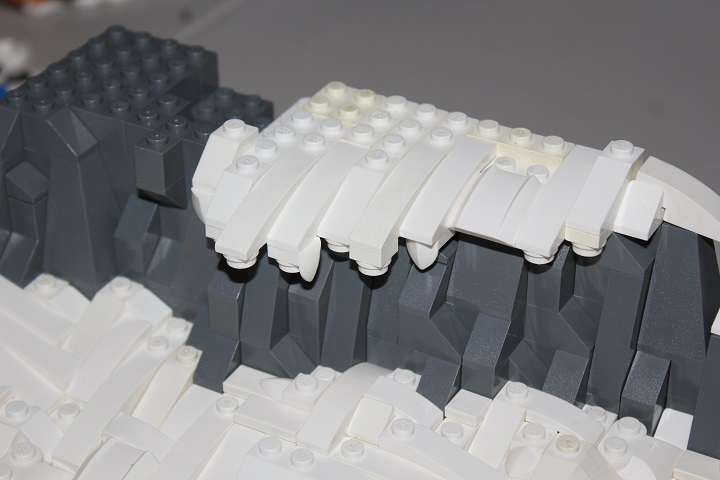
Now the whole front of the overhanging snow has been roughed out, but I need to fill in behind.
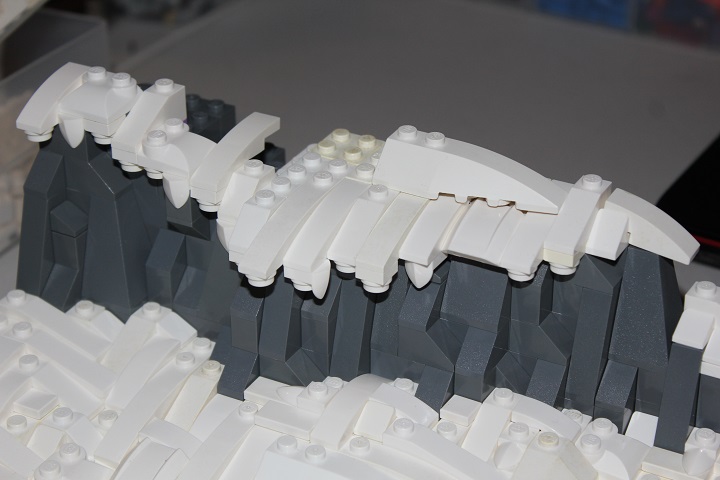
The 2×6 wedge slope going perpendicular to the others gives the look of another drift on top.
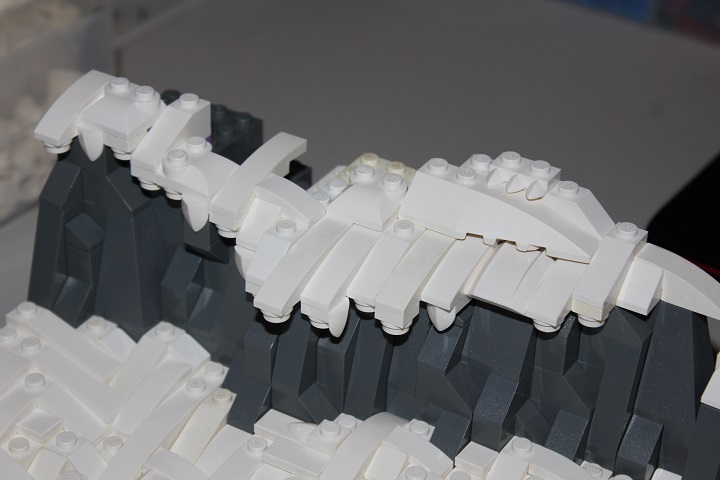
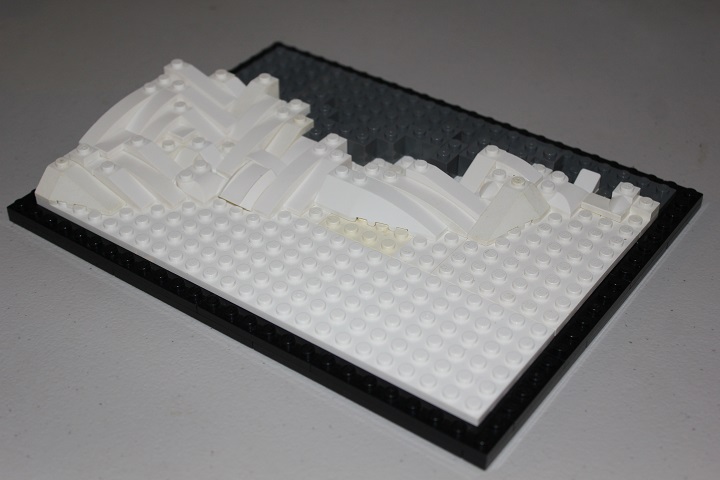
Finished, though the bottom area still has some plain white plates that need detailing.
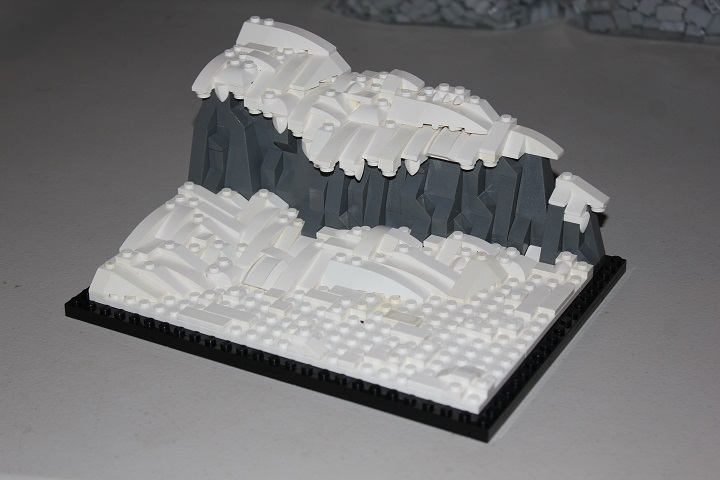
Which brings us to the third method of snow-scapes: texturing flat areas. I do this by using small plates and tiles, and even some small slopes now and again. I generally place tiles and plates in patterns of 2, and alternate directions. Also trying to avoid overly large sections of bare studs by mixing in tiles.
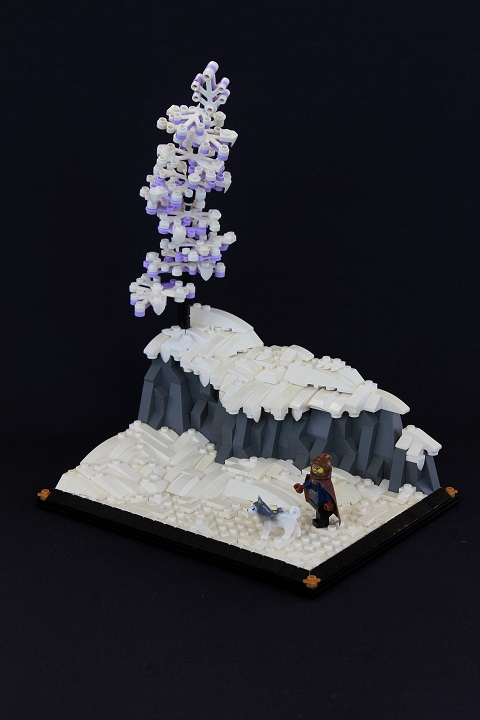
And here’s the completed scene with a tree and border added:
Hopefully this tutorial will inspire you on how to create your own snow-scapes, and be sure to leave a comment if you have any questions or ideas for new tutorials!


Sweet! This is awesome! Thanks Isaac and John! I will definitely have to try this sometime soon! This is very helpful, and will definitely look to this for inspiration!
Great! Glad it was useful for you, and thanks for suggesting it!
Really good tutorial, super helpful and just in time seeing as I’ll need to use this for BricksCascade 🙂
YES!
This is very helpful! I’m building a moc with snow and I’m not sure if it looks good. Could you take a look at it for me? Here is link if you want to take a look at it:
https://sites.google.com/view/bishons-lego-creations/build-log-snow-guardians-tower
Glad it was helpful for you!
You’re off to a good start with your snow. To improve it even further, I would suggest that instead of making a simple rectangular base framed with sideways building, that you make more or an irregular organic shape to then connect the sideways parts too. Otherwise the eye sees a basic box structure with lots of straight lines instead of a natural looking landscape.
See this guide for an example.
Oh yes, I only saw your message now! I will indeed remember that for next time, but the moc has been finished 😂. Here is the final:
https://sites.google.com/view/bishons-lego-creations/home?authuser=0
Have you al the names of the parts. Want to order some on bricklink
Mostly they are elements you can find under the “slope” and “slope, curved” sections on bricklink.