


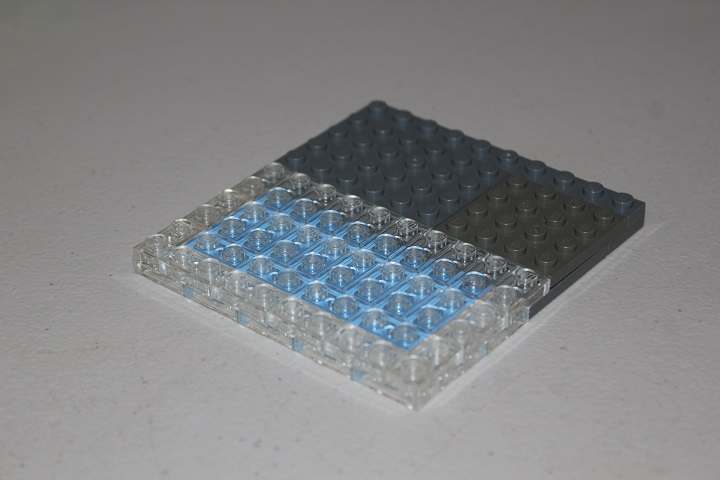
This is a very simple rockwork technique that combines studs up and SNOT sections easily. The parts used consist mainly of basic slopes and bricks along with 1×1 brick with stud and 1×1 headlight bricks.
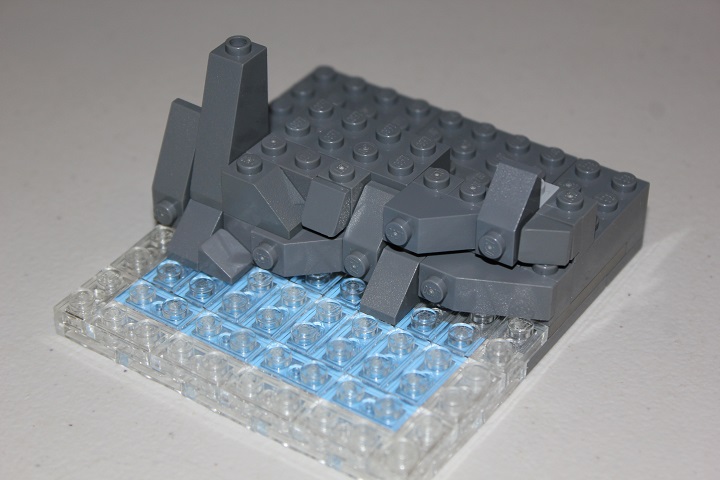
For this tutorial, I will build a small section of coastal rockwork. Something to keep in mind with this design, is that for the SNOT sections to fit over the water, the rockwork needs to start on the same plate level.
Now I’ve added the first two slopes. The 1×3 slope is attached to 3 headlight bricks in dark bley. A handy thing about this technique is that you are often able to implement headlight bricks or bricks with stud in colors other than the rockwork. Here for example, I could have used filler color headlight bricks for the two farther to the left.

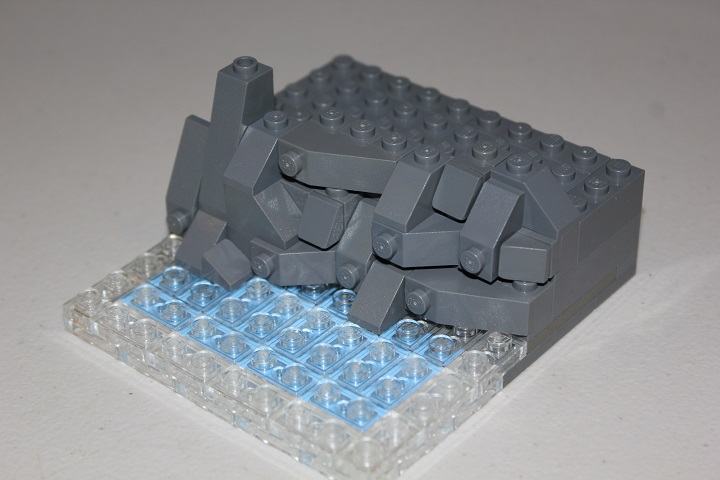
Vertical SNOT slopes can also be implemented occasionally. Be sure to mix the SNOT sections with studs up parts to keep the slight gaps below the SNOT slopes from becoming too uniform.
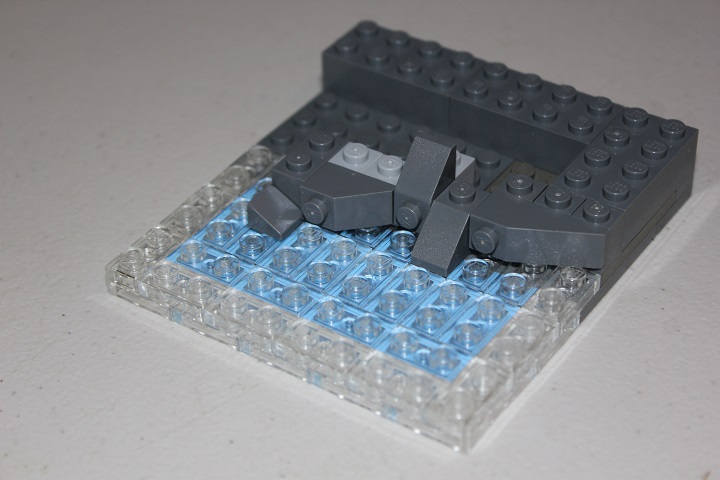
As you can see, I’m using bley brick with stud myself, more neutral tones like that work easiest for filler, but even colors like yellow and red can be mixed in occasionally if you’re careful.
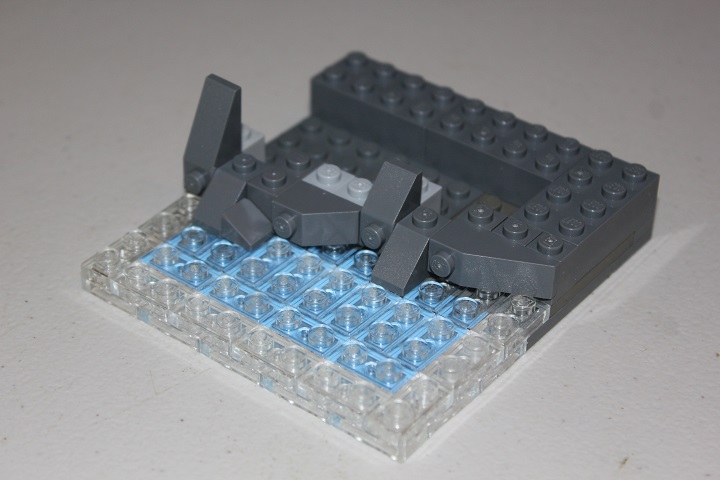
Sometimes plates behind the SNOT slopes help them fit better, like with the cheese slope on the end here.
This technique is inherently a little rough, so you don’t need everything to fit super smoothly.
Studs up 1×2 slopes fit nicely hanging over onto SNOT slopes.
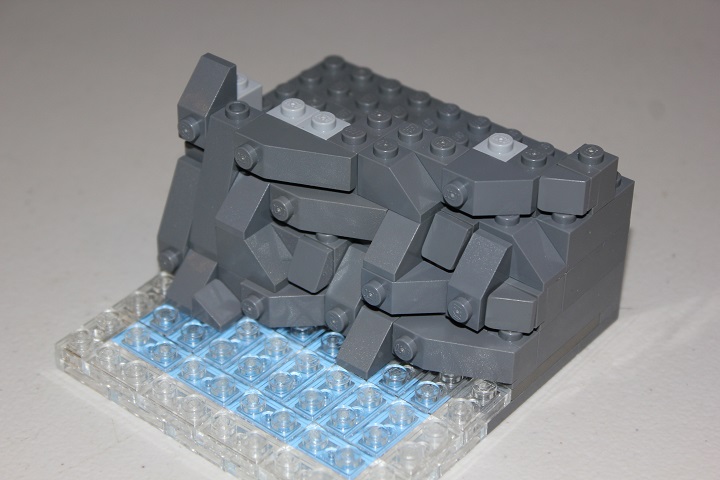
If you have any wedge slopes or bricks, those often fit in nicely as well.
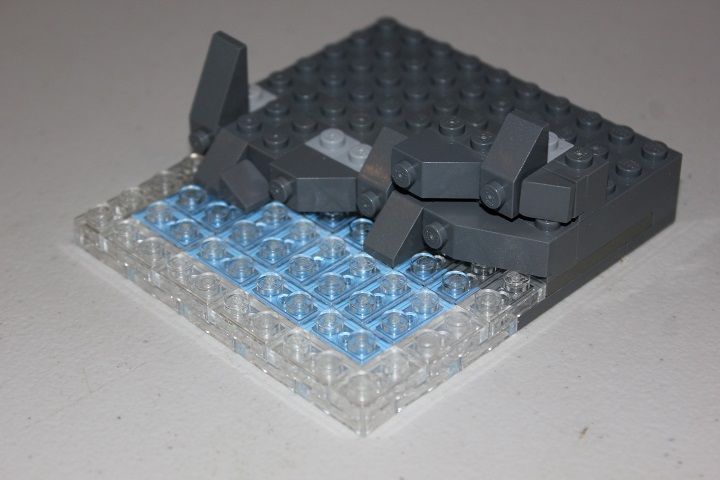
Almost ready to top it off, I used a SNOT headlight brick here to get another stud attachment option for the final layer.
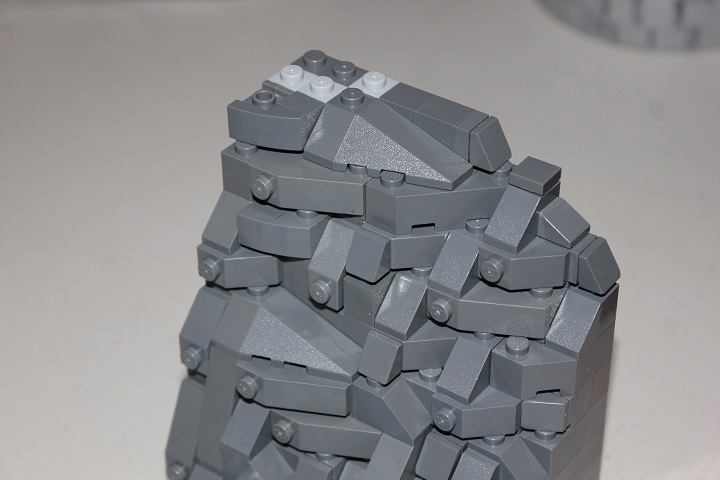
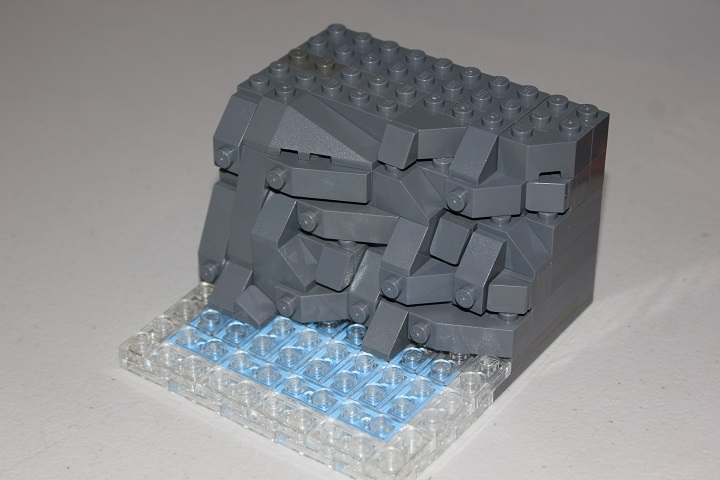
And there’s the finished rockwork section!

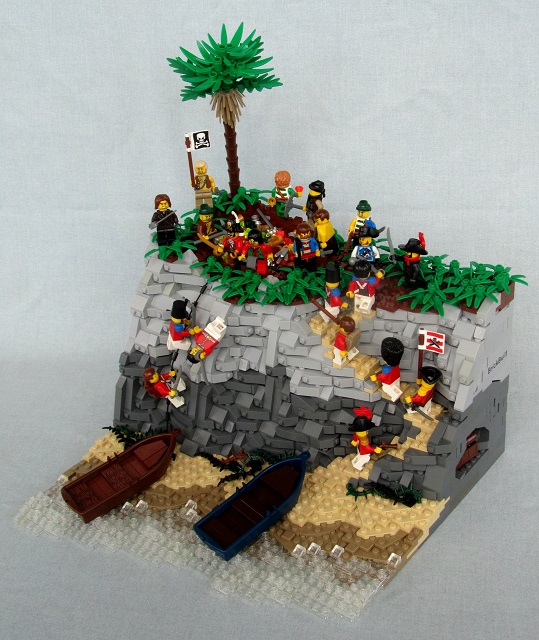
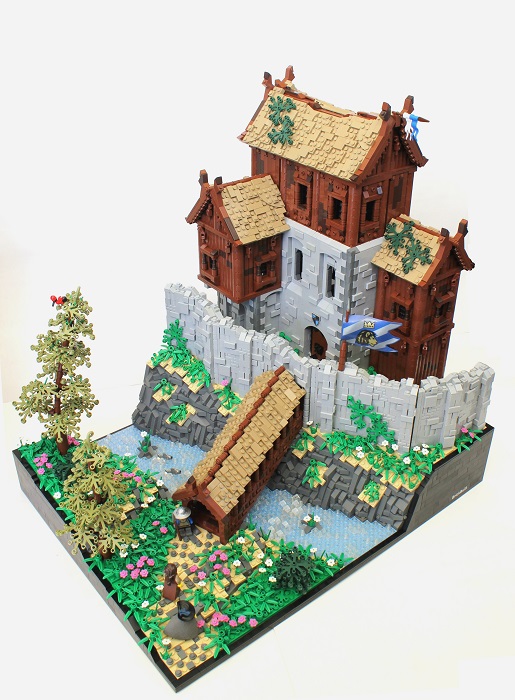
This technique usually works best when used for larger areas, here are some of examples of it in use in my previous builds:
I hope you found this tutorial useful. And as usual, feel free to leave a comment if you have any questions or suggestions for future tutorials.


Nice! I’ll have to try your technique some time! 🙂
Awesome! Thanks for making this! Keep it up guys!
Awsome. Looks so easy, but it is not. Thanks!
Thanks guys! I always struggle with creating landscapes, so almost never build them. This tutorial really helps!!
Thanks for the comments! Hearing that our tutorials are helpful is what motivates us to make them 🙂
Yup! They’re all helpful! aren’t the headlight bricks illegal used like That? Aren’t the bricks attached to them making it not quite fit?
No, this is a perfectly legal use of the headlights, as just building off the front allows everything to fit perfectly. If you turn the headlights backwards so that the SNOT stud is faced up against other bricks, that is when it doesn’t quite fit.
Thanks!
I have been struggling to find a good tutorial on how to do some more advanced rock faces for a new castle mic I’m building for ages, just want to add how helpful your page is and how much I’ll be referencing back here in future.
I’ve always wanted to know how to do this, thanks!
Great tutorial, I used it on one of my project and I`m very pleased with the results.
Thanks Ivan, glad to hear it worked well for you!