


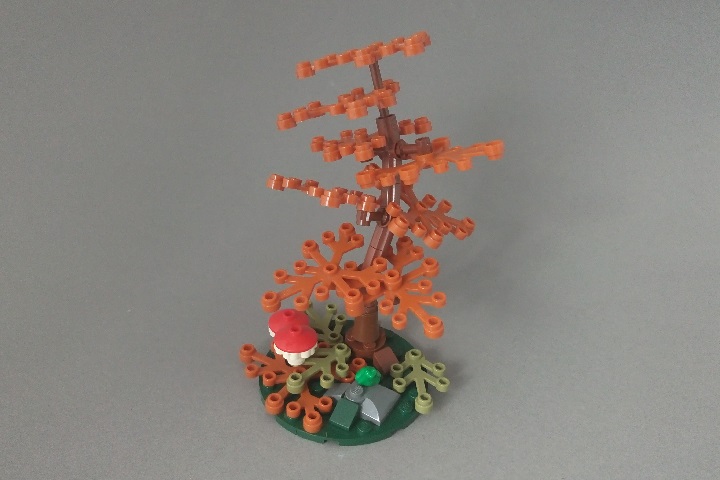
This post marks the beginning of a brand new feature on Brickbuilt: guest tutorials! Every month a guest will be contributing a new tutorial, and to kick things off, Joeri Ridder shared his beautiful tree design:
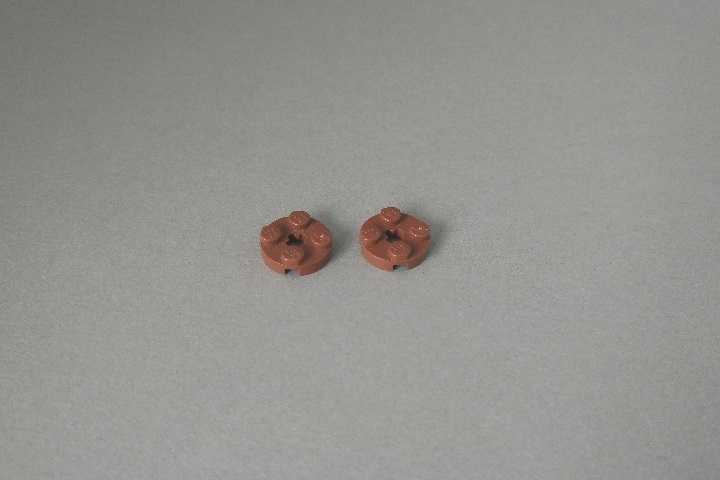
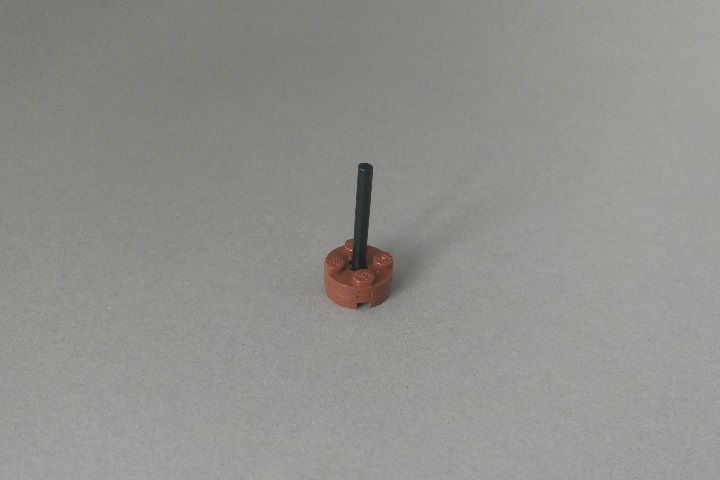
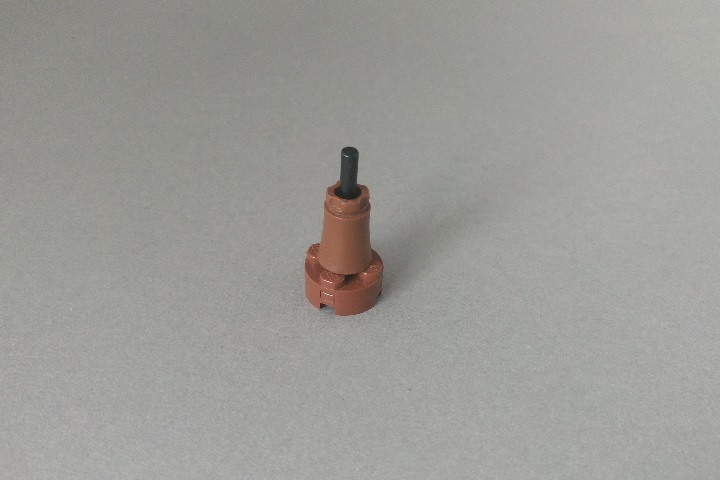
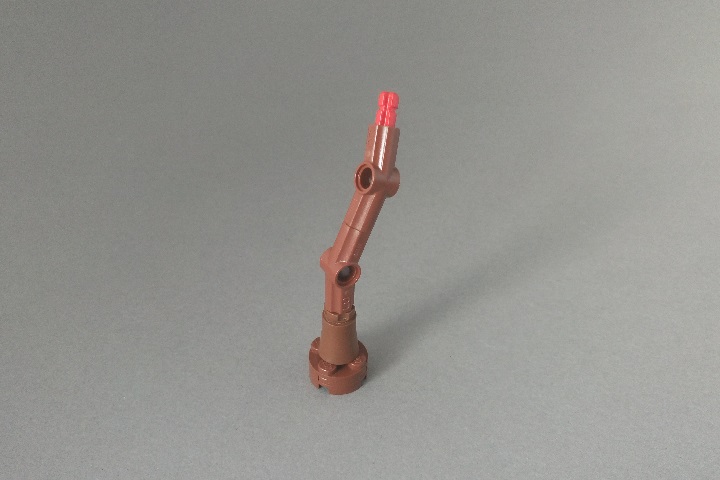
“Let’s start at the bottom of the tree. Two 2×2 round plates will make up the base, so the tree will have enough studs to stay attached to the ground firmly.
Put a four-stud long bar piece down into the stacked round plates. This will hold the trunk.
An old palm tree piece, placed upside down, makes a great trunk. You could easily use another type of cone-shaped part, whatever works best.
That’s the trunk done for now. Next come the technic axle connectors, connected by pins of course, to give the tree some height. I used connectors #3, but you can get creative with every type of angle to give your tree its own personality.
The top of the tree is made using another bar piece, any length will do.
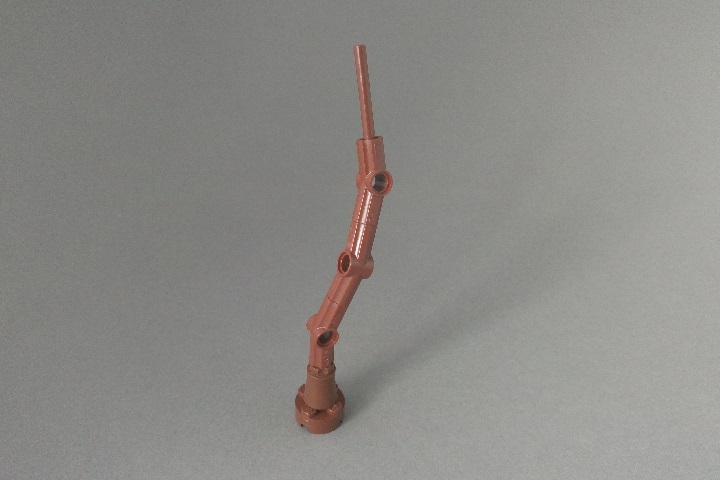
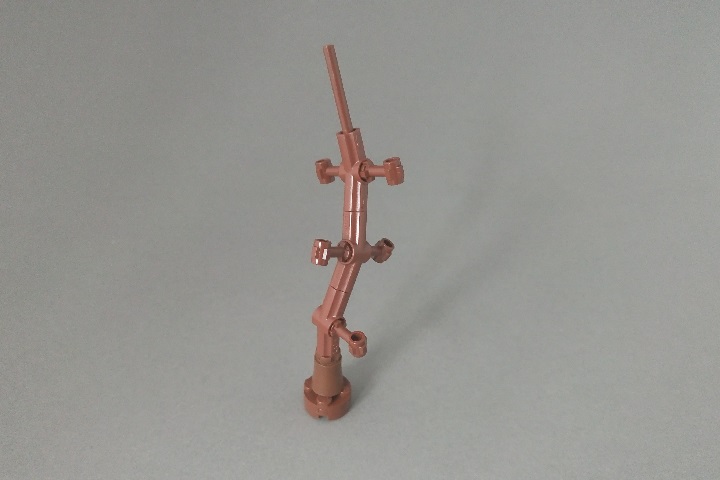
Next comes the magic! I used a bar with one top stud and two side studs, in brown, to make branches. The top studs fit in the technic holes in the connectors and the side studs will hold all the leaves.
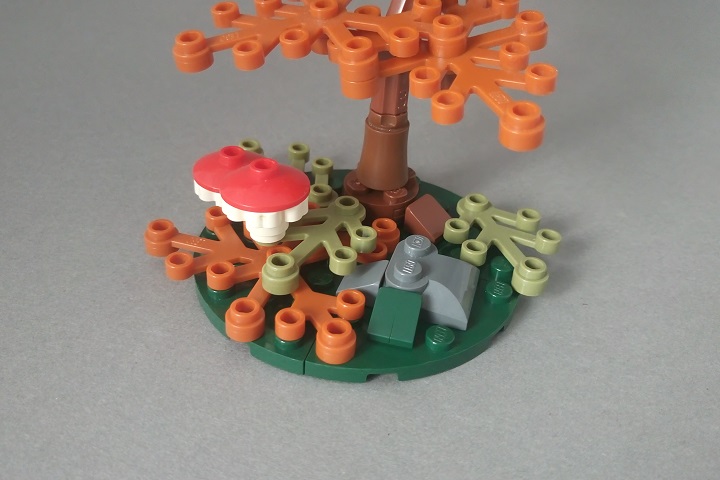
Then the leaves can be added. The colours are all up to you, but my build happened to be autumn-themed.
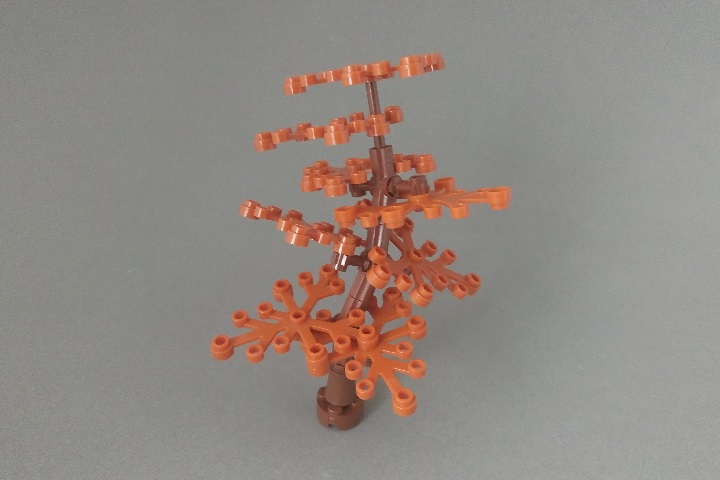
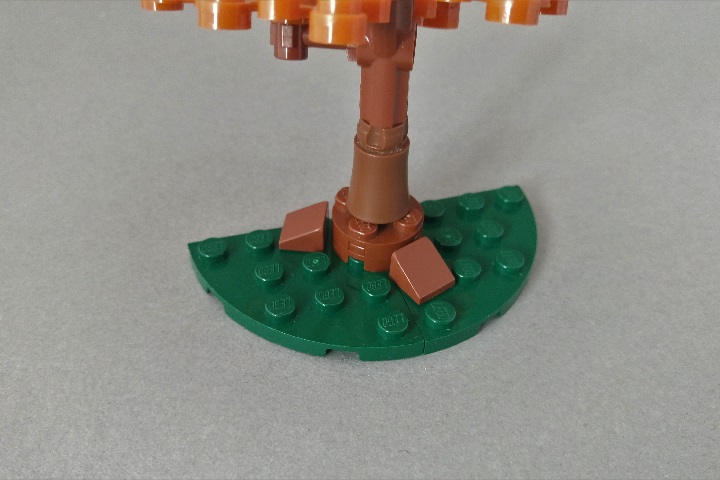
When the tree is put where it needs to be, use cheese slopes to create roots. The larger the tree, the bigger the roots!
Now finish the scene with some accommodating terrain and wildlife, and you’re done!
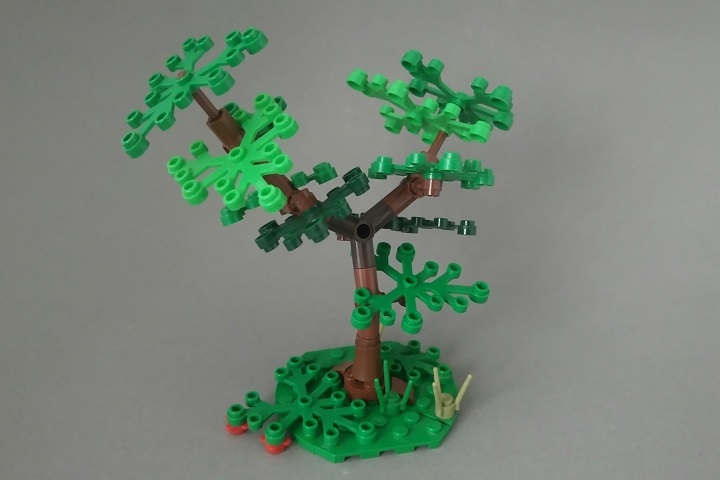
This technique can be used for creating tree of all sorts and sizes, so give it your own twist! As an example I made another tree, using the triple connector piece.”
Thanks Joeri for sharing your tree design, and we hope all of you enjoy this new feature on brickbuilt!


Yes! I love this technique 😀
Hey! This will be a cool new addition to the site! 😀
Glad you guys enjoyed this tutorial, we’re really excited about these posts 🙂
Very useful! Thank you for sharing.