


For this month’s featured tutorial, Mark Erickson will show how to build a tiled stone wall that works wonderfully for castles and other medieval stonework.
“Today I’m going to show you the basics of the tiled stone wall technique. If you have not built any structures in this style before, you are going to need to compile an abundance of a particular selection of pieces in order to get the desired result. These necessary pieces are:
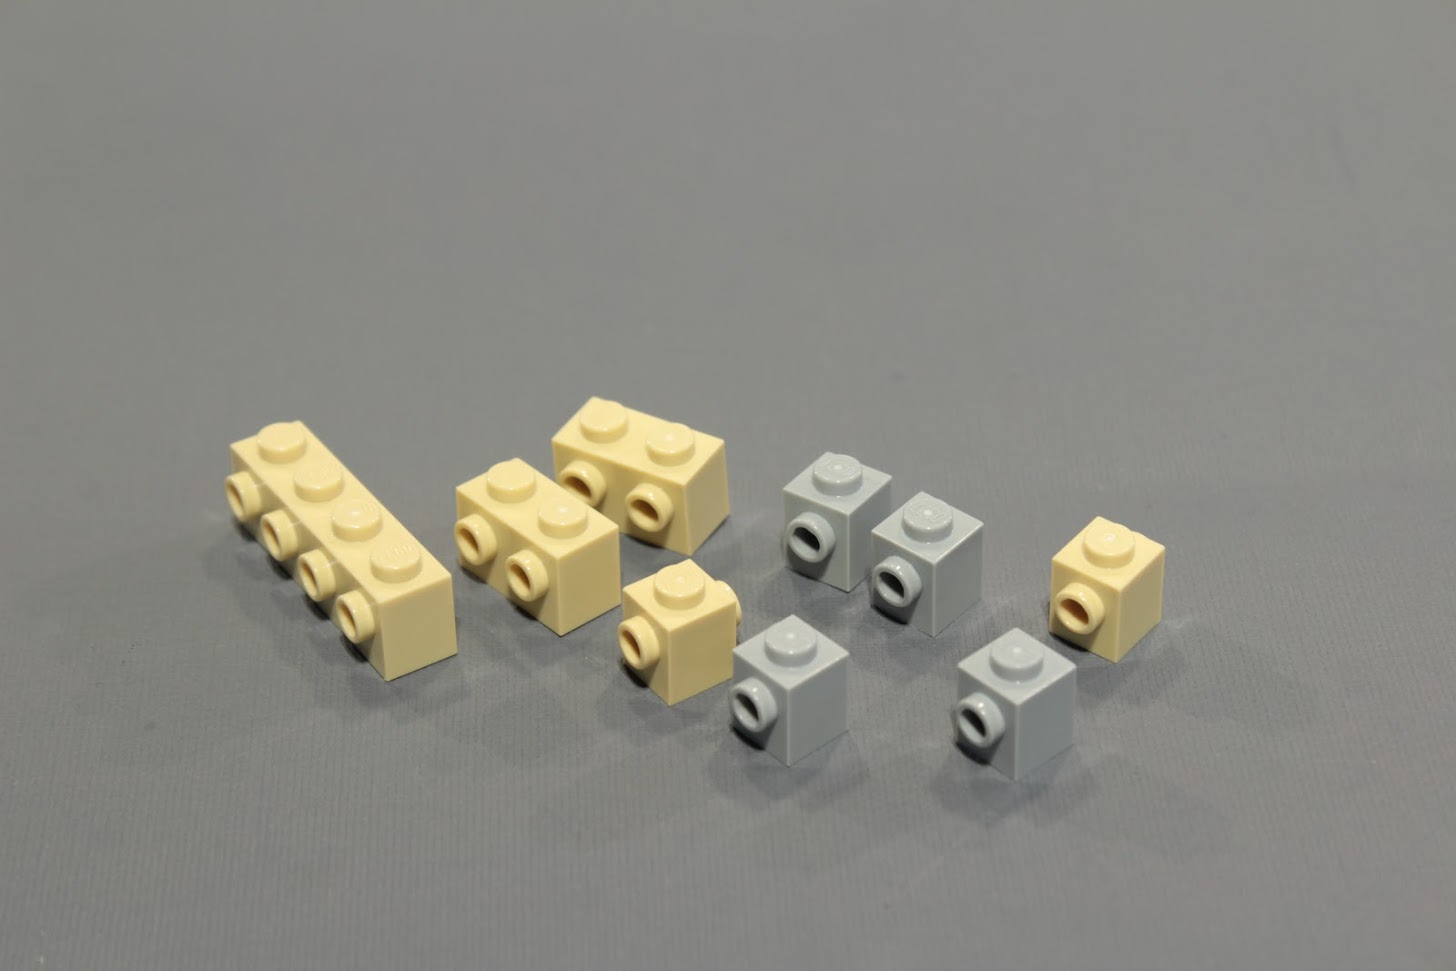
-Bricks with studs on the side. Or “headlight bricks” as I like to call them. Every size is useful but the 1×1 bricks are the most efficient and most vital.
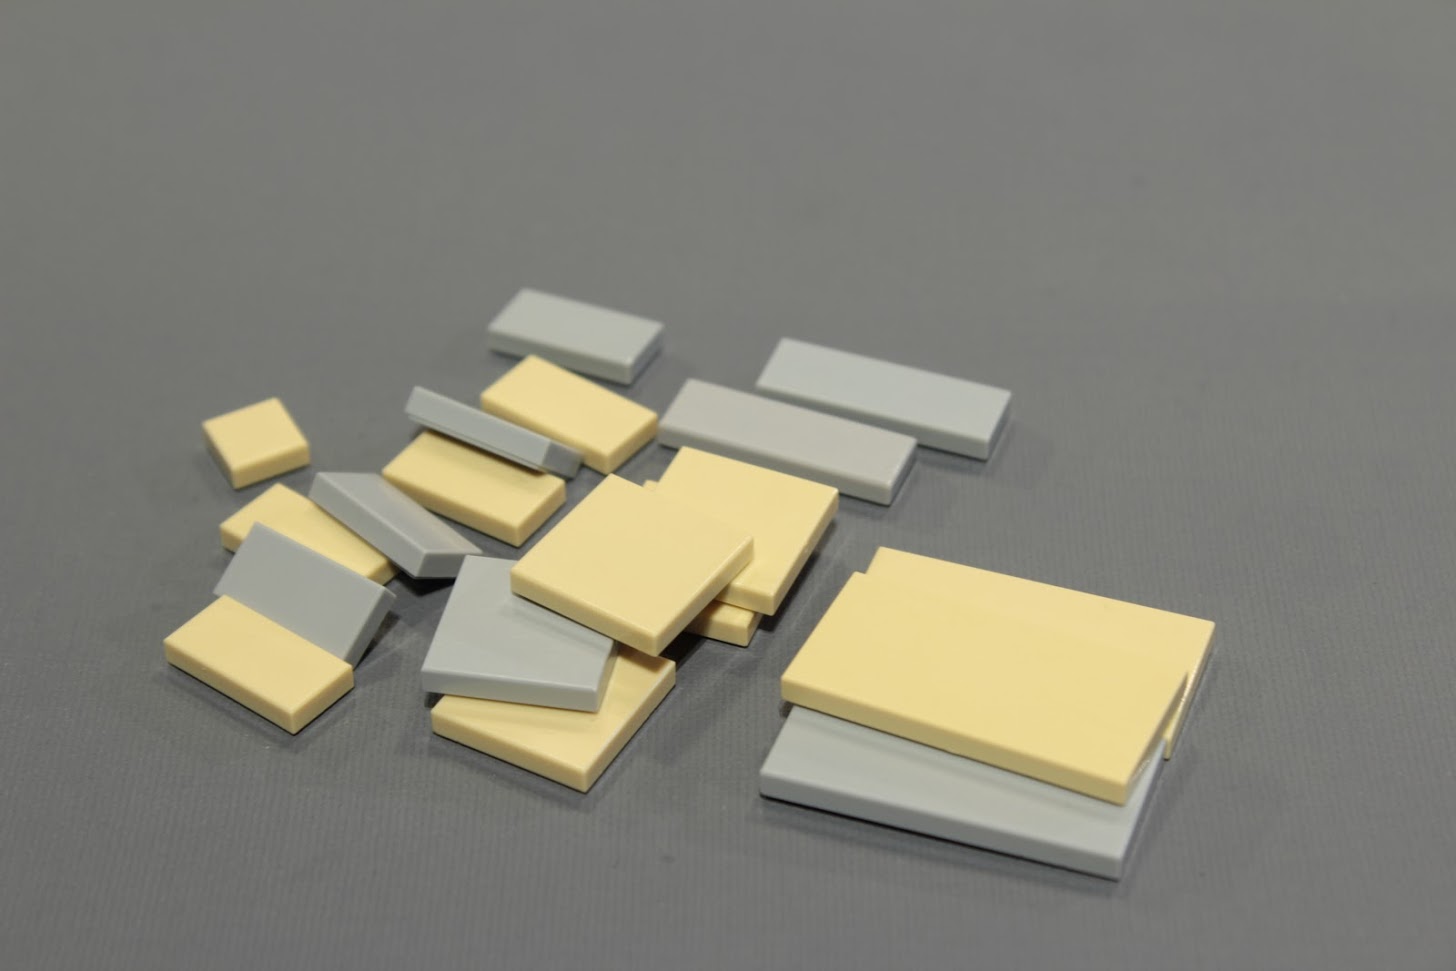
-An assortment of tiles. Again, every size is usable, but the 1x2s are the staple.
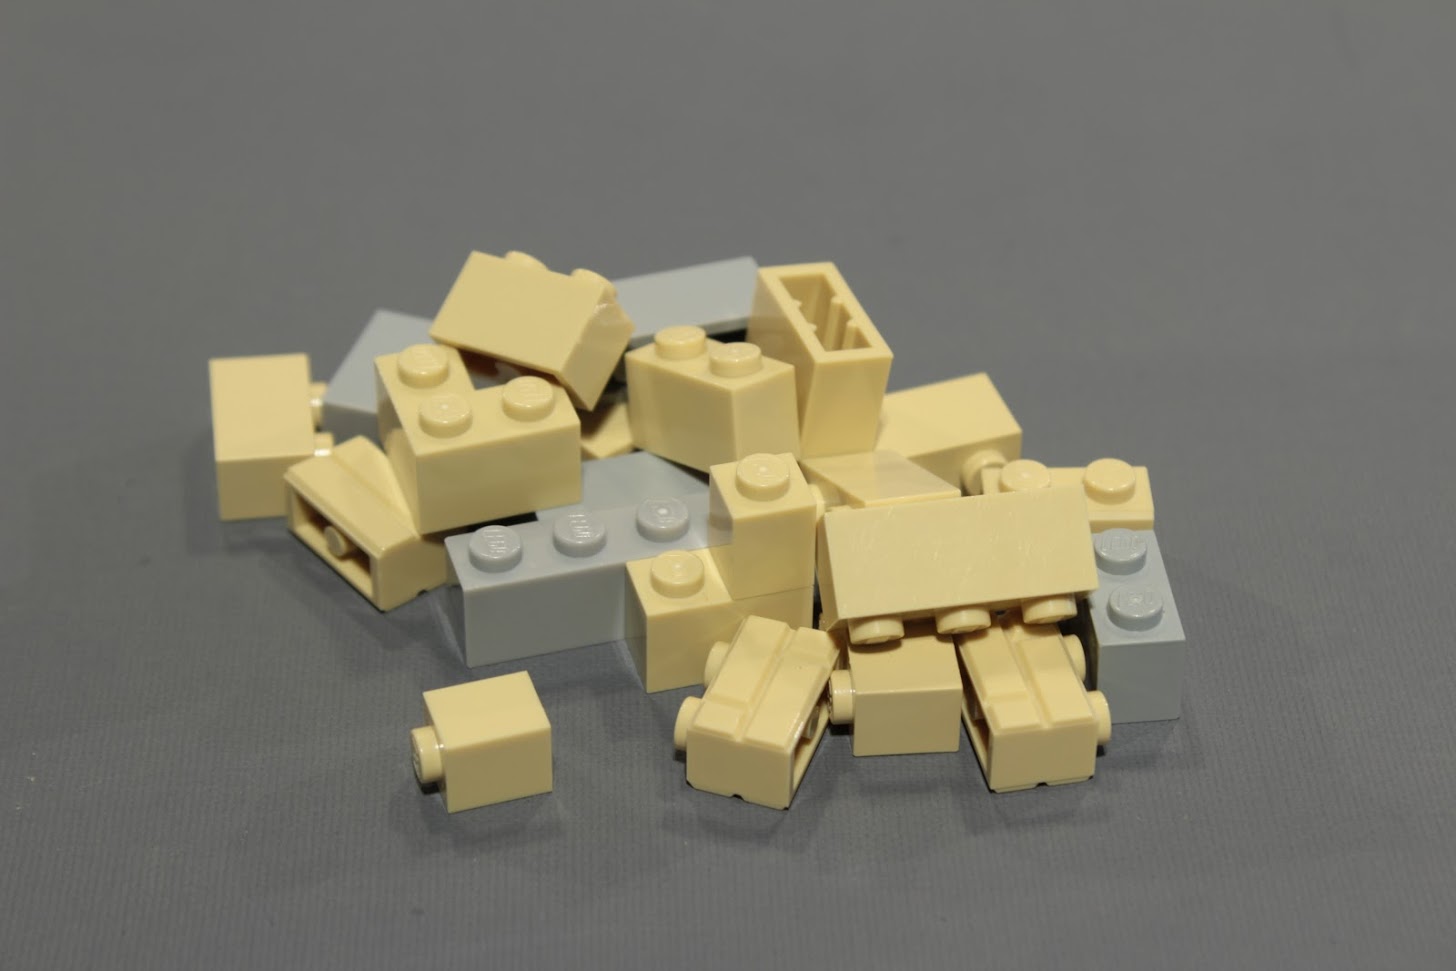
-Lots of regular bricks. I find the 1×2 and 1×1 bricks in the greatest demand for this style of stone wall. For the purposes of this tutorial I’m going to construct a small section of wall, but the principles of this walkthrough can be applied to every feature of a tower, keep, castle or citadel.
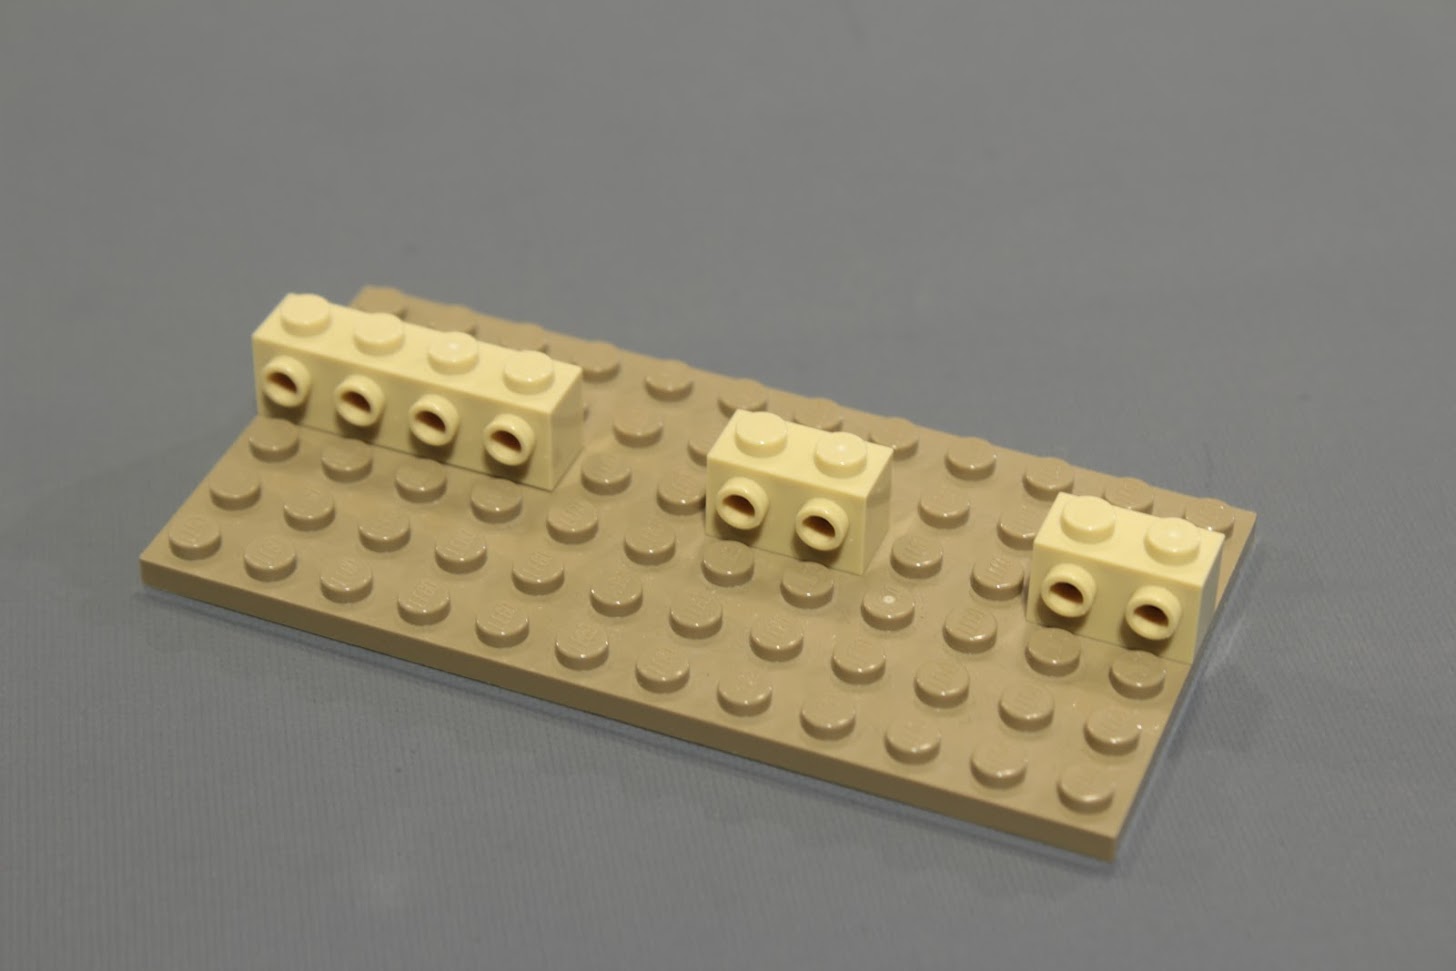
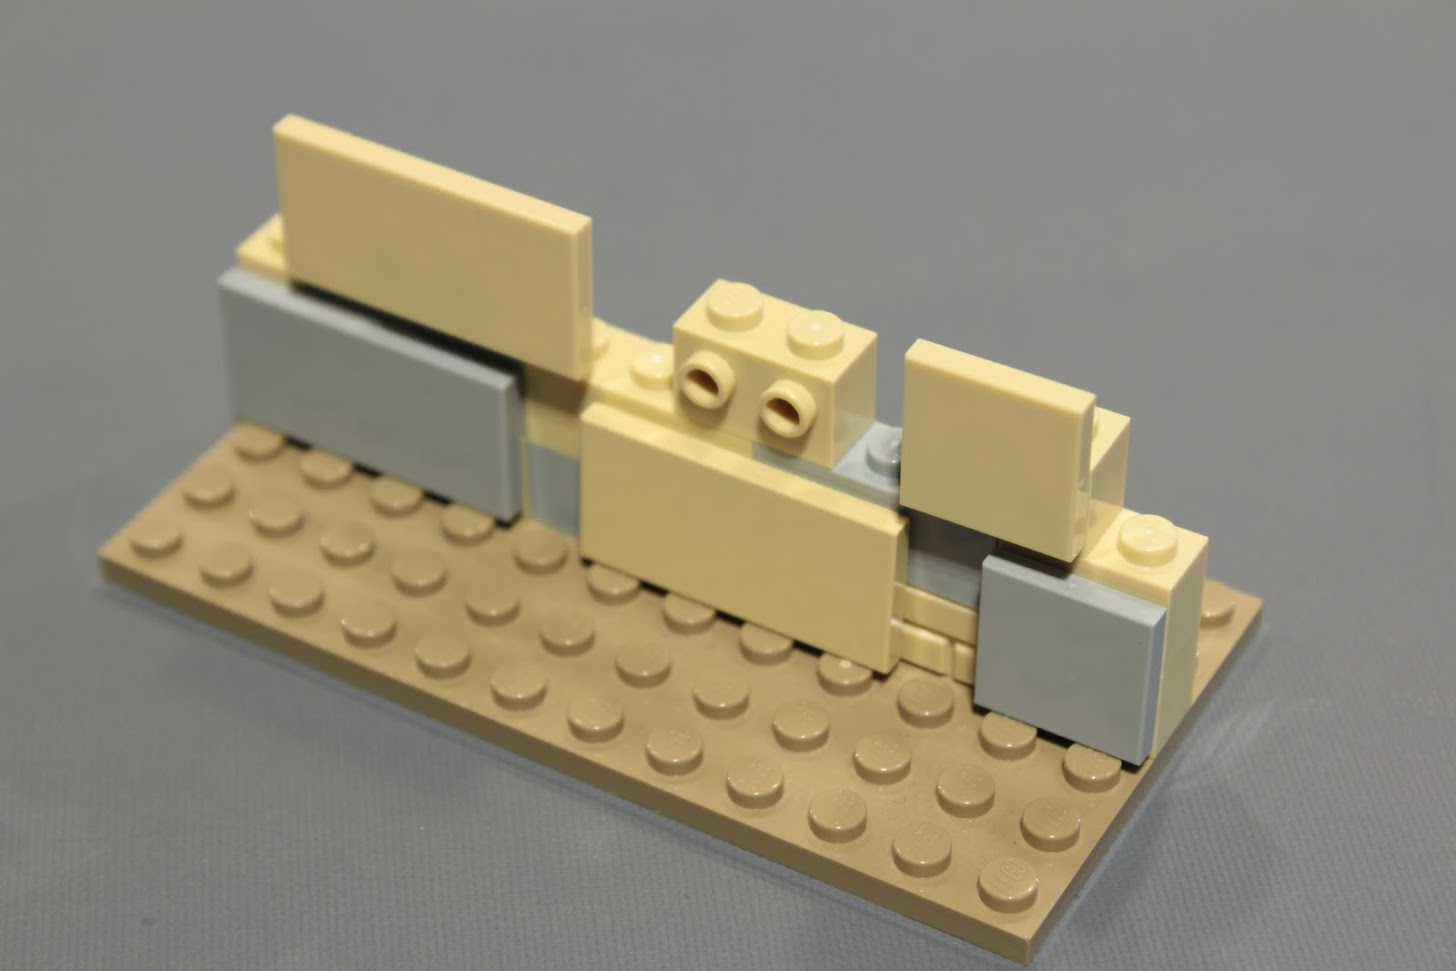
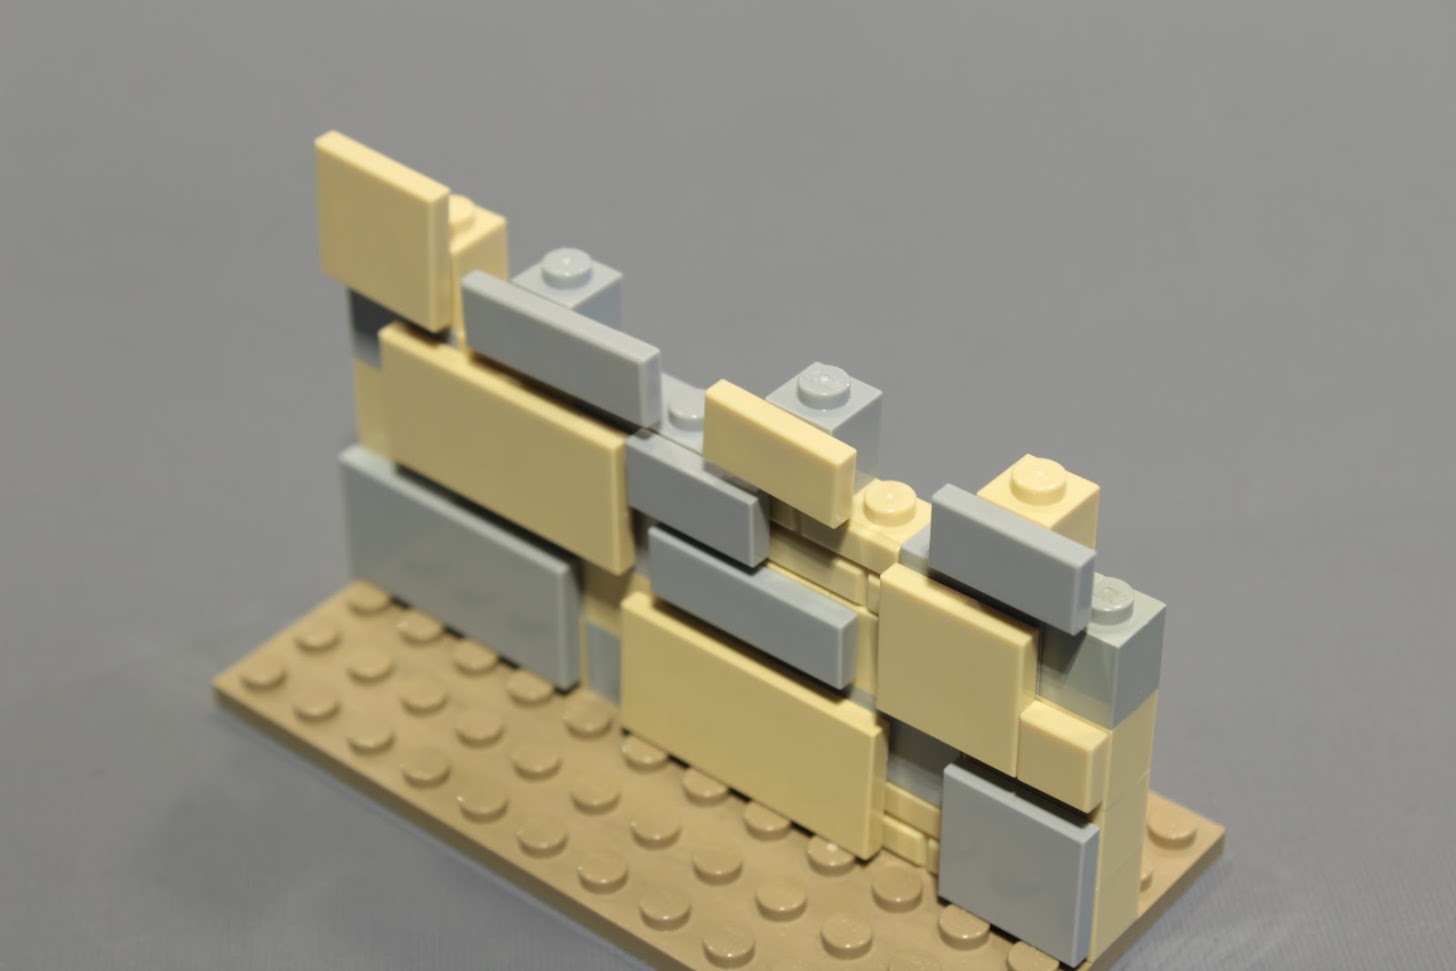
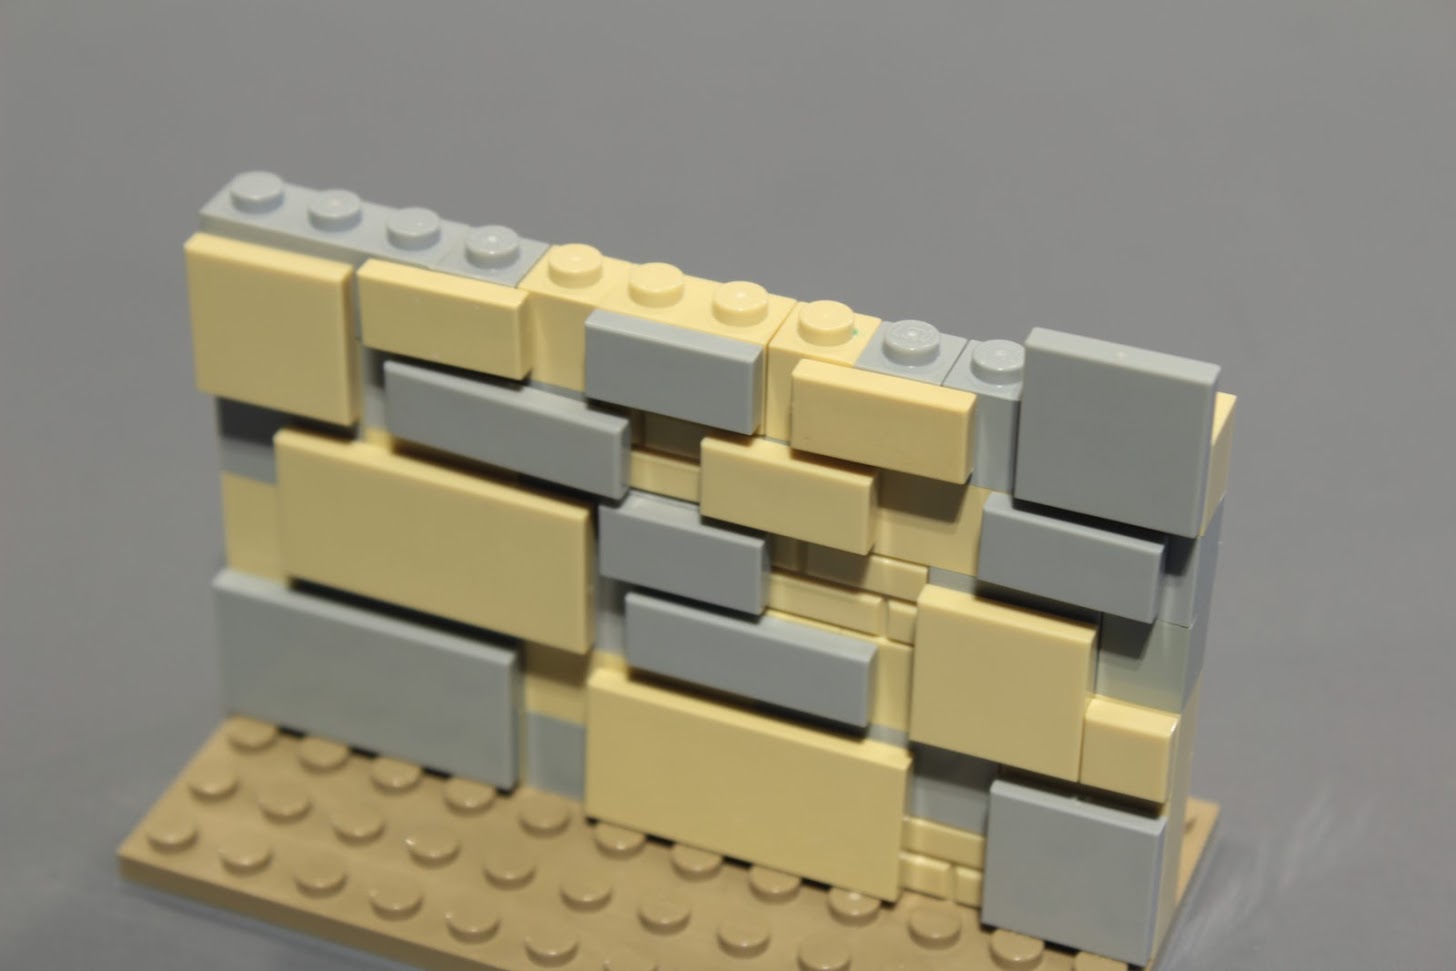
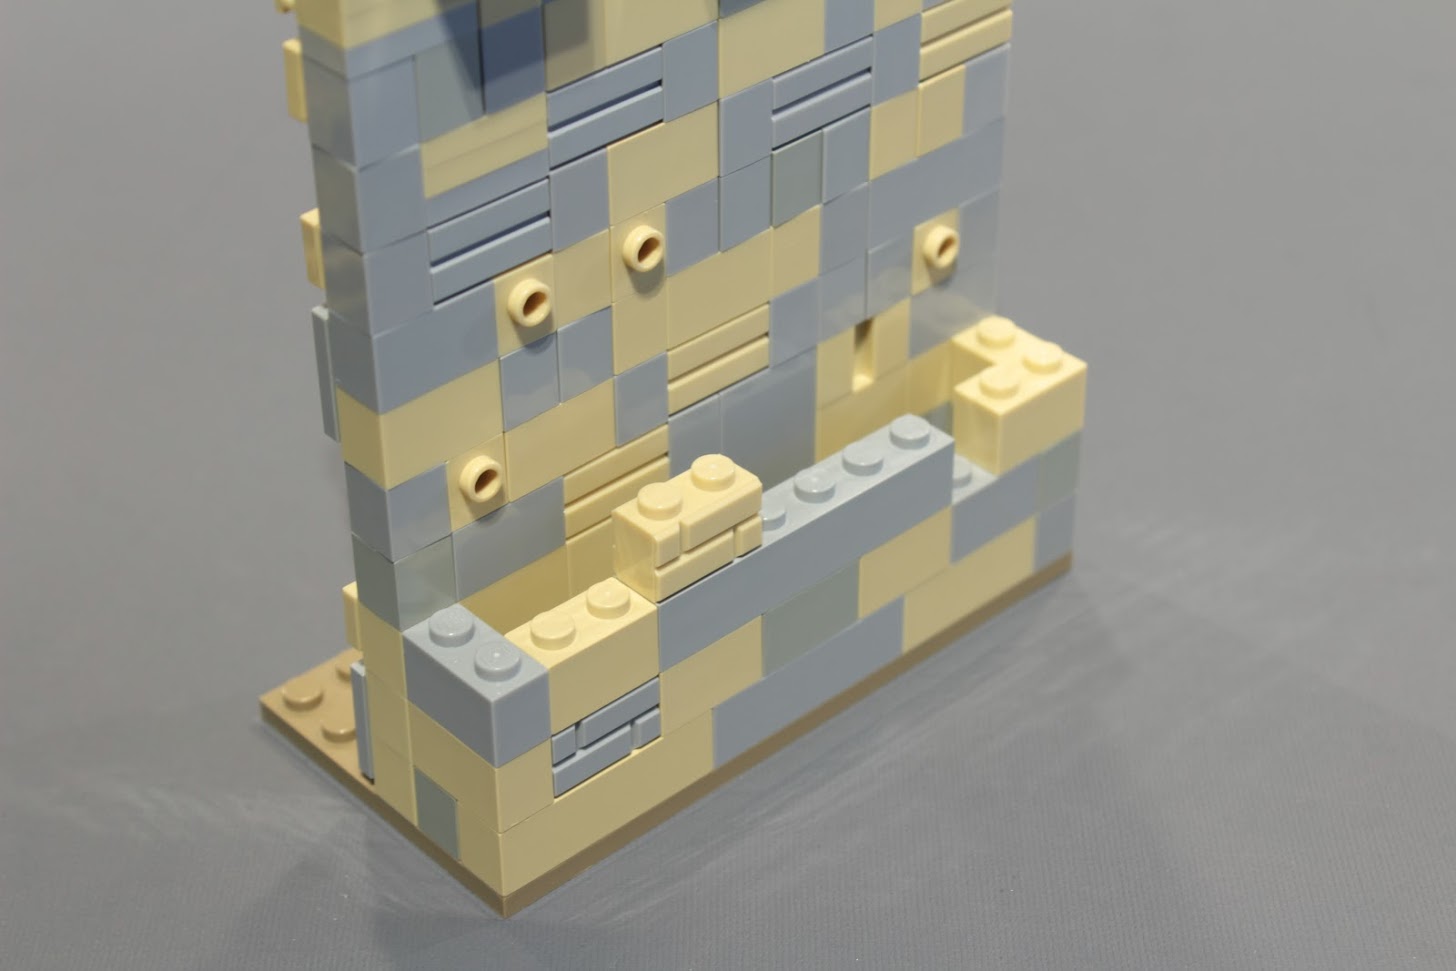
I almost always start out with the larger bricks with studs on one side such as the 1x2s and 1x4s. It makes a lot of sense both visually and conceptually to place the larger looking “stones” or tiles at the base of the structure. This gives the piece a nice subtle sensation of greater weight and strength the lower you go on the wall. This isn’t absolutely necessary, but I find it works well.
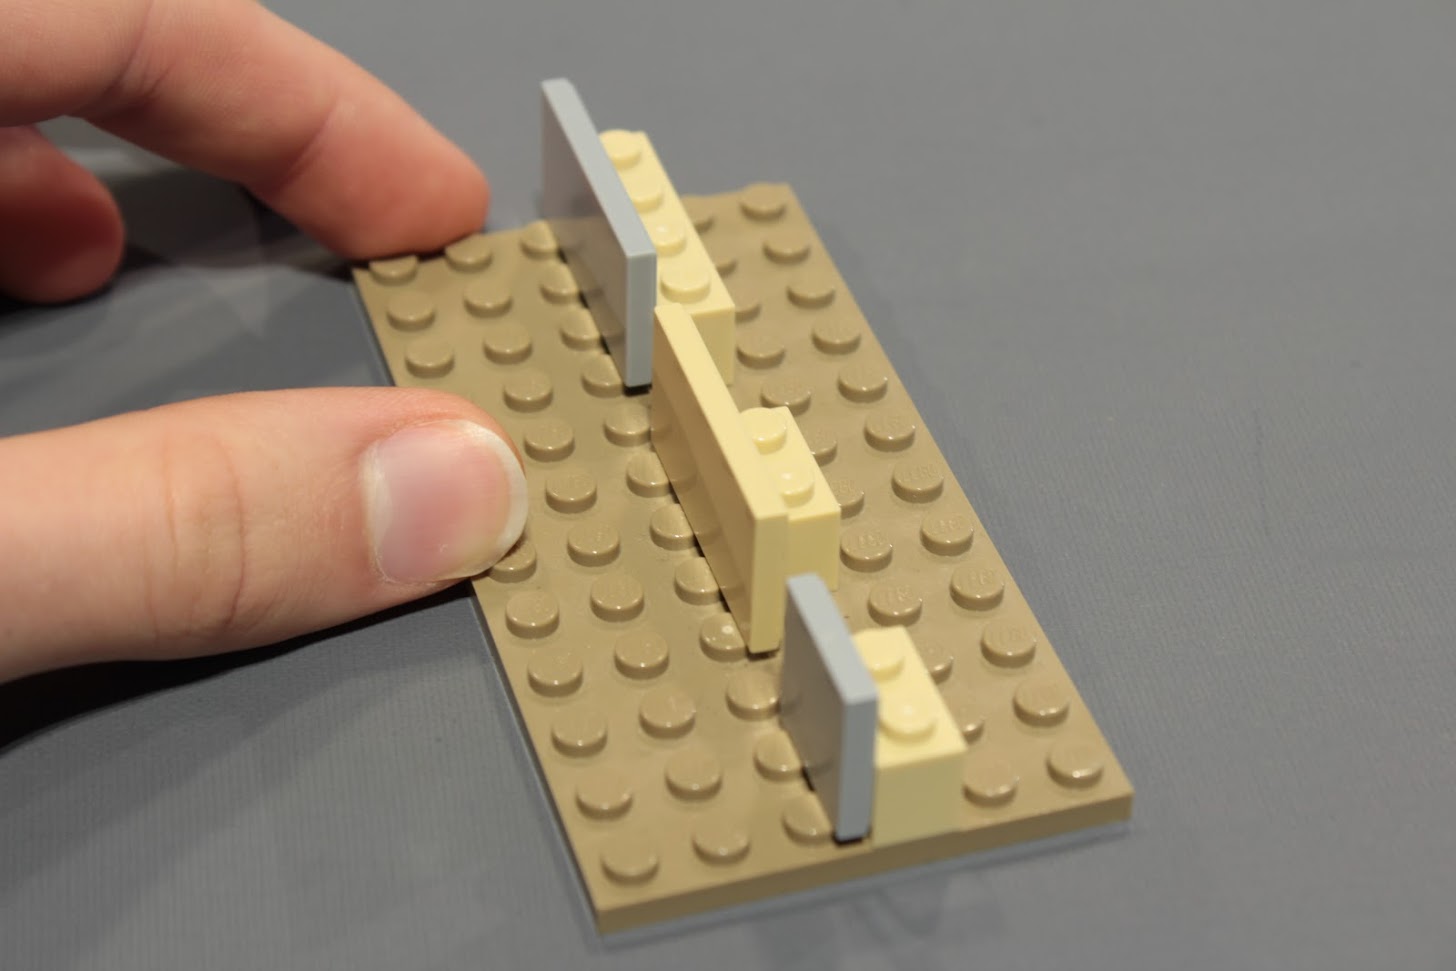
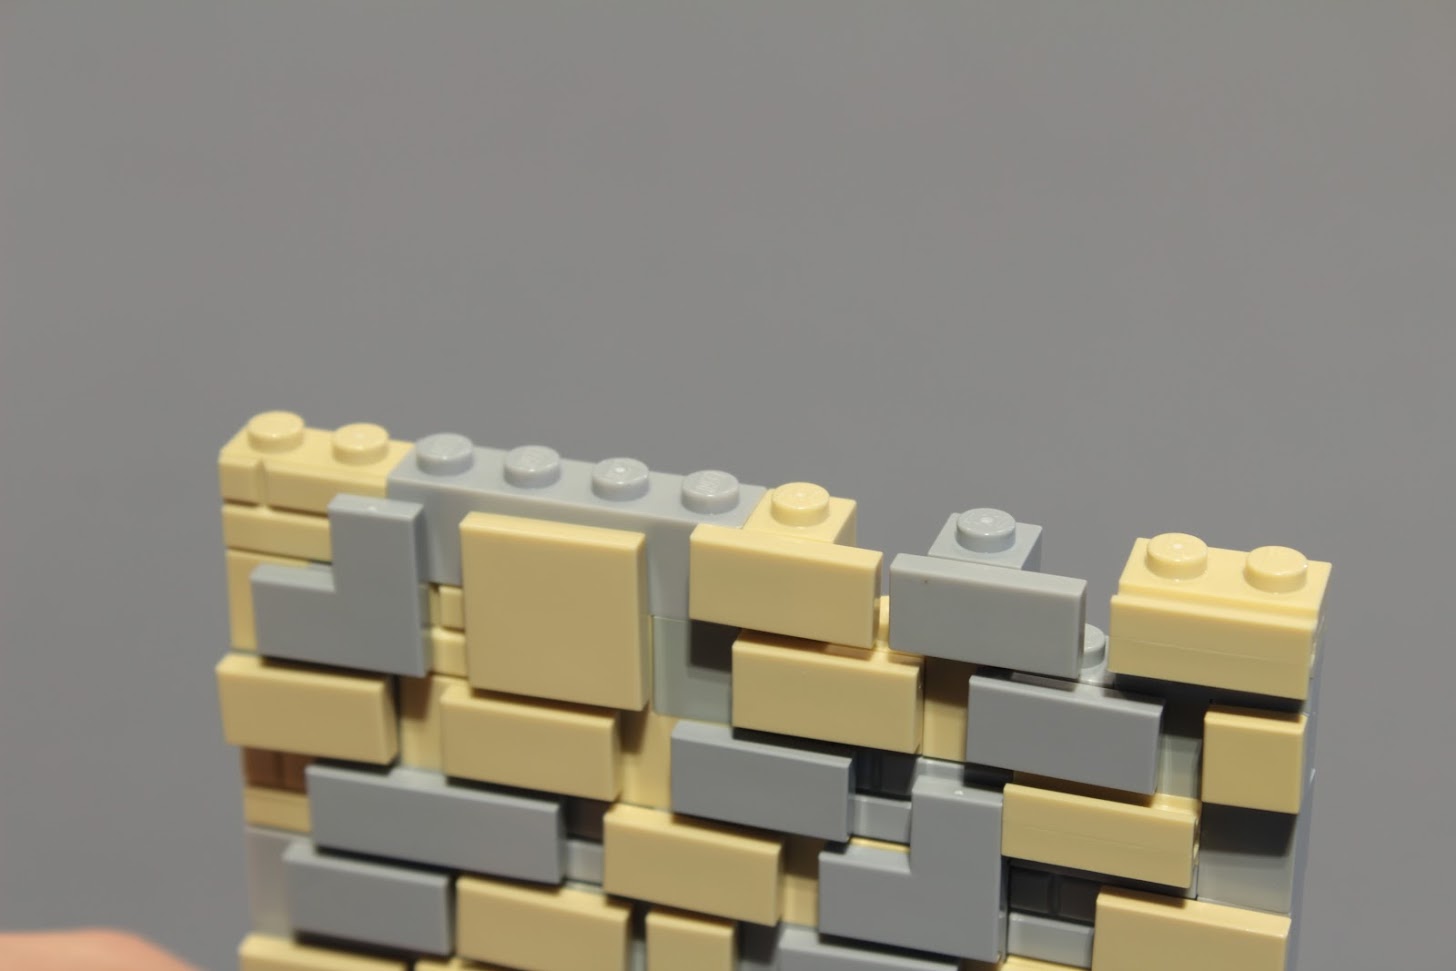
Make sure there is a little space between the tiles, if they are right next to each other the stonework effect is lost and it looks out of place.
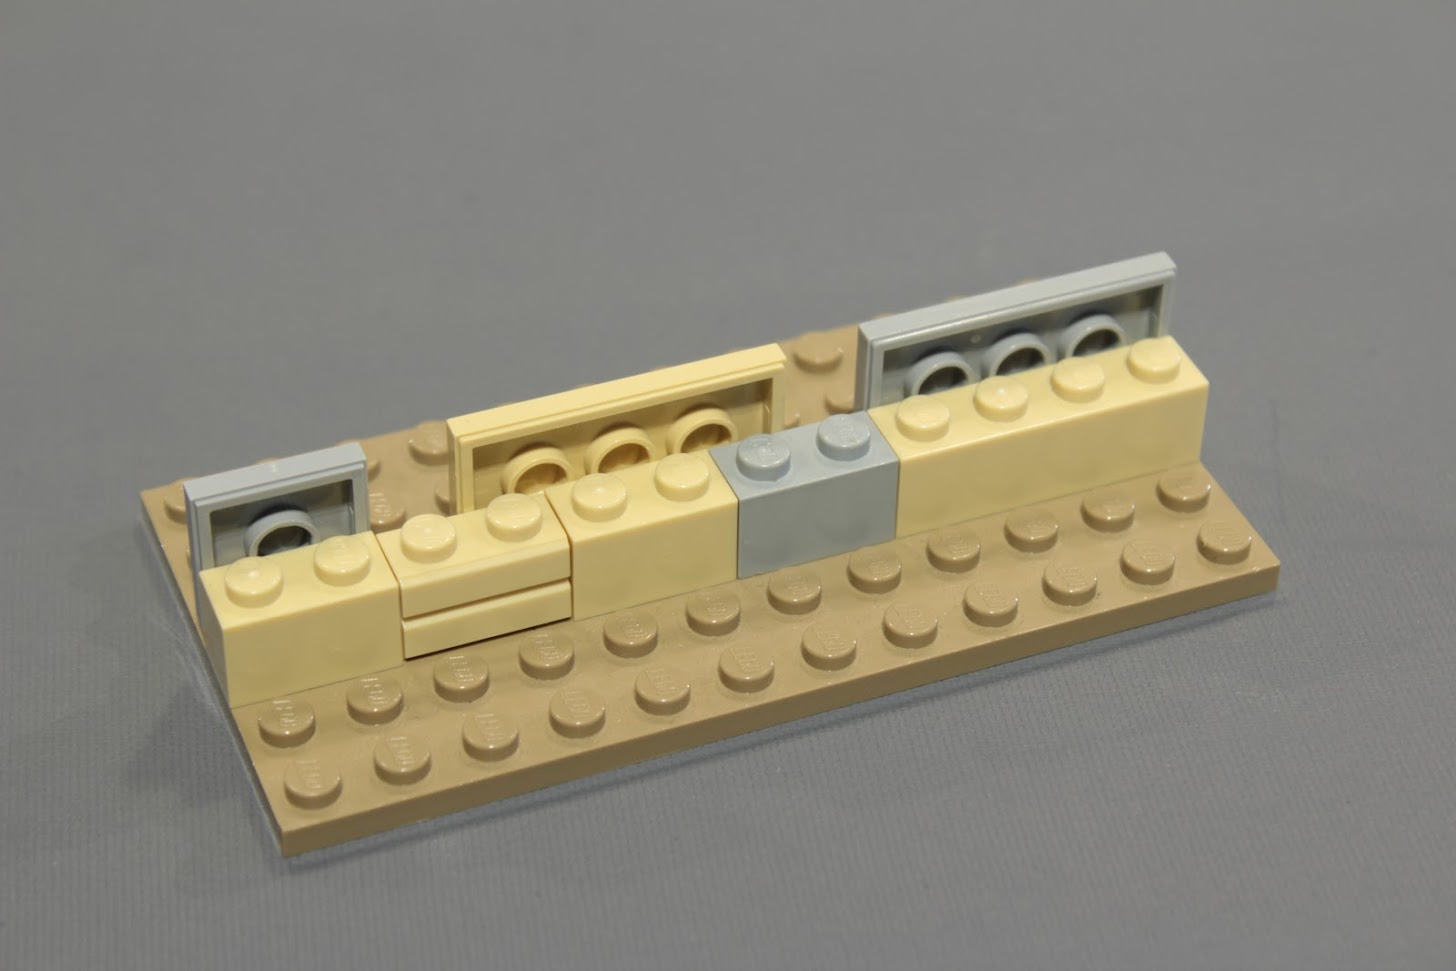
Once you have snapped down the bricks with studs on the side, and the tiles, you can fill in the rest with normal bricks. Be mindful of what color bricks you are using, if your wall is only one color it doesn’t matter, but if you are going for a two-tone castle like this it’s a good idea to break up the colors.
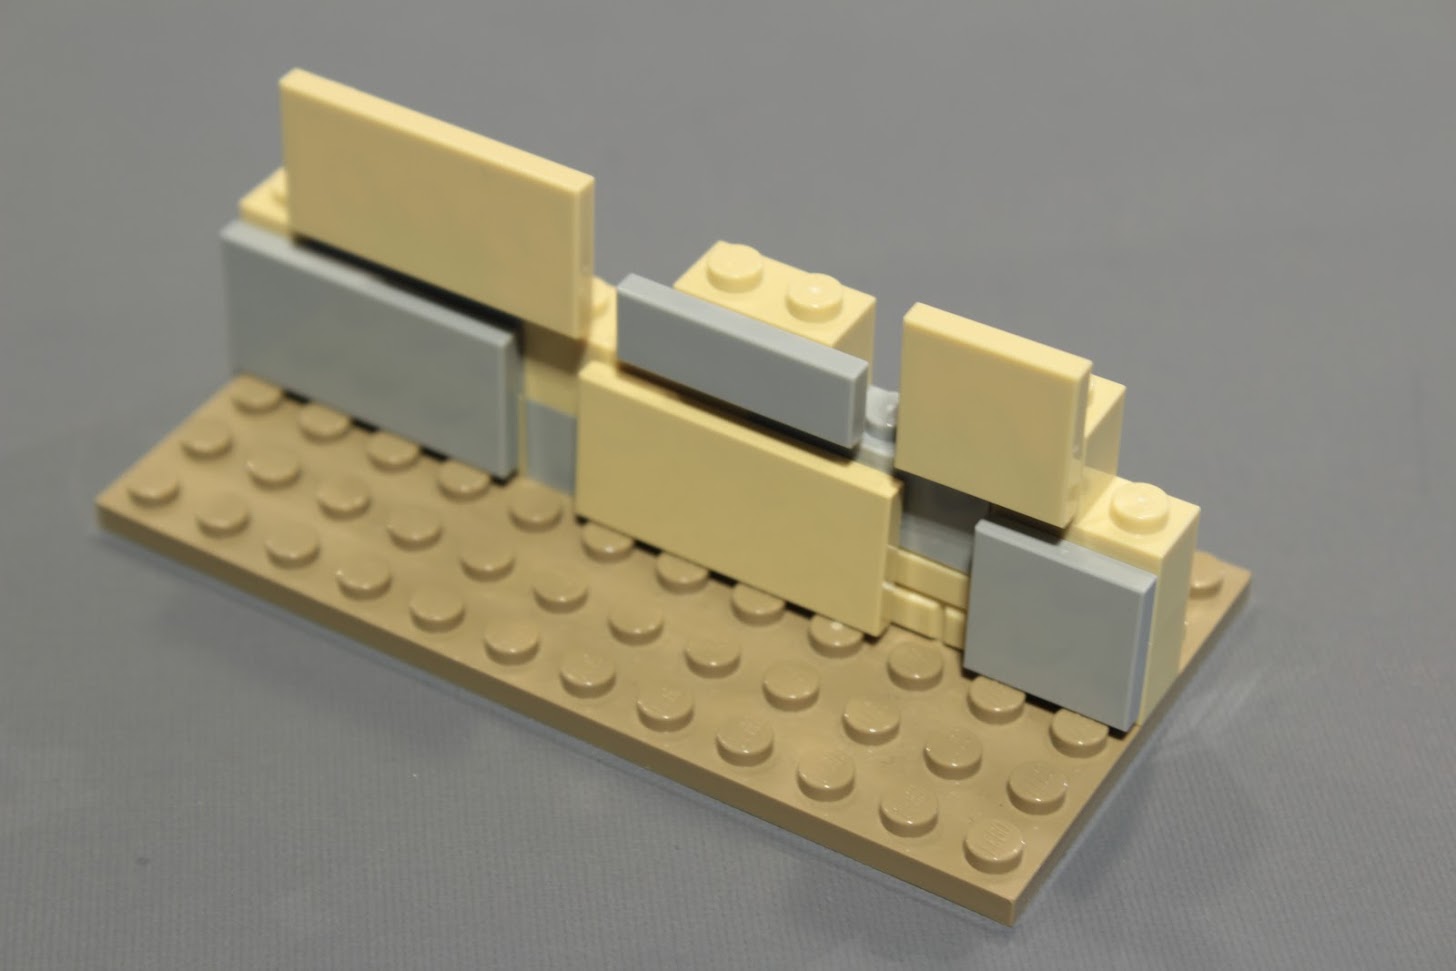
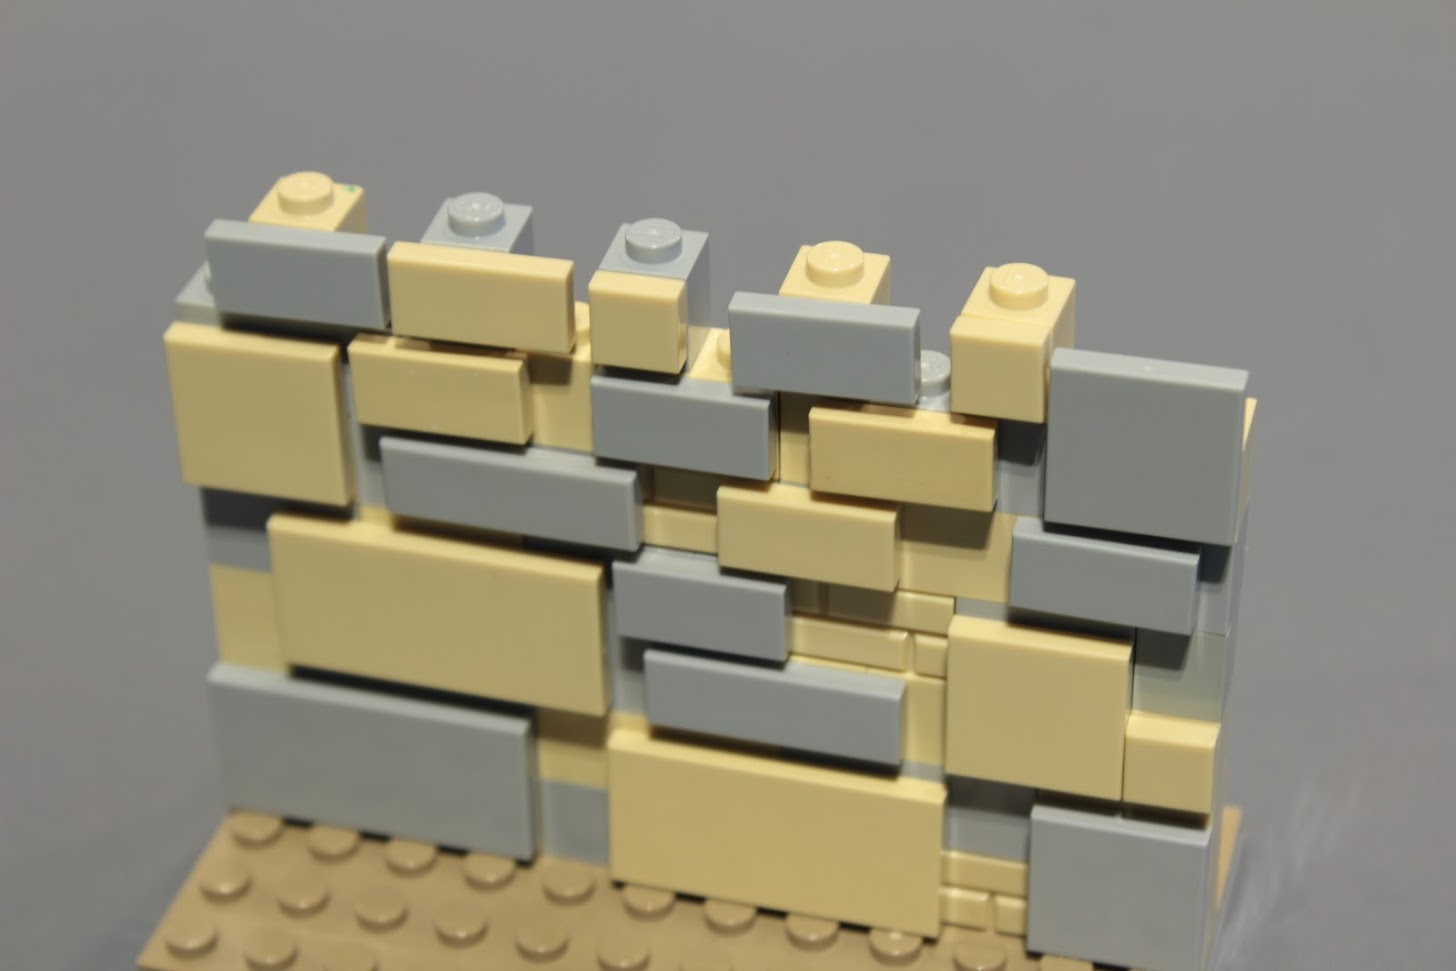
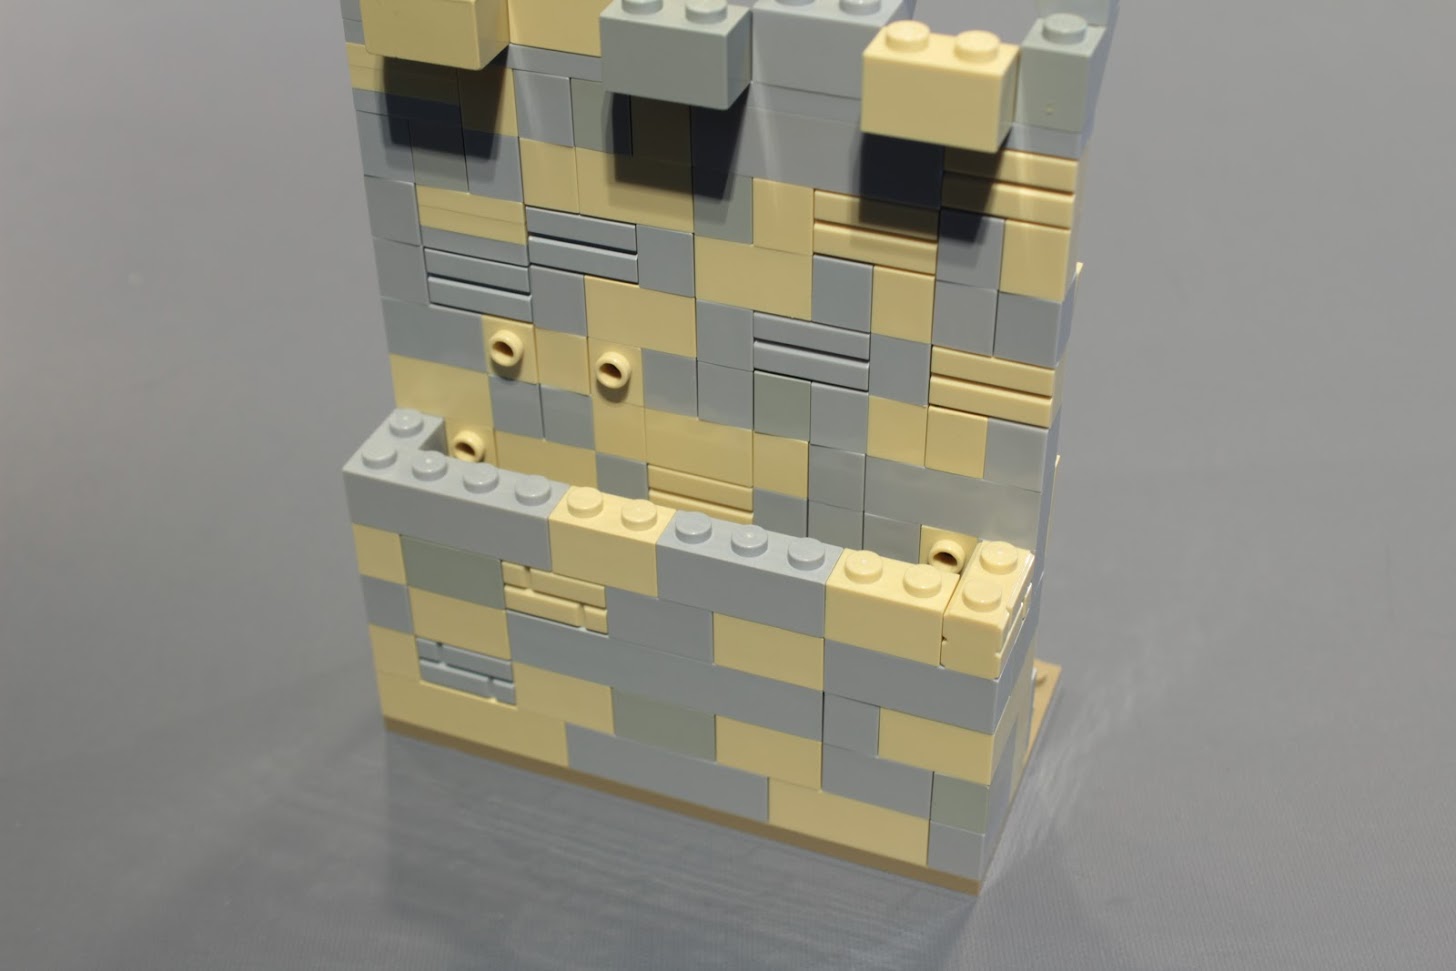
Keep on filling in brick until you get up to the top of the tiled area. Then you can place more headlight bricks for the next layer.
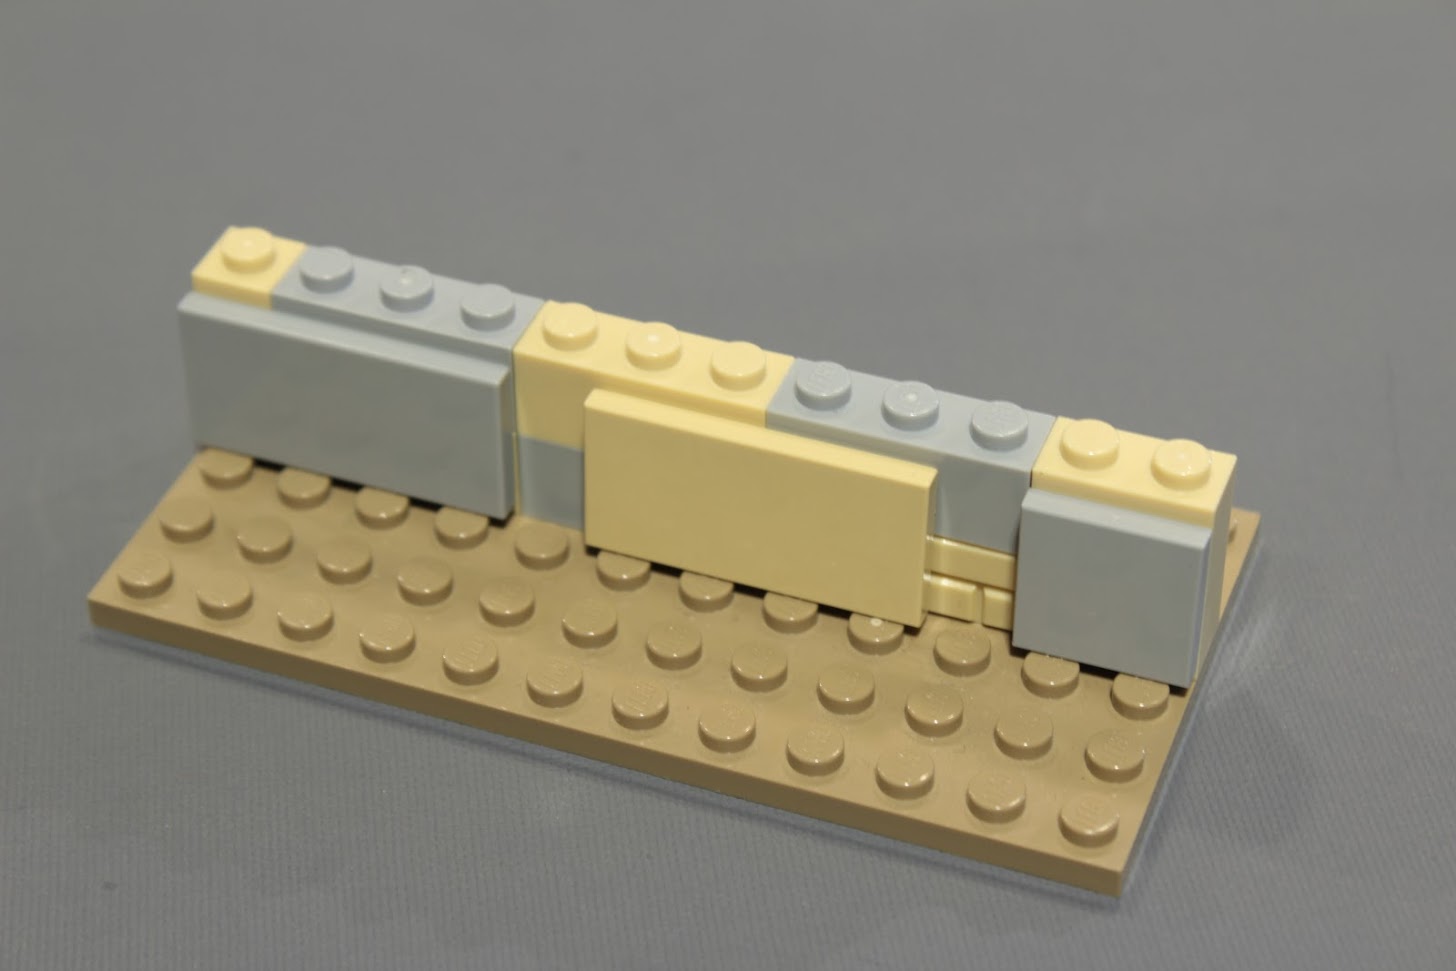
Try not to place headlight bricks and tiles directly over each other, the actual strength of stonework comes from the differences in lateral position of the bricks.
I usually try to only use large 2×4 tiles in the first two layers, the rest of the wall can be built using smaller pieces.
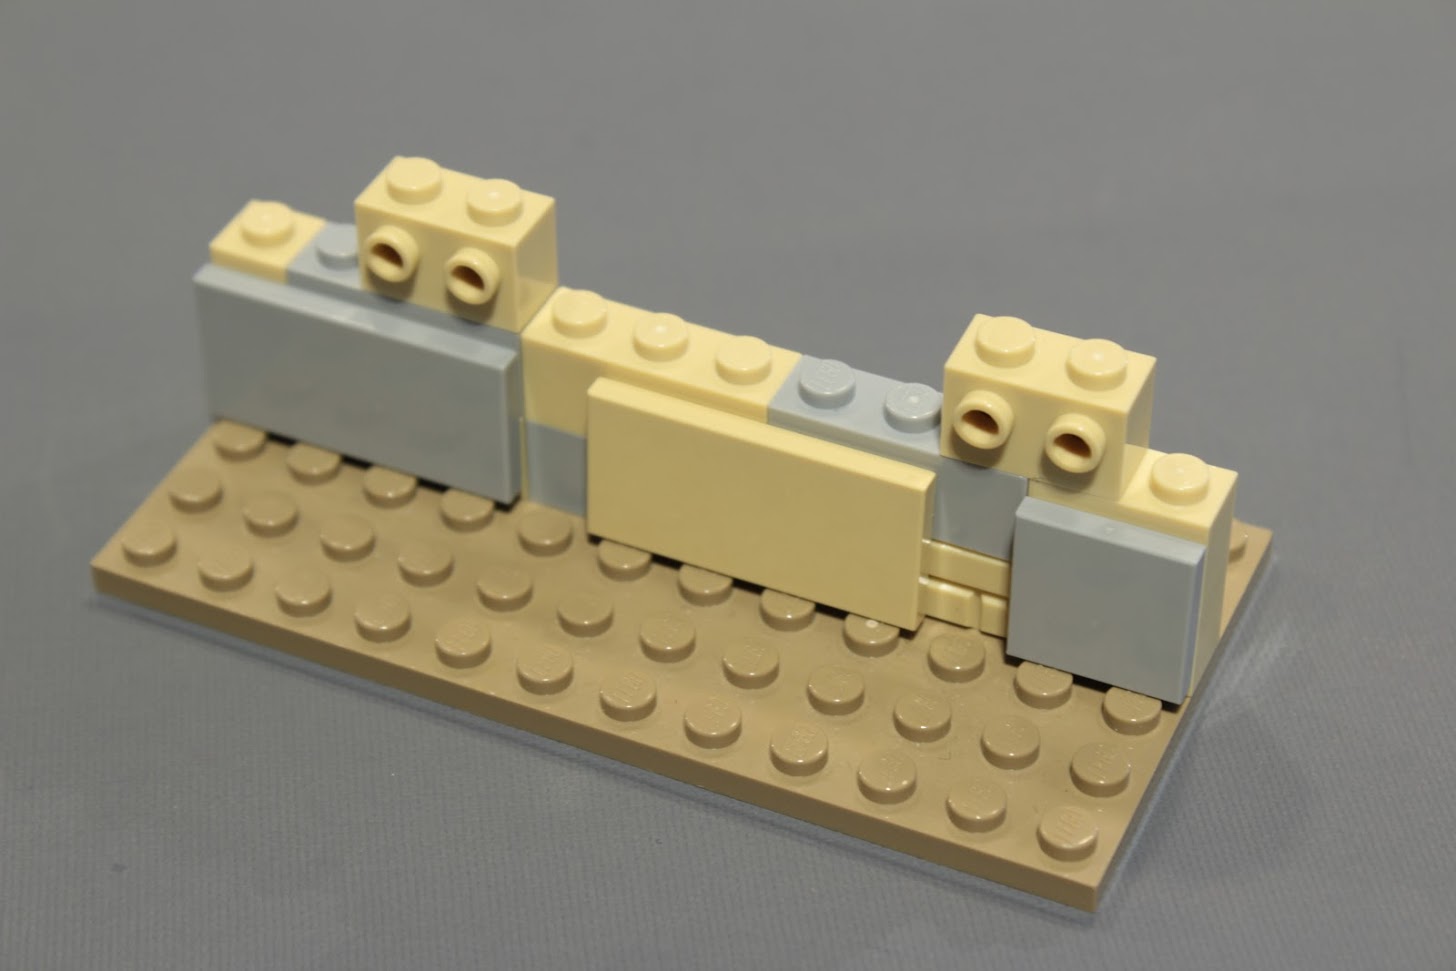
Once the layer has been filled with headlight bricks and tiles you can fill it in with regular bricks again. This is the essence of the basic construction method I use to build in this style.
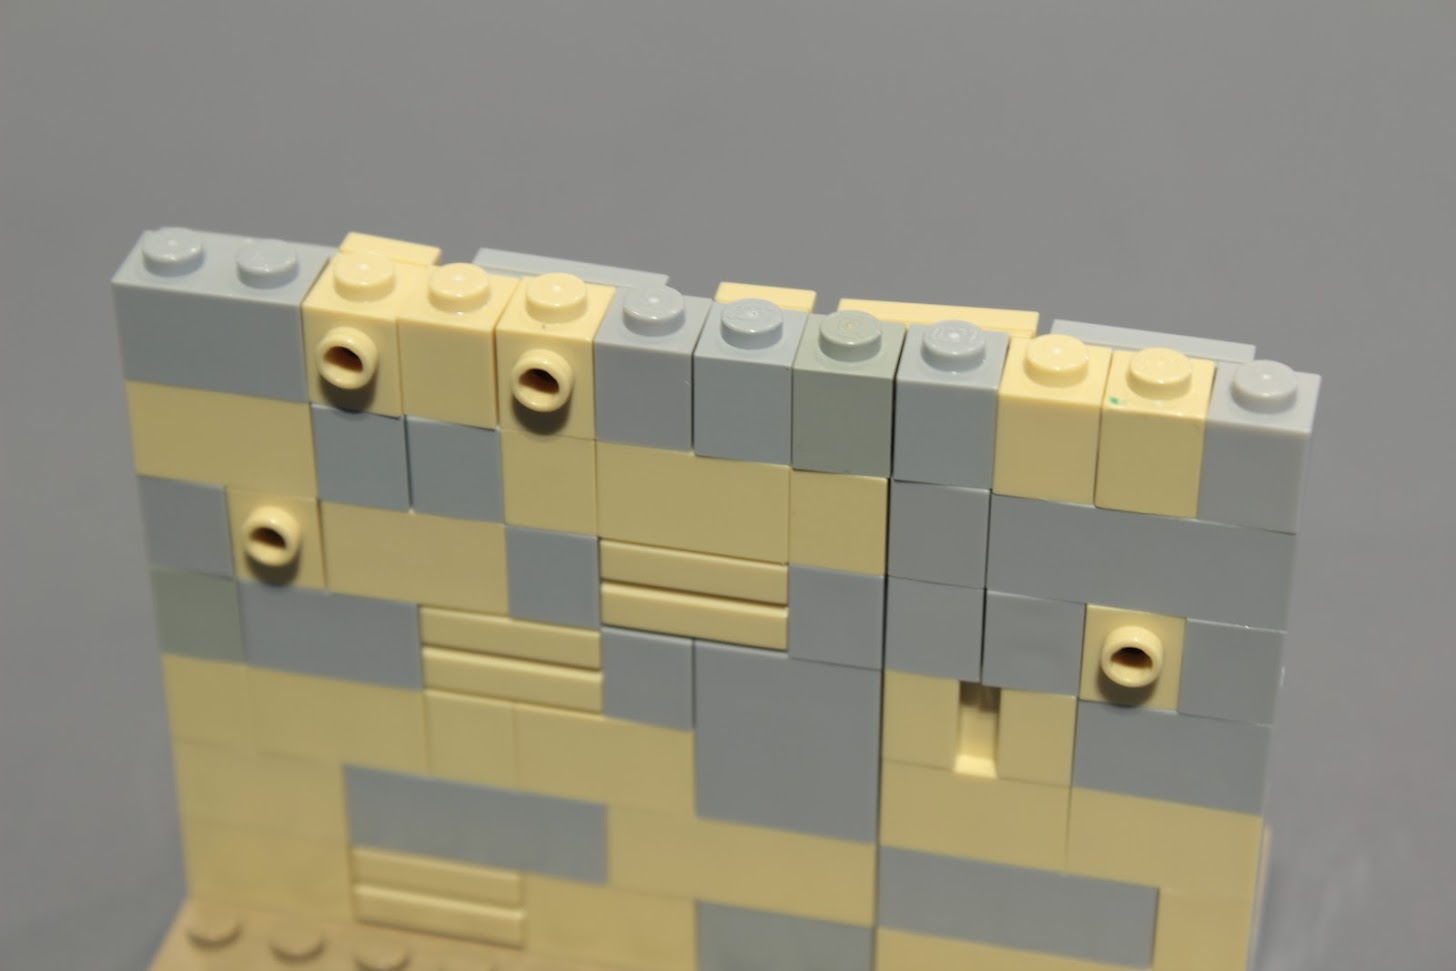
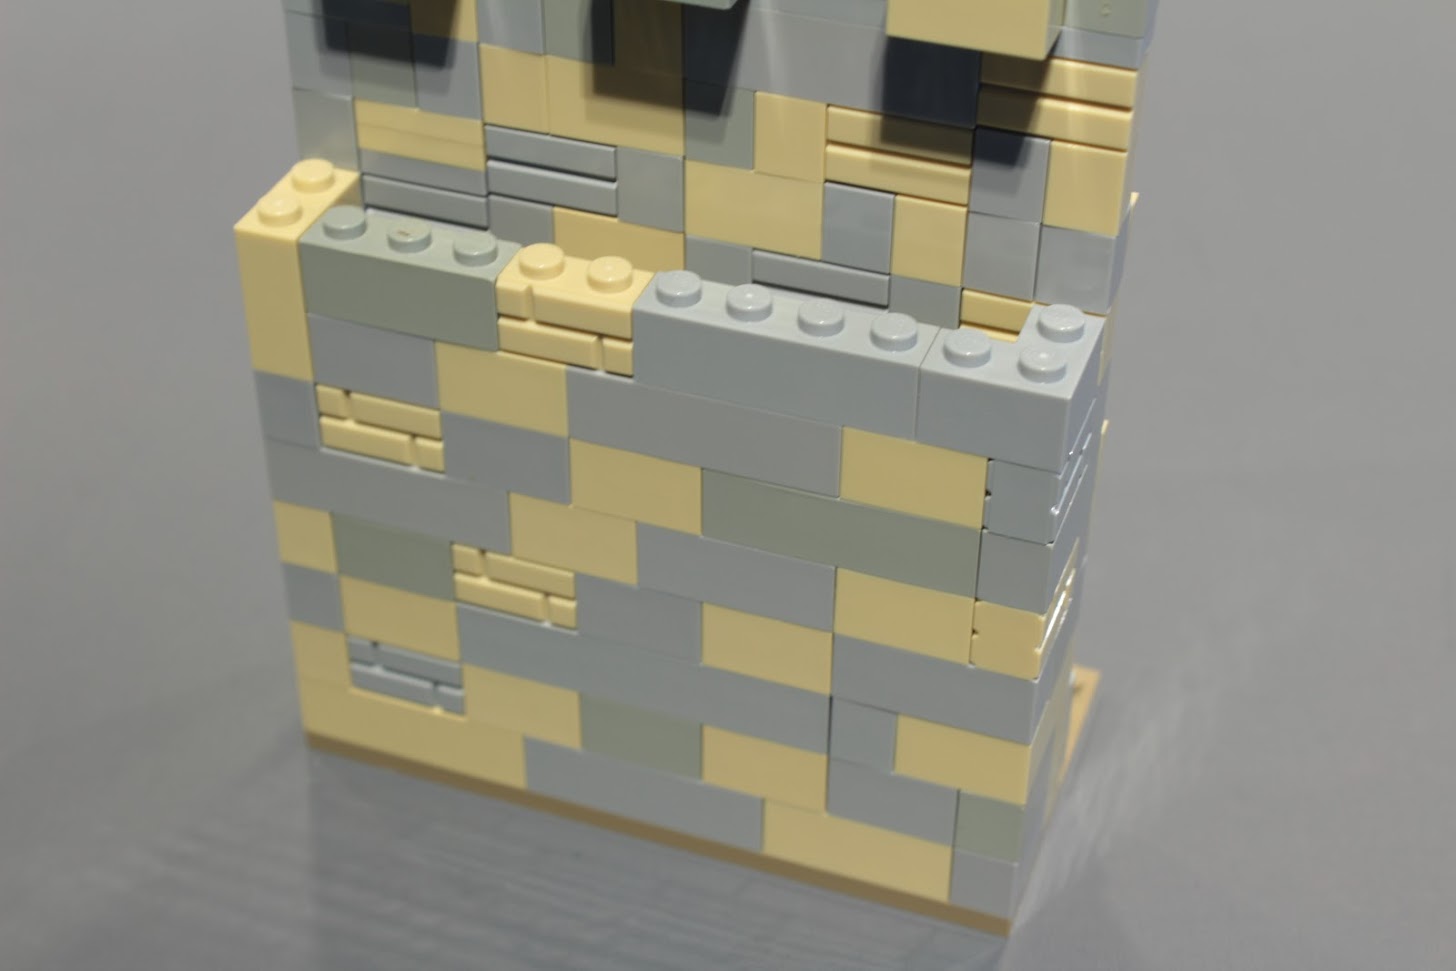
Now that we are past the second layer I like to gradually use smaller tiles, as said before this helps give the wall a realistic look.
Continue to add layer after layer using the three main components.
On a side note, I find using 2×2 tiles higher in the wall is not that obtrusive to the overall look. They are not nearly as big as the 2x4s near the bottom.
Not only do you have to be careful of what color filler bricks you use, you need to select your tile color and shape carefully to get a nice mixed look.
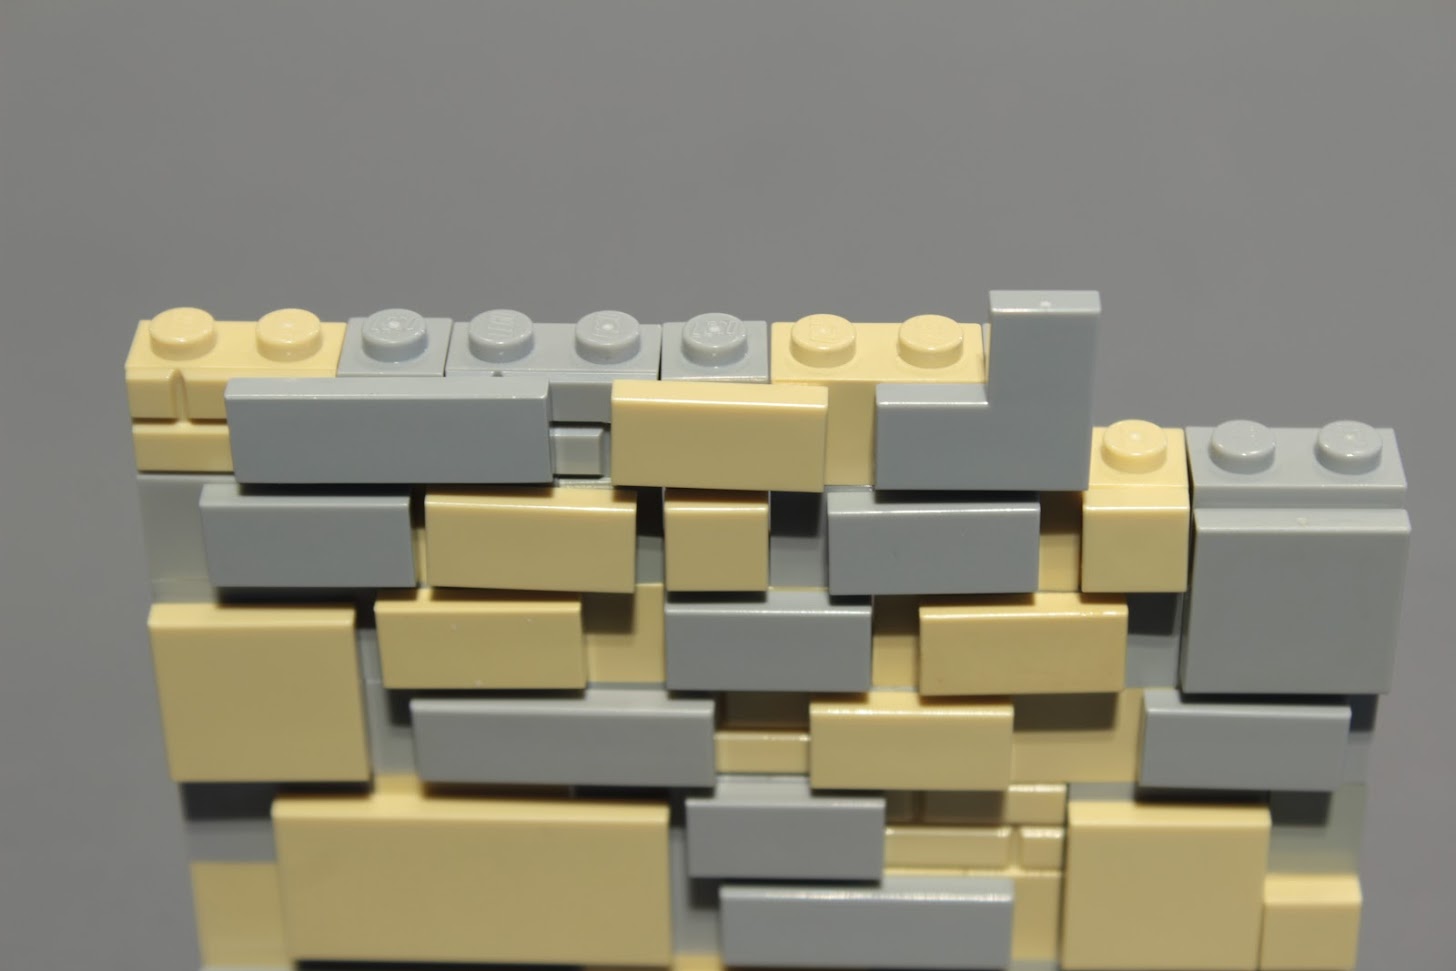
More filler bricks for the next layer. Don’t be too worried about how the back looks for now, most castle walls are several bricks thick and the visible surface on the back will be built later.
The first few layers might not look that impressive, but just keep working! The larger the tiled surface the more the brickwork effect becomes apparent.
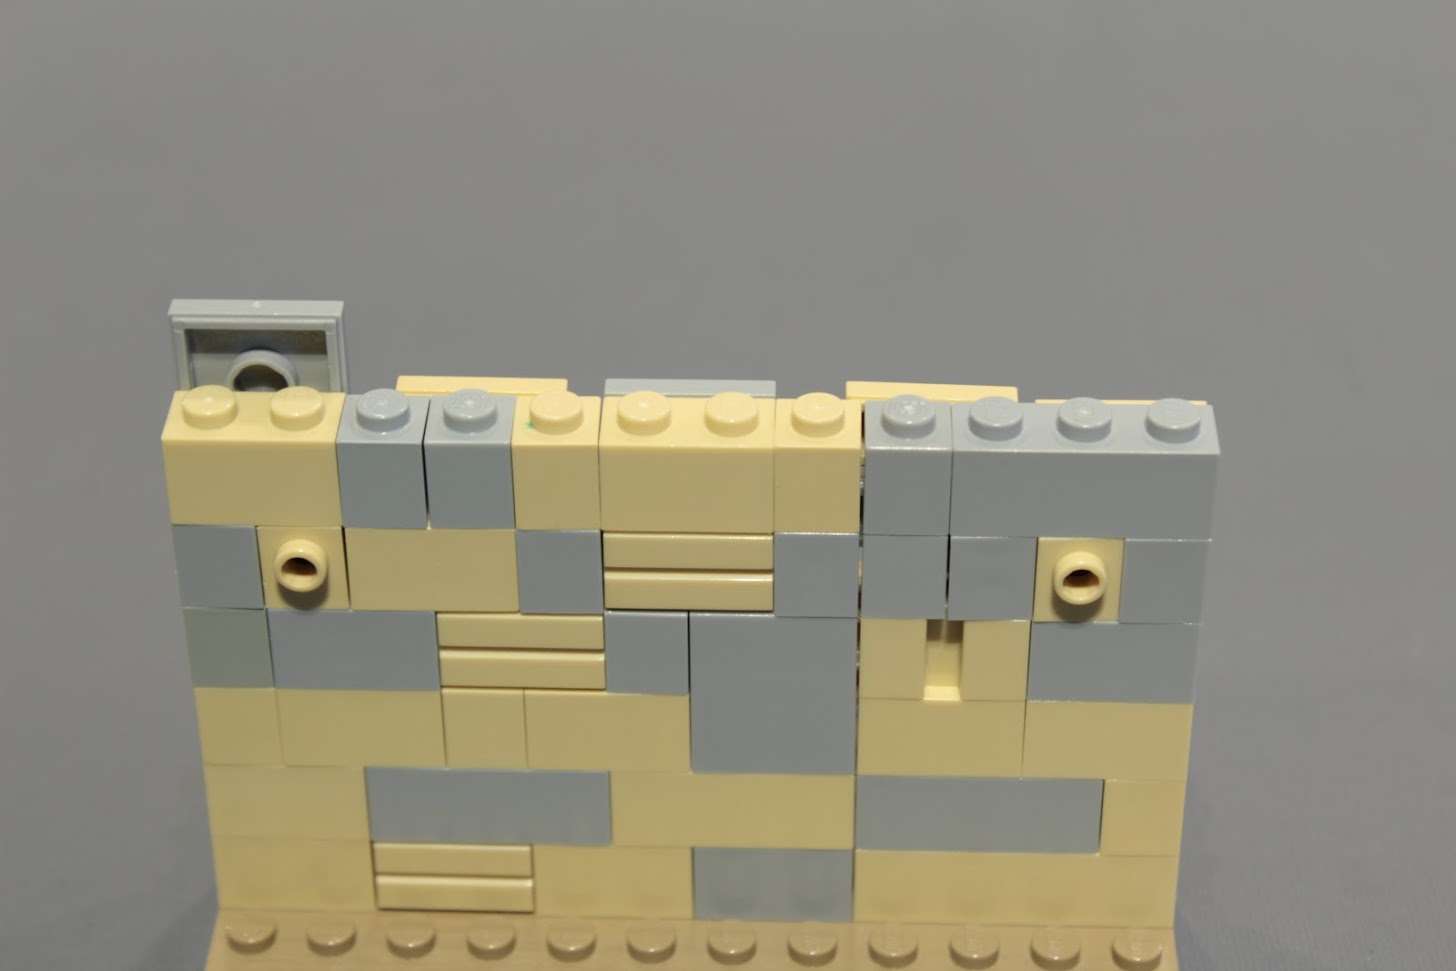
At this point I am using very small “lighter” tiles for the wall which helps solidify the visual contrast to the base.
More filler brick as usual. When using lots of 1×1 headlight bricks and normal 1×1 bricks the wall can seem a bit unstable. Don’t worry about it for now, that issue will be solved once we get to the top of the wall.
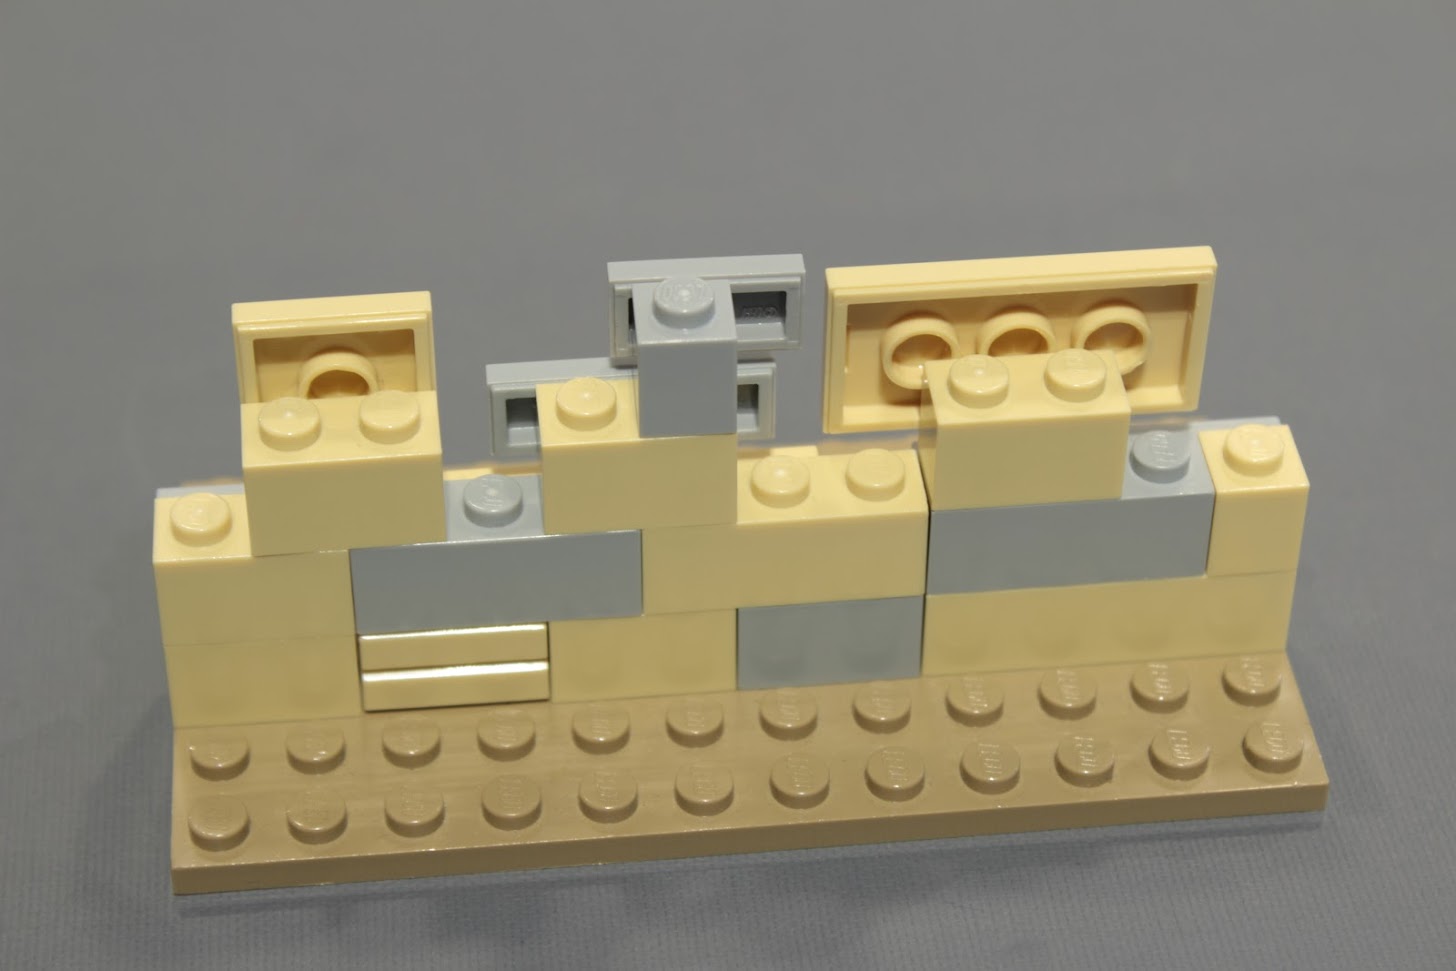
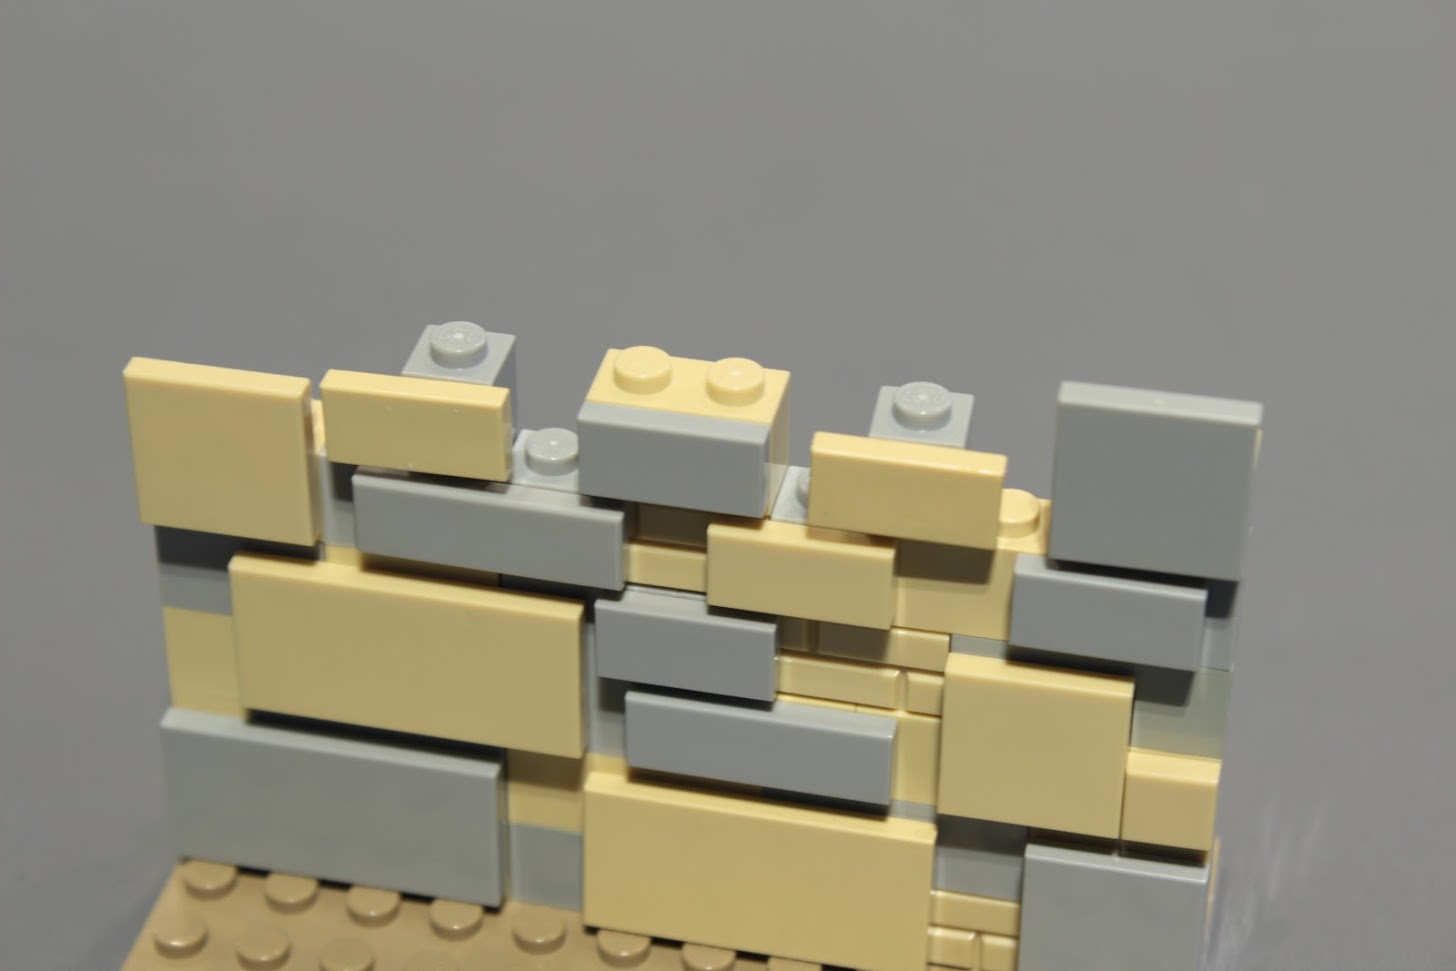
Now, a solid wall of 1×2 tiles is impressive but not always the most desired look, I usually try to incorporate some uniquely shaped tiles to give the build a neat imperfect hand-crafted look.
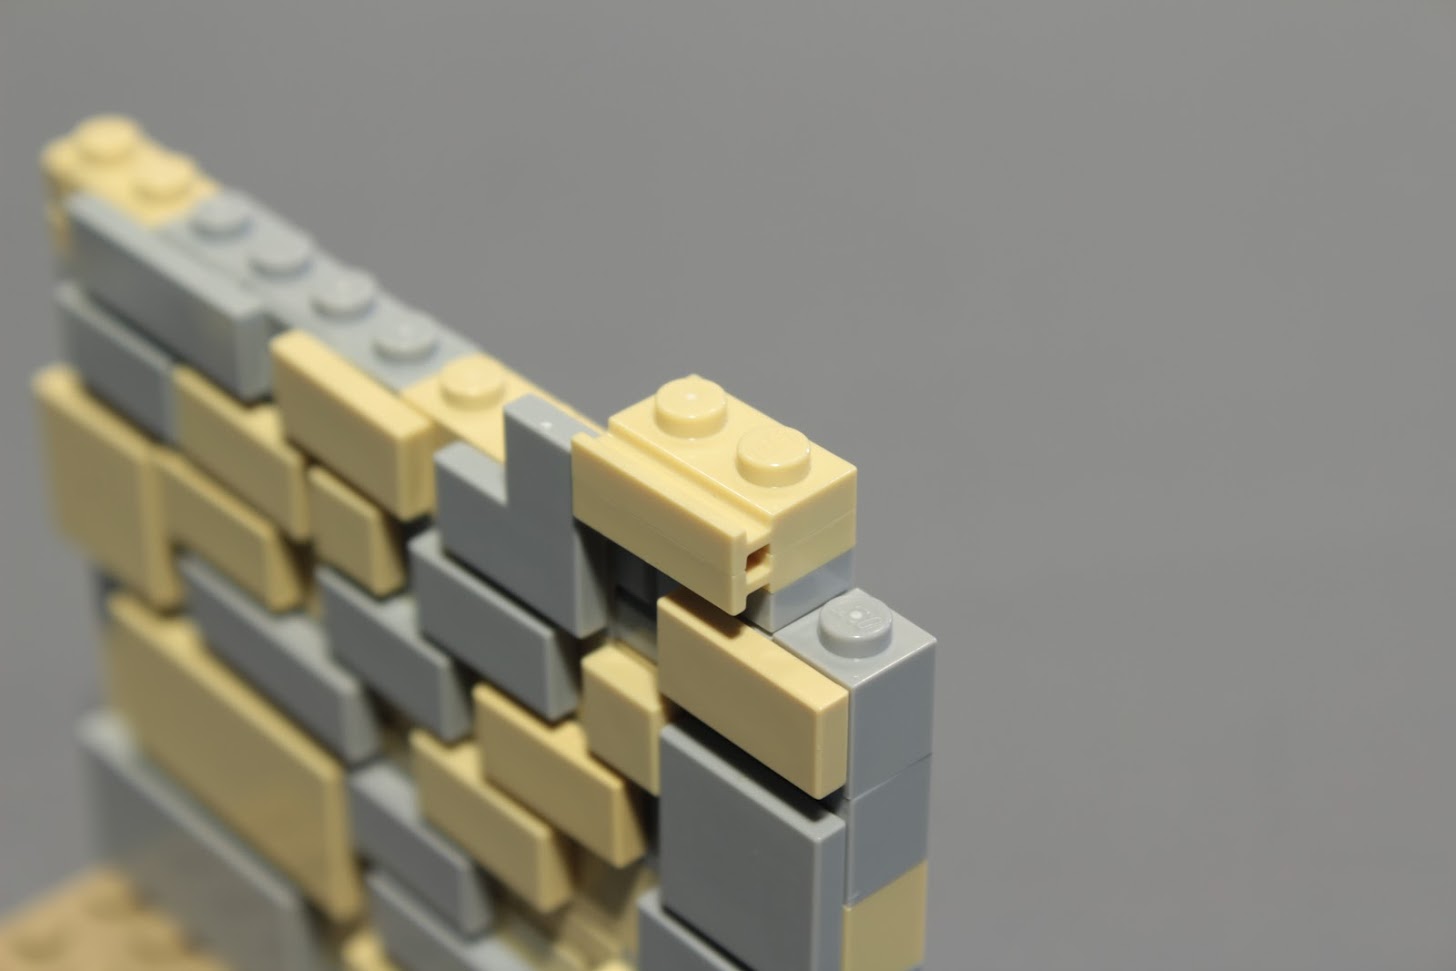
I have also opted to use some 1×2 modified plates. If you stack two together they look like a slightly thinner tile. There are literally hundreds of ways to add extra variety to this wall technique. Once you have learned the basics, it’s a good idea to experiment with different pieces and combinations for a unique appearance.
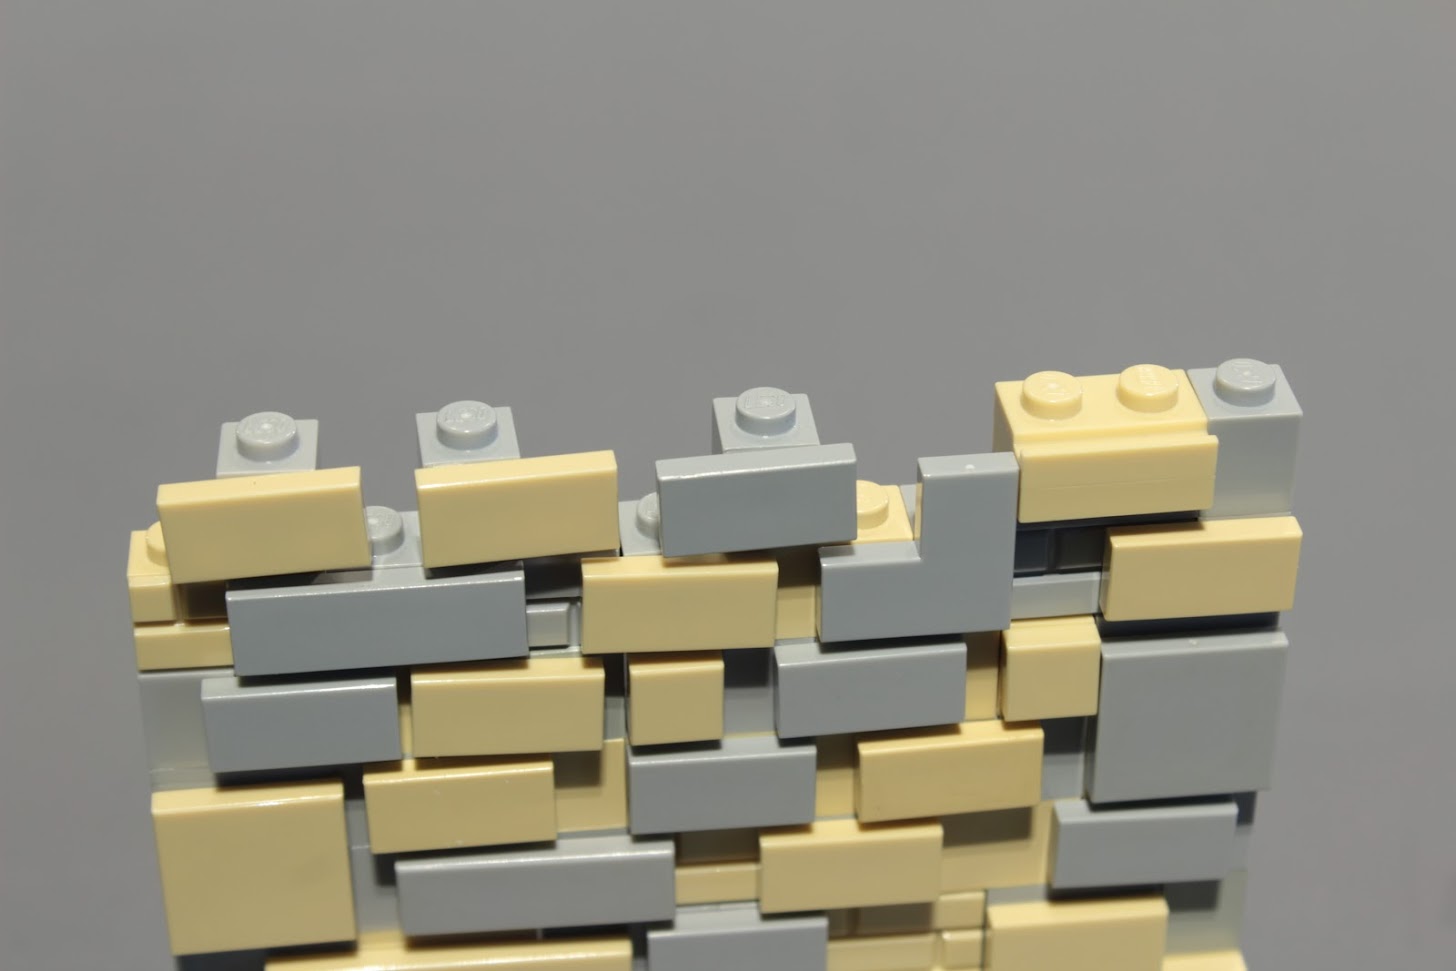
More headlight bricks and tiles, almost high enough.
Obviously, more filler too! I have tried to incorporate several modified profile bricks or “brick-bricks” in the filler bricks. I think they look good behind the tiles and help add even more detail.

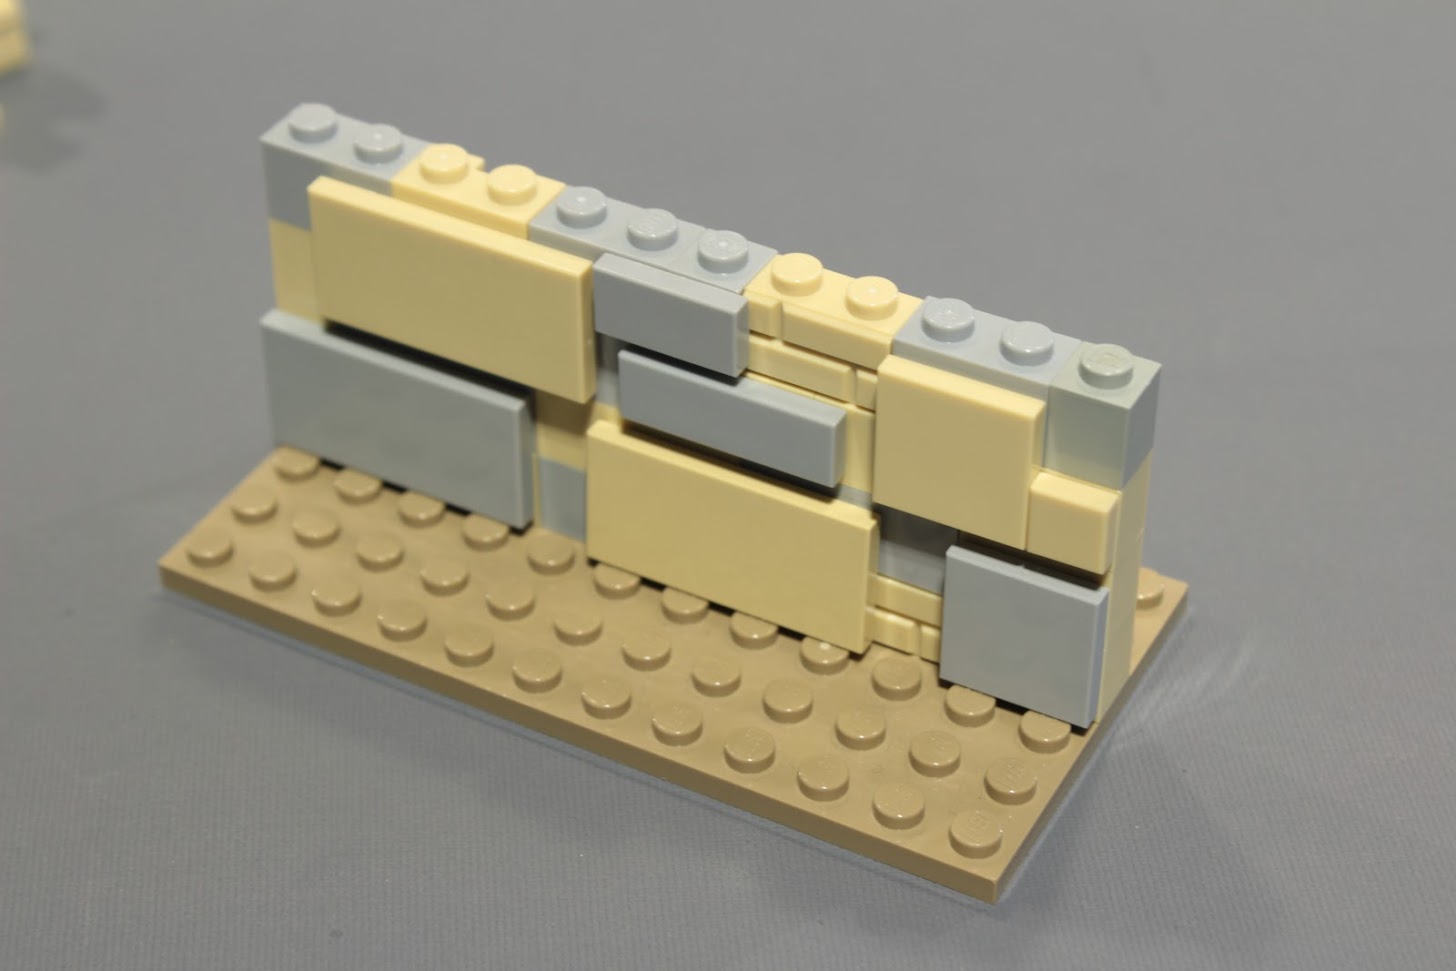
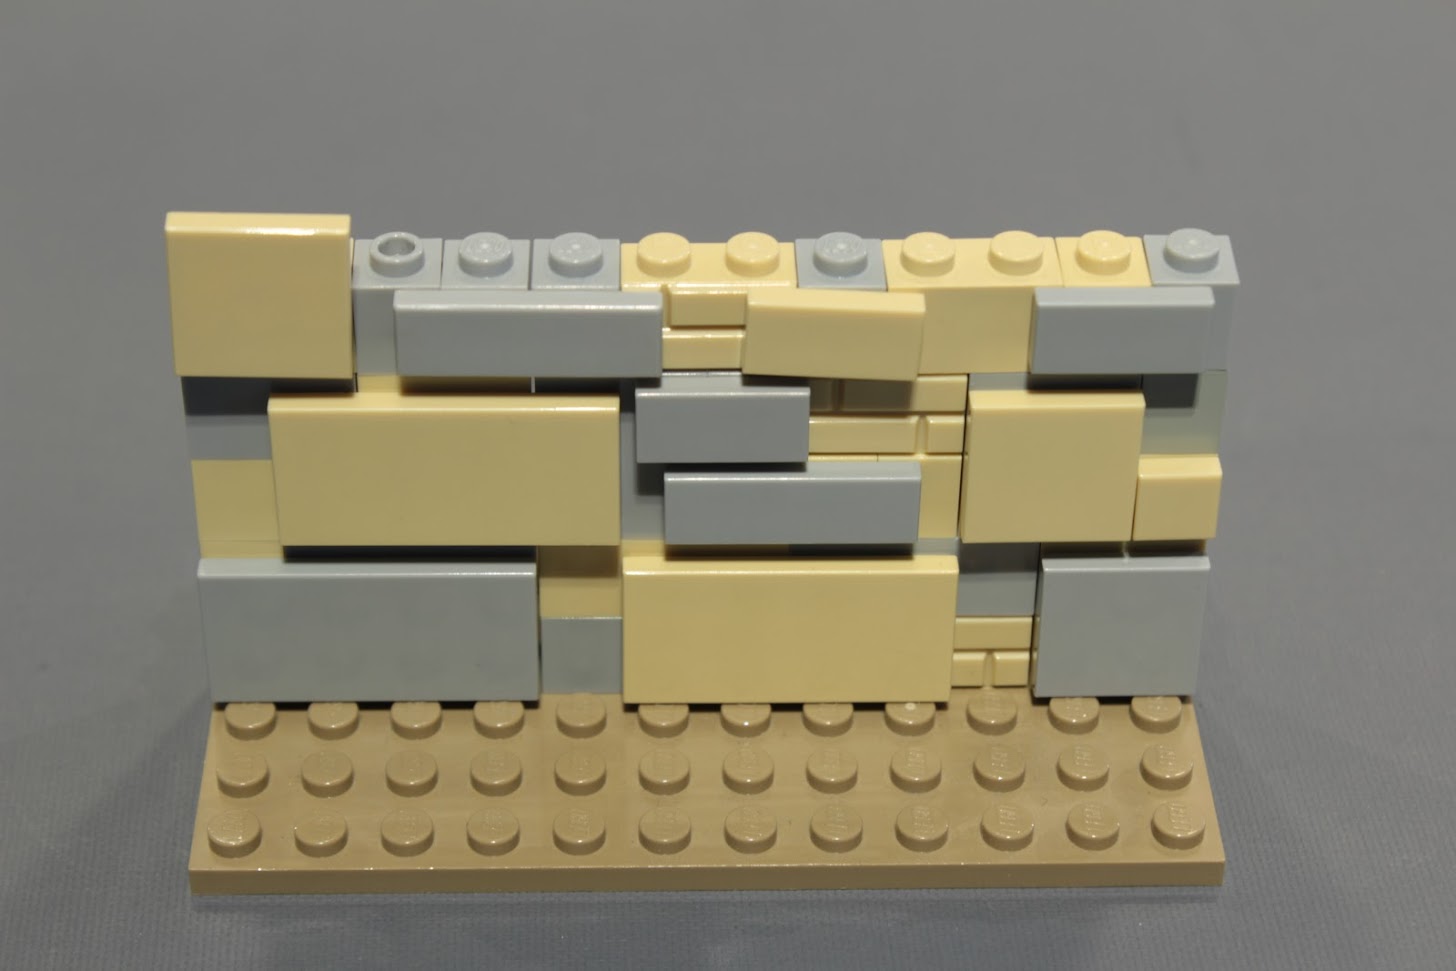
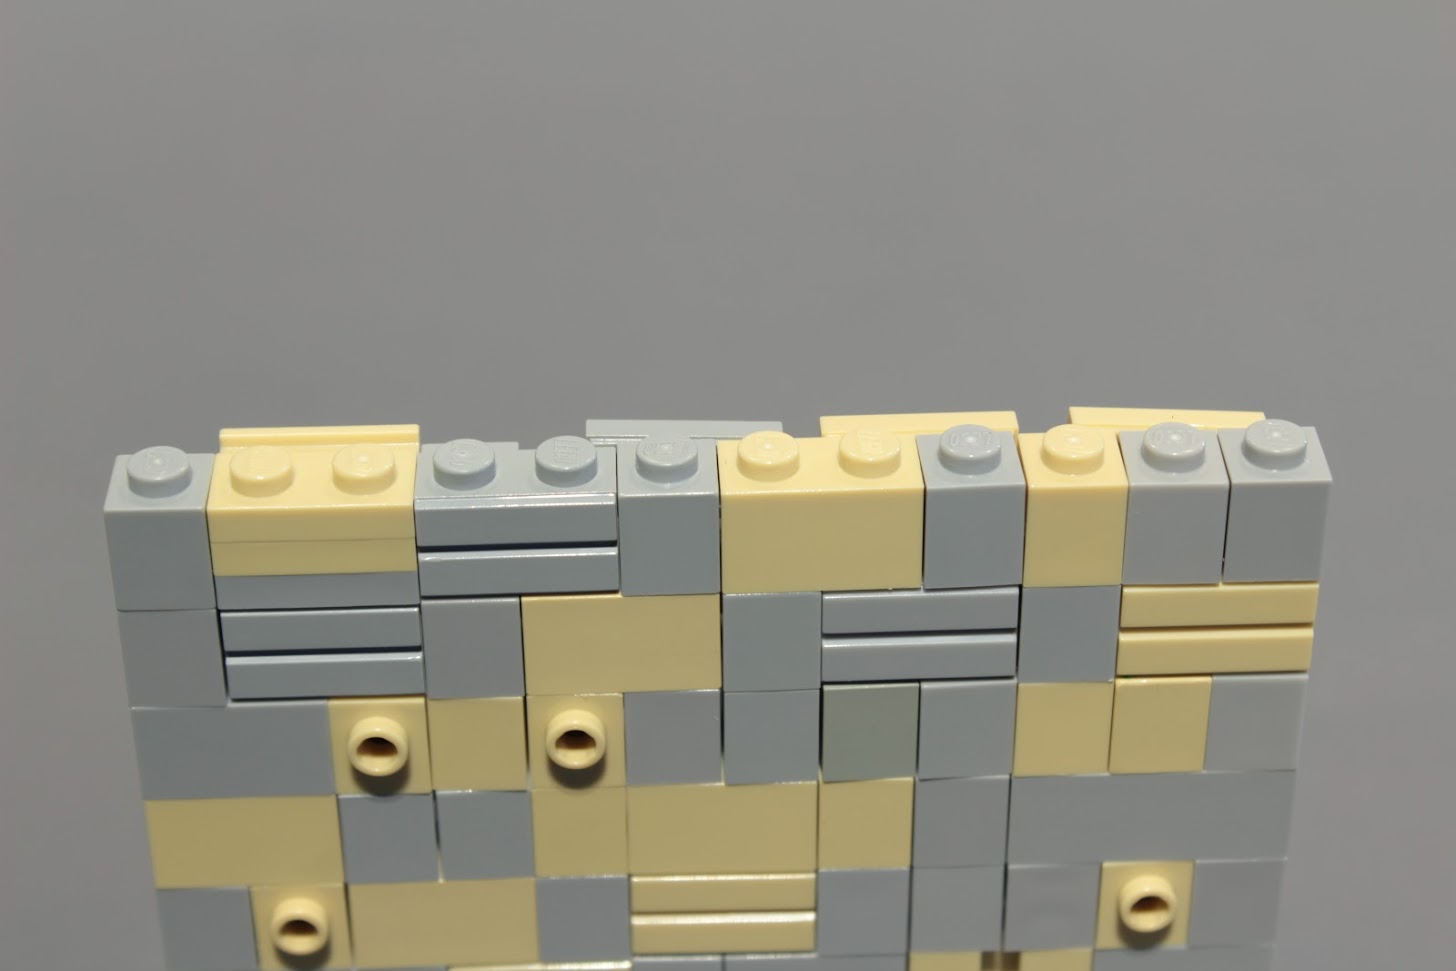
Yup, you guessed it, more headlights bricks, tiles and filler. I think this is the last layer for this wall. It is about 11 bricks high at this point.
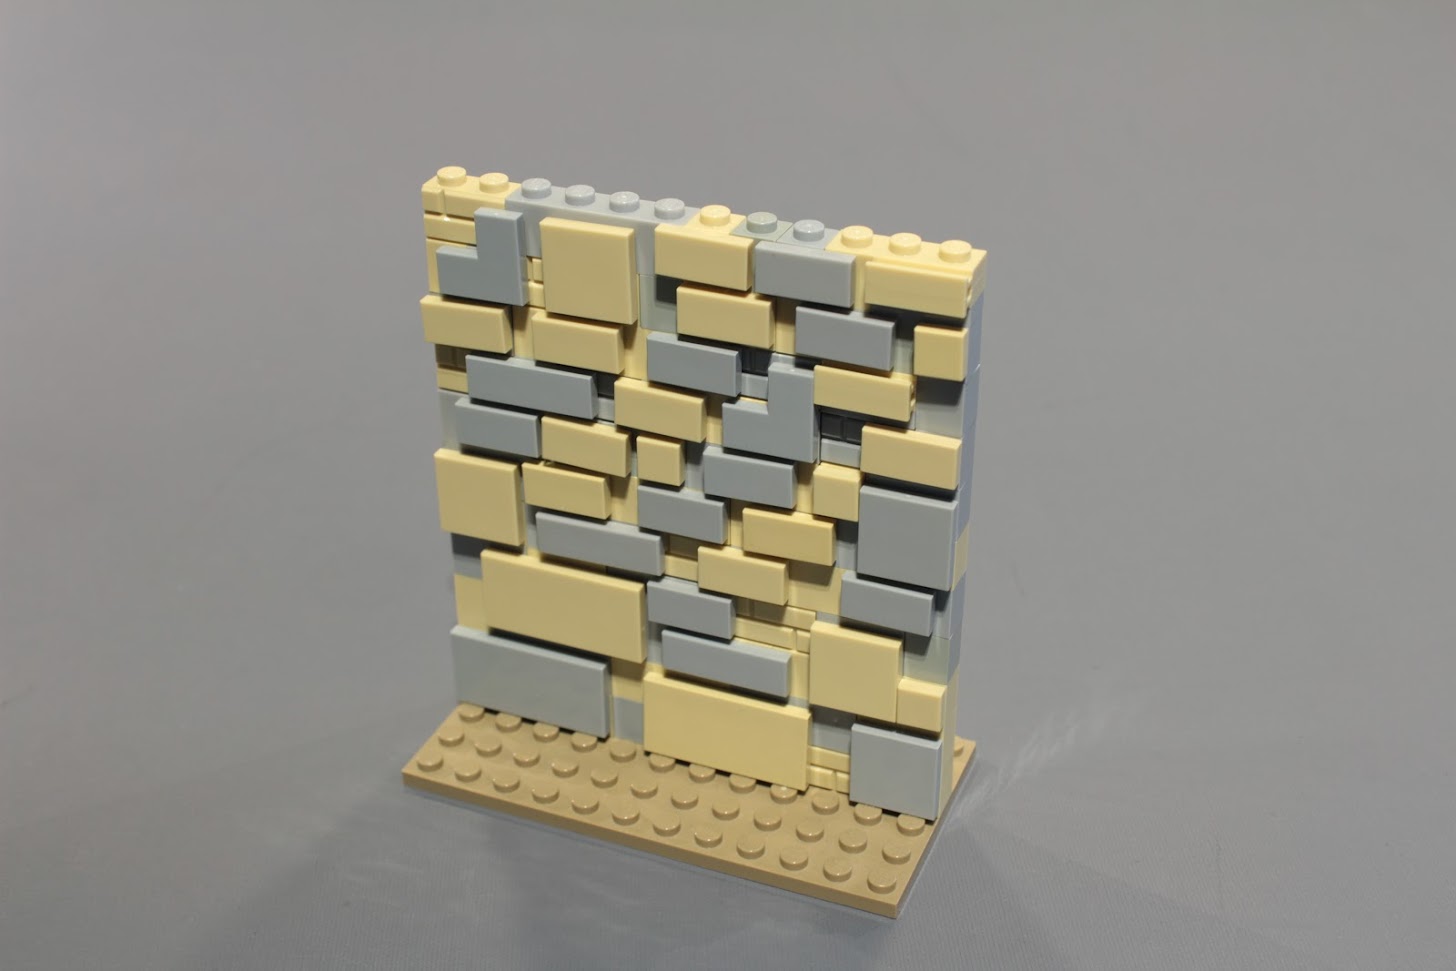
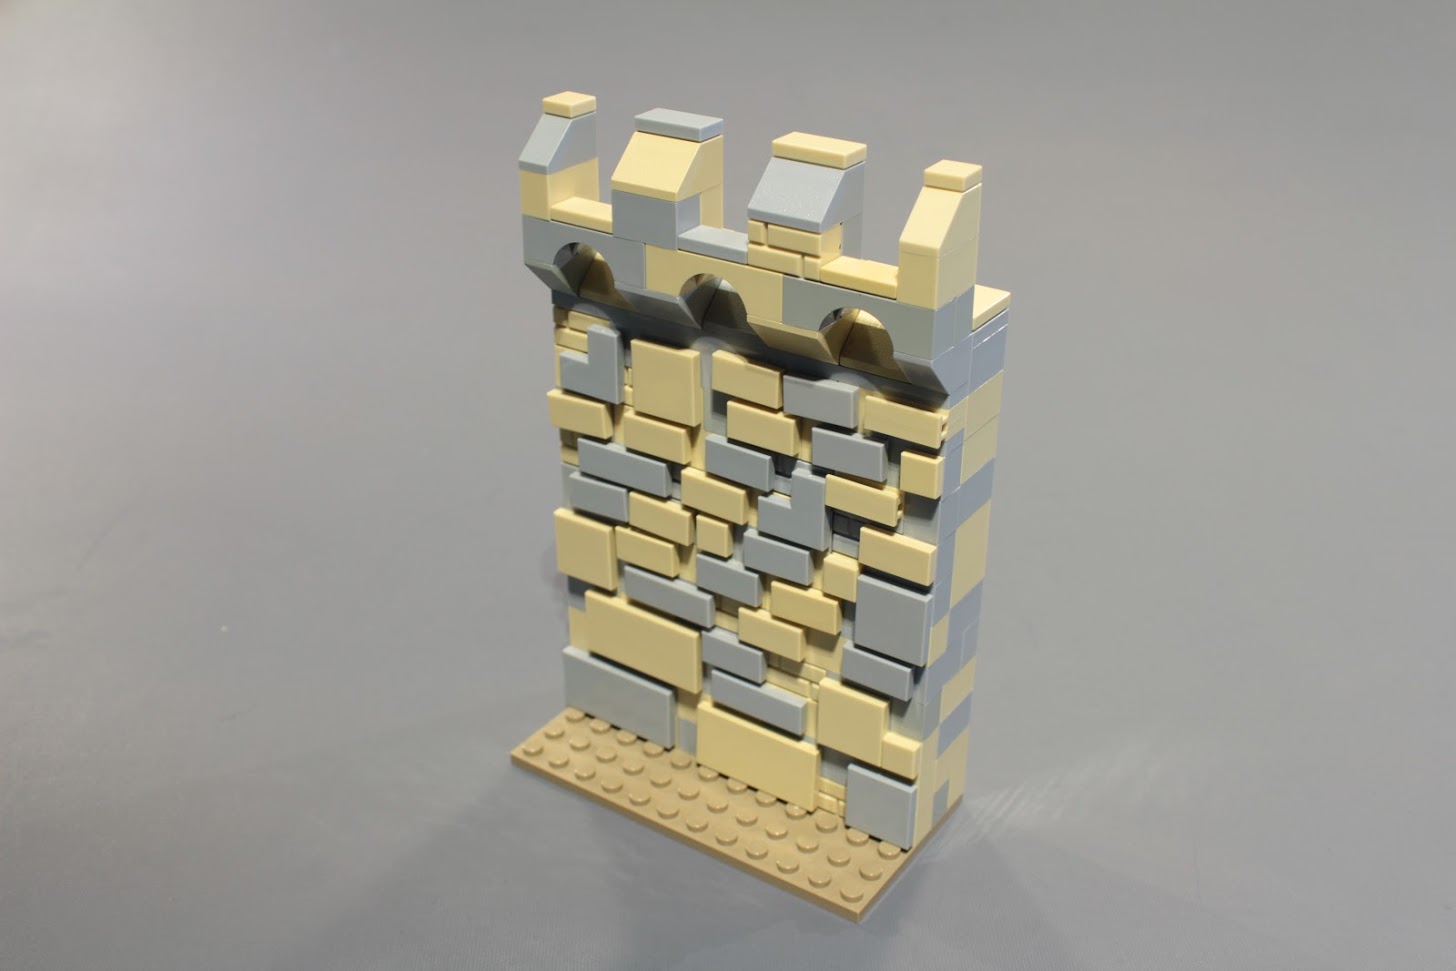
And here we are! A nice chunk of brickwork.
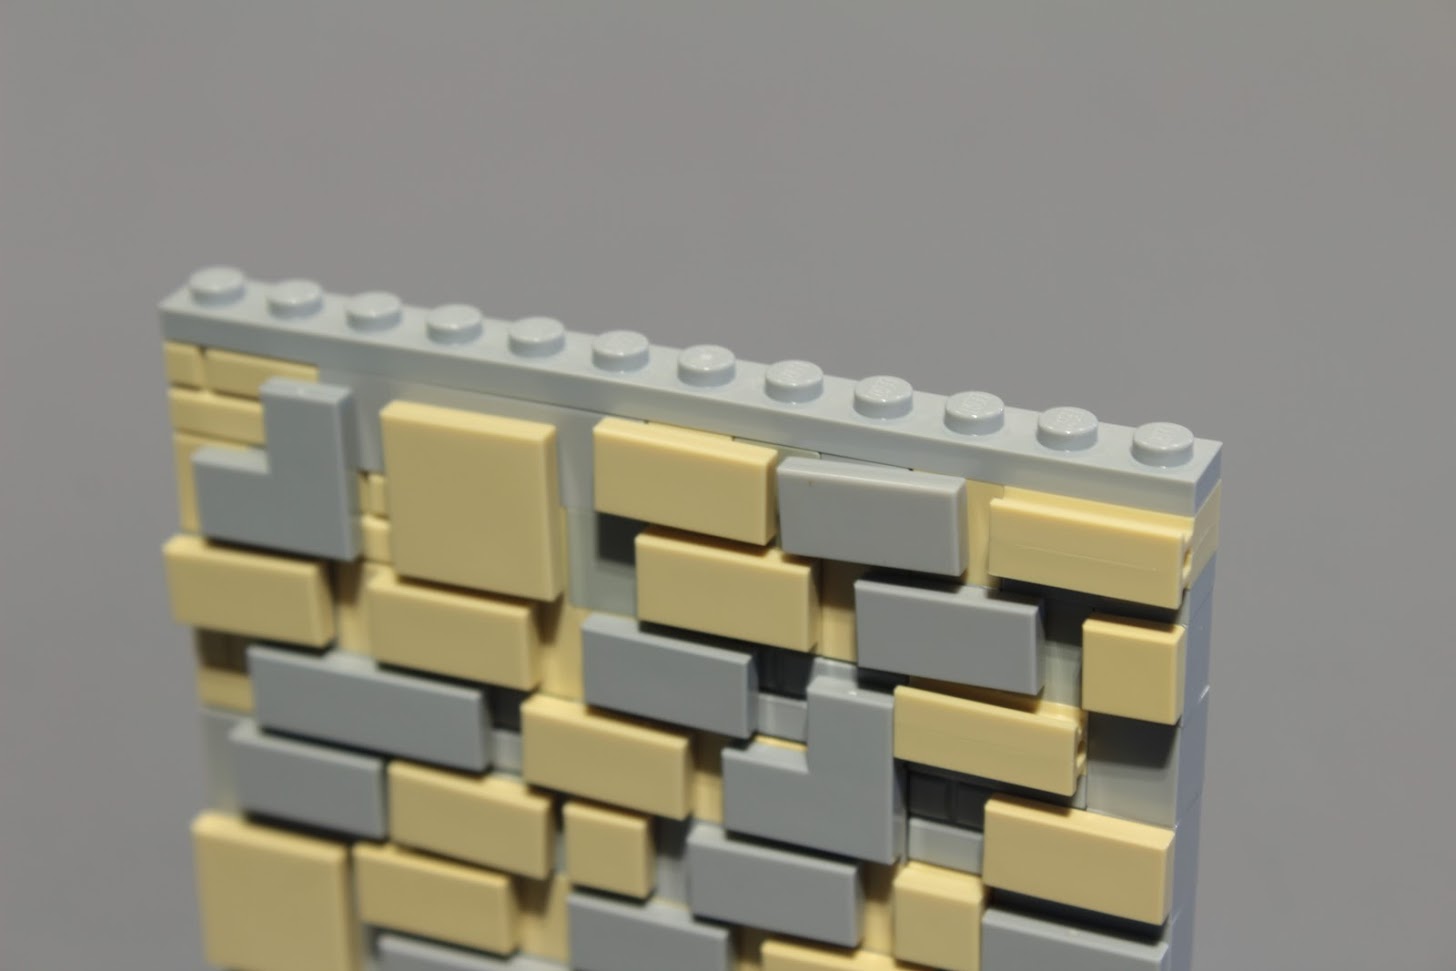
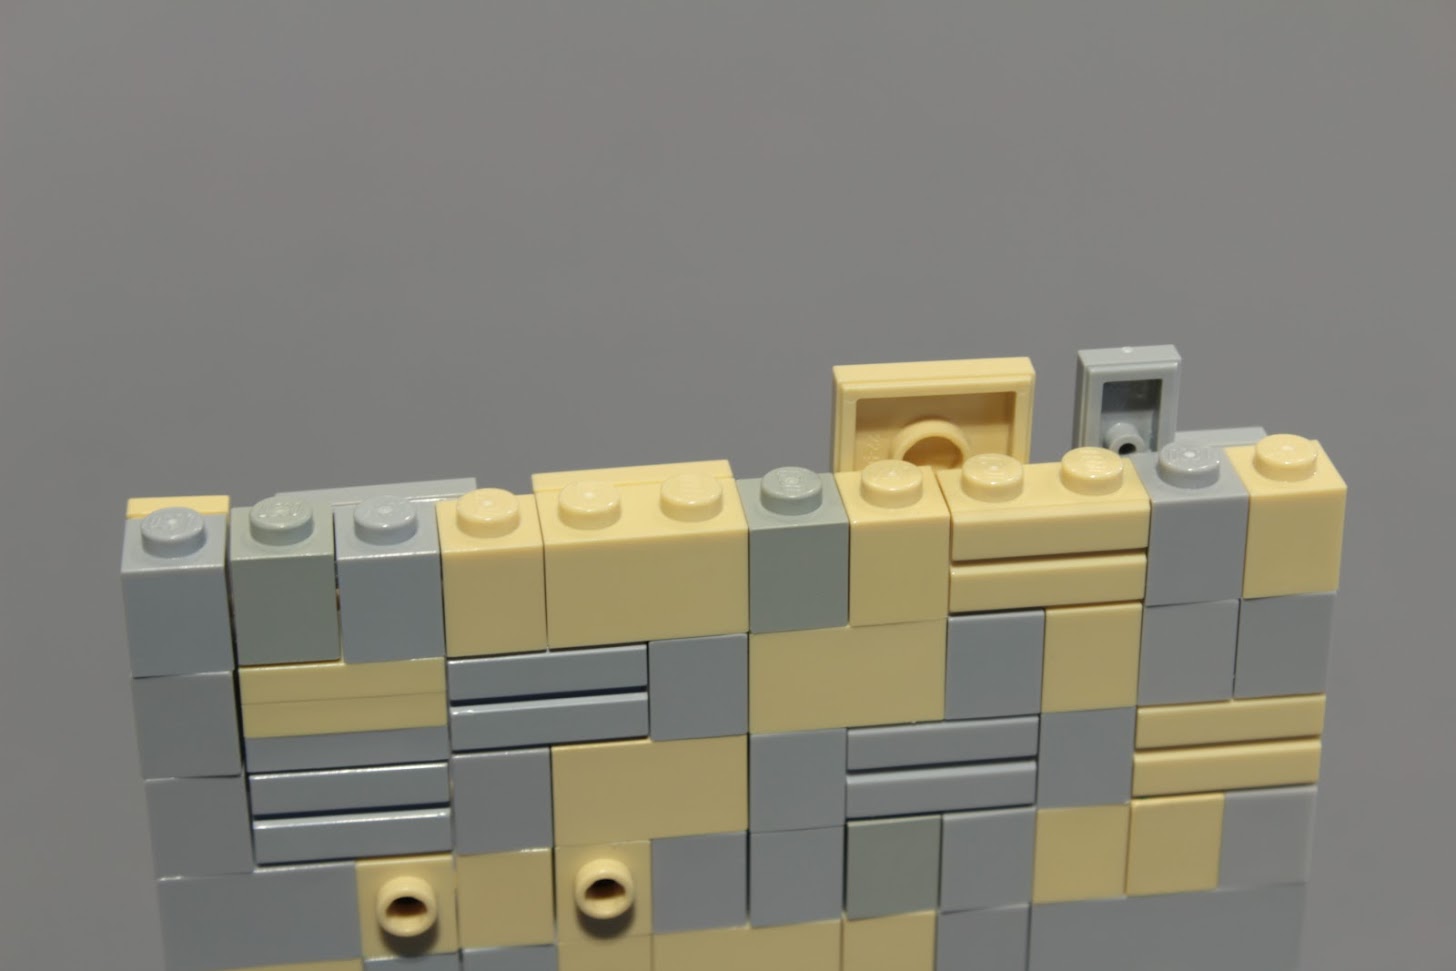
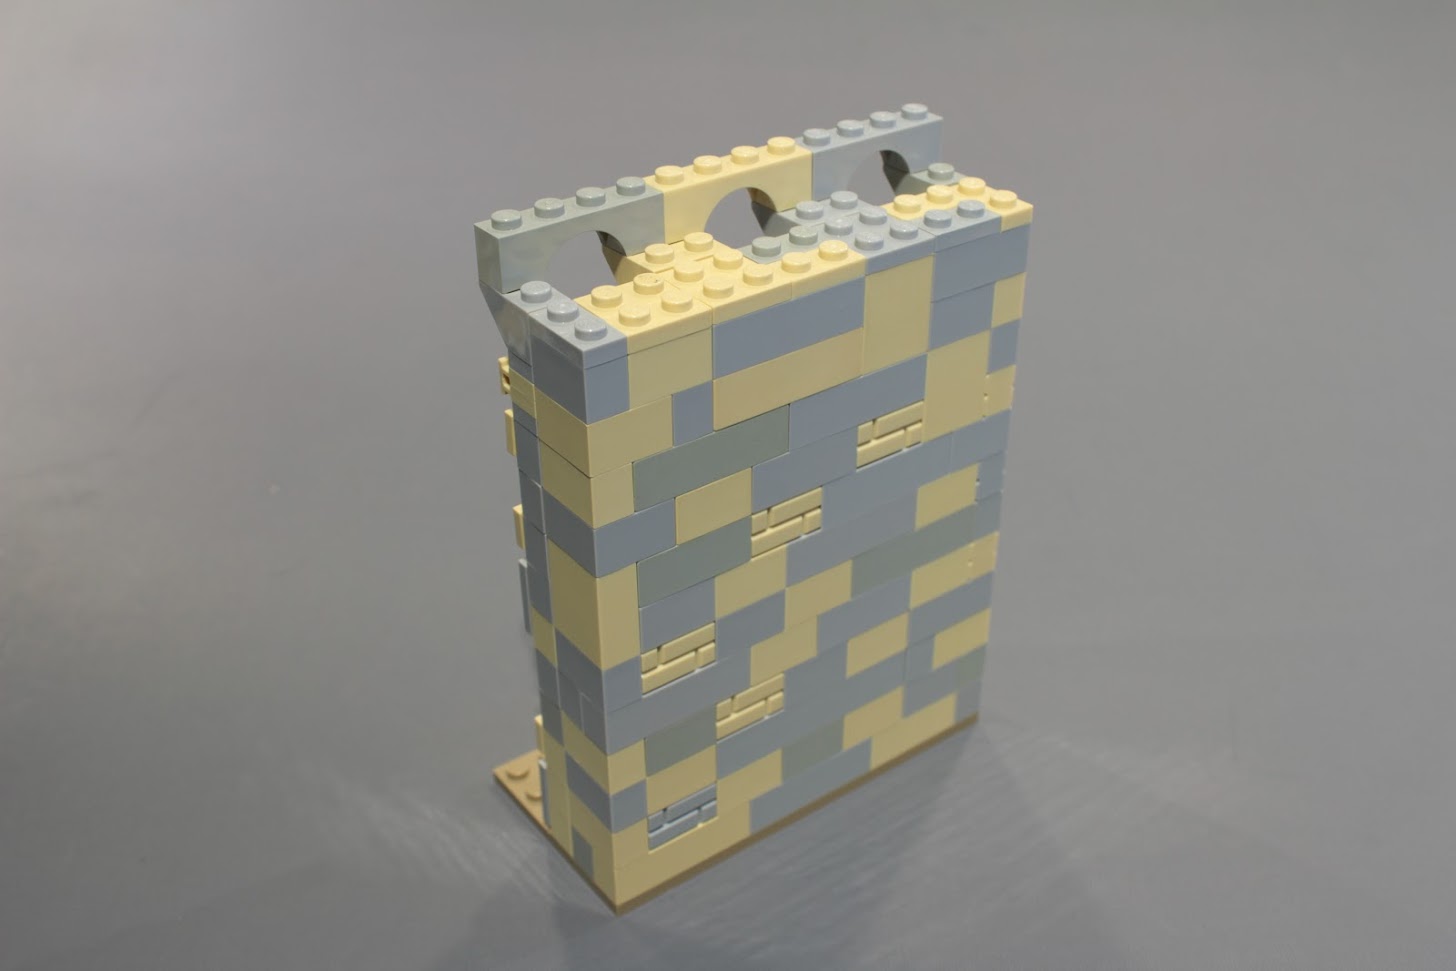
In order to solve the structural weakness caused by lots of 1×1 bricks, I usually place some long plates over the top of the wall, in this case I used one long one.
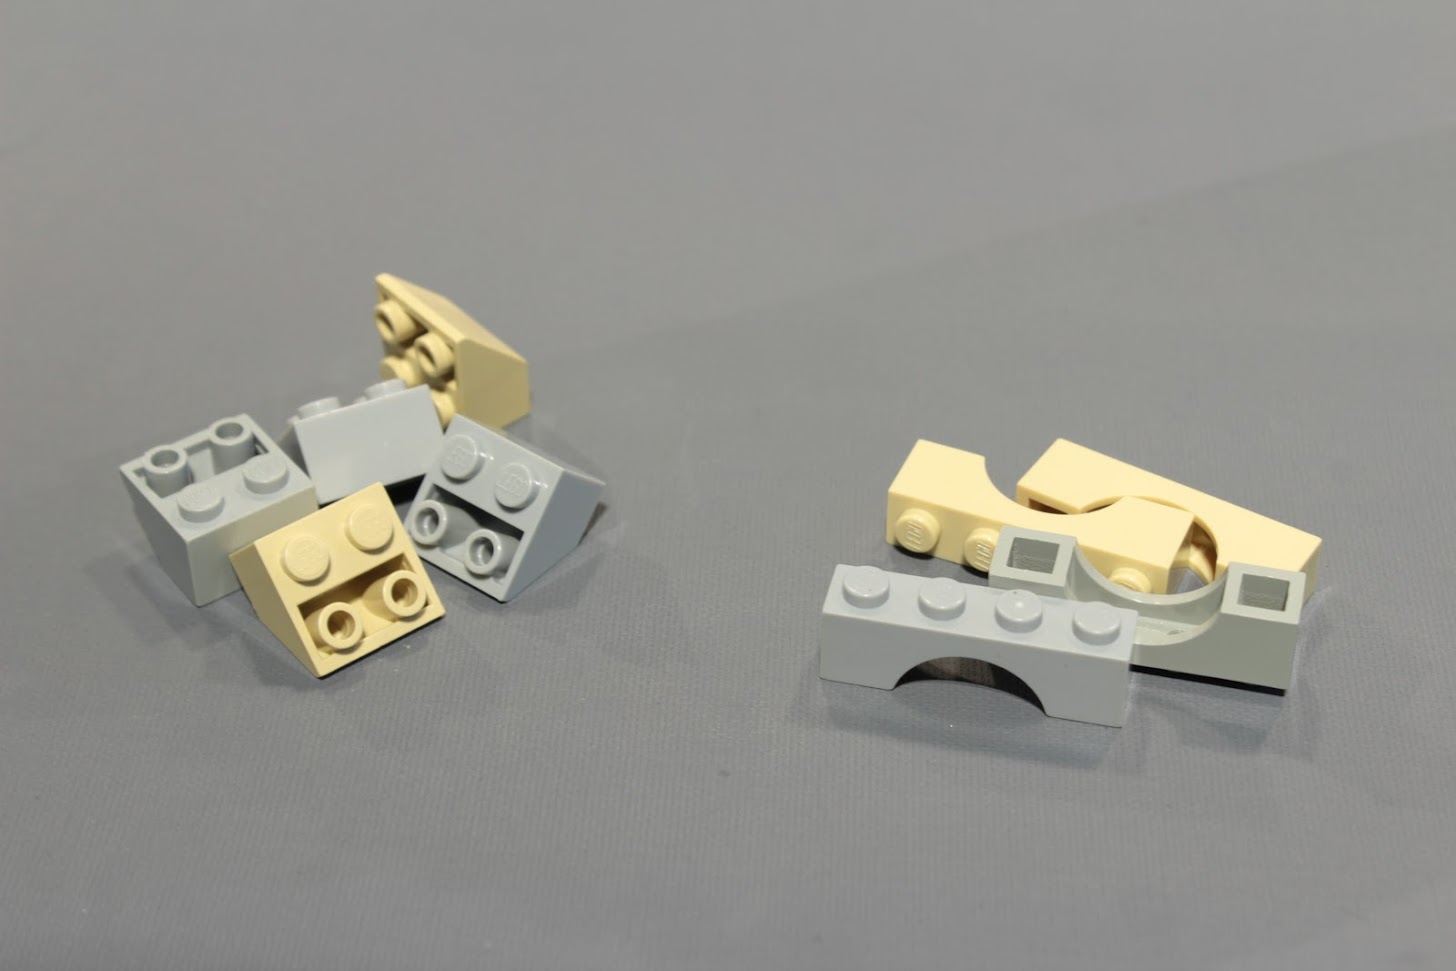
Next I’m going to add some basic battlements. There is a huge variety of different styles for this part of the castle, I’m going to show one that is very simple and realistic. I often find myself using it. This one uses inverted slopes and 1×4 arches as the primary elements.
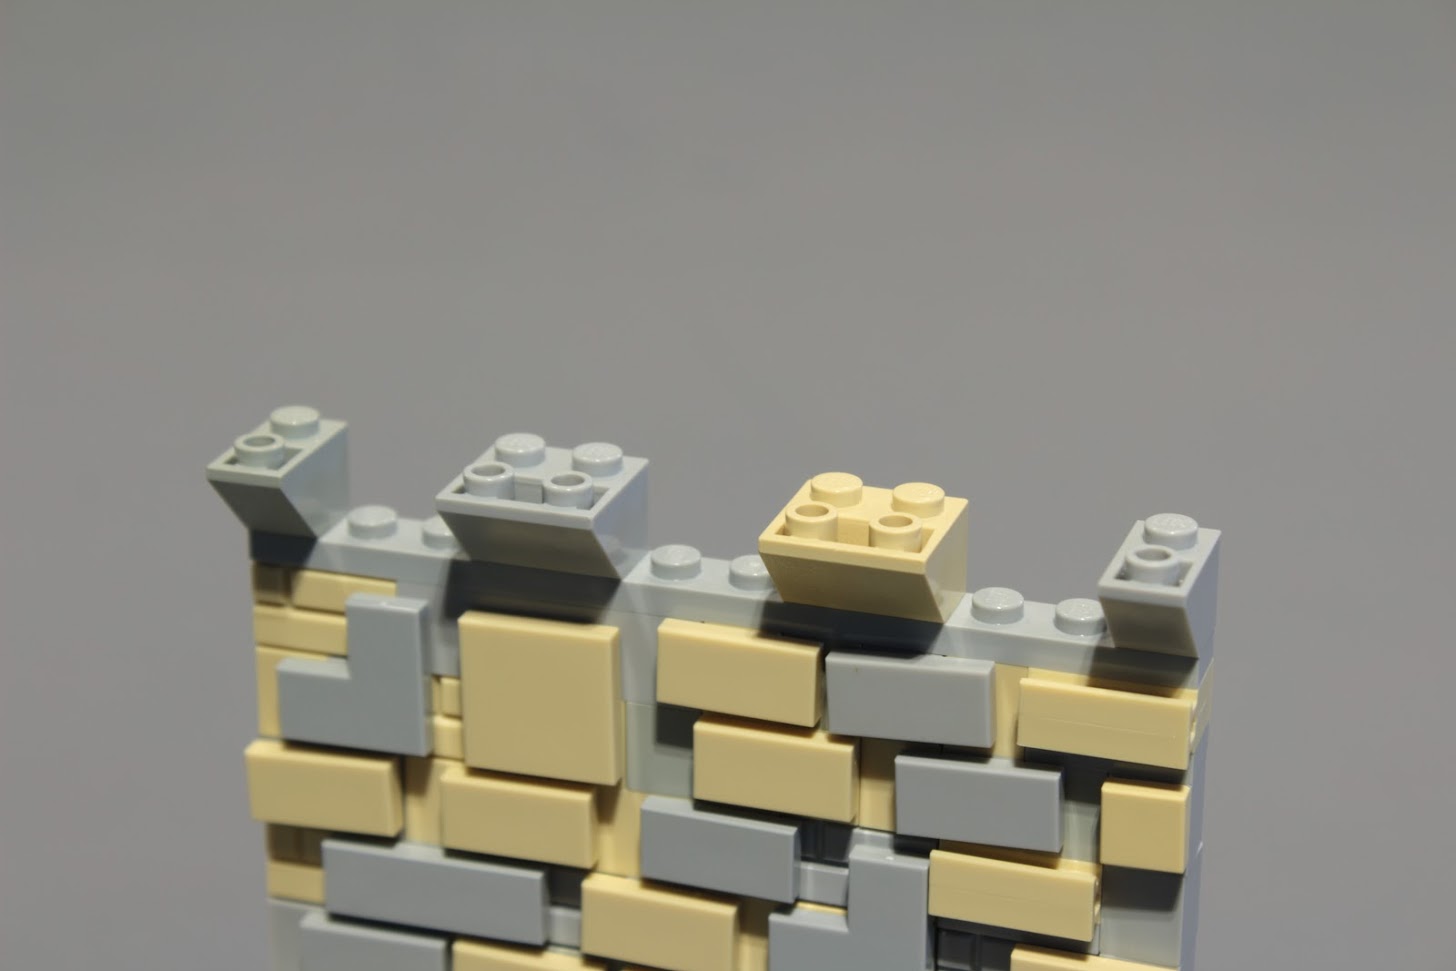
Leave 2 stud spaces for the arches.
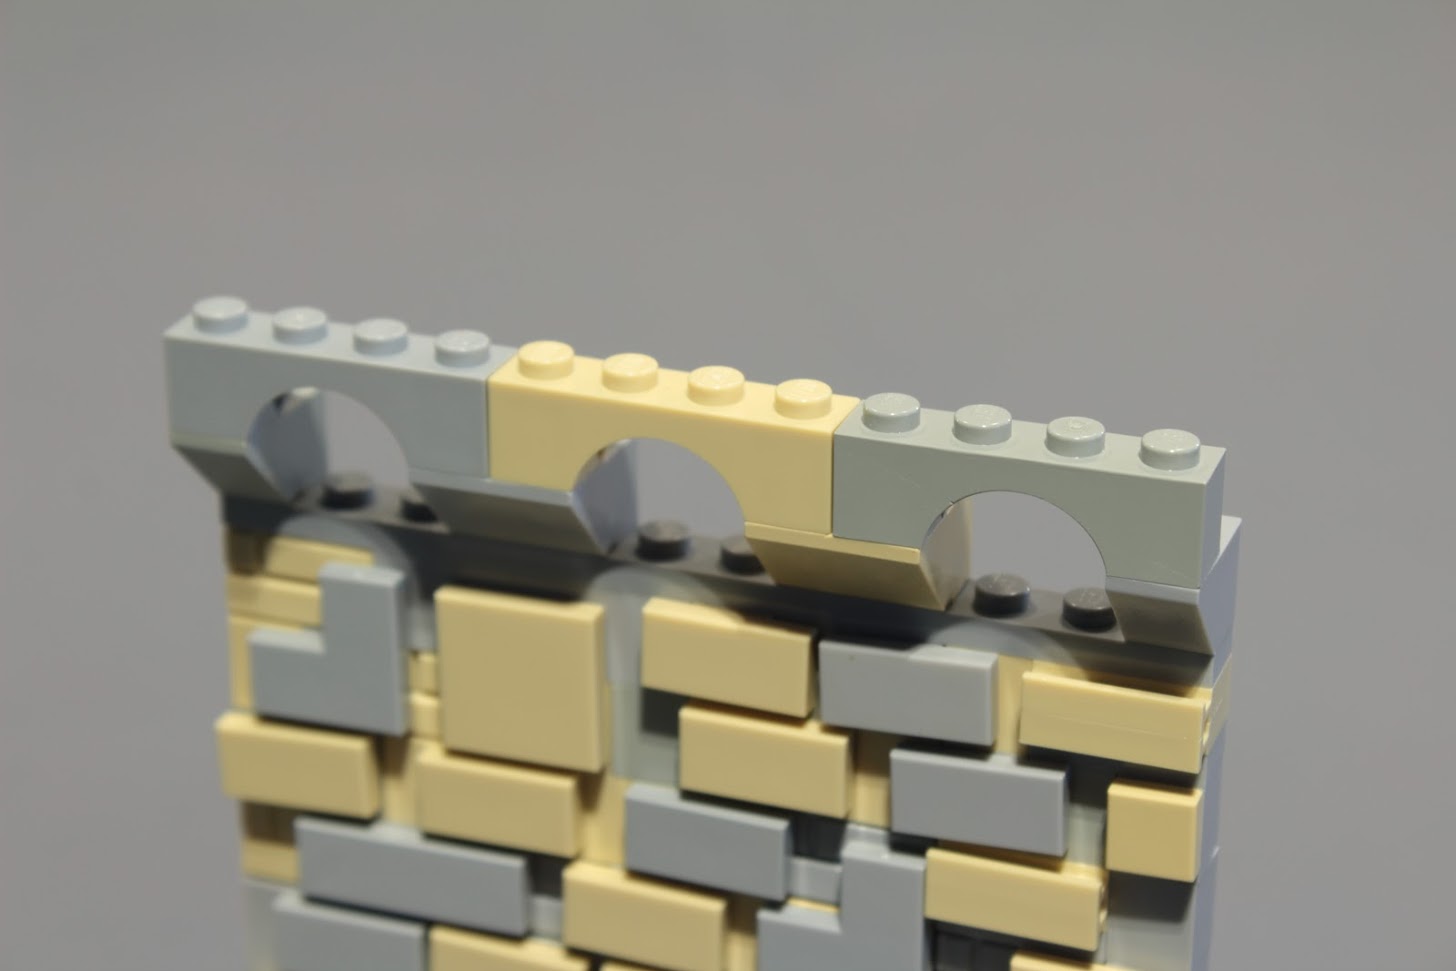
When placing the inverted slopes and arches try to keep the color mixture consistent. It’s going to be tricky with bigger pieces but a little effort goes a long way.
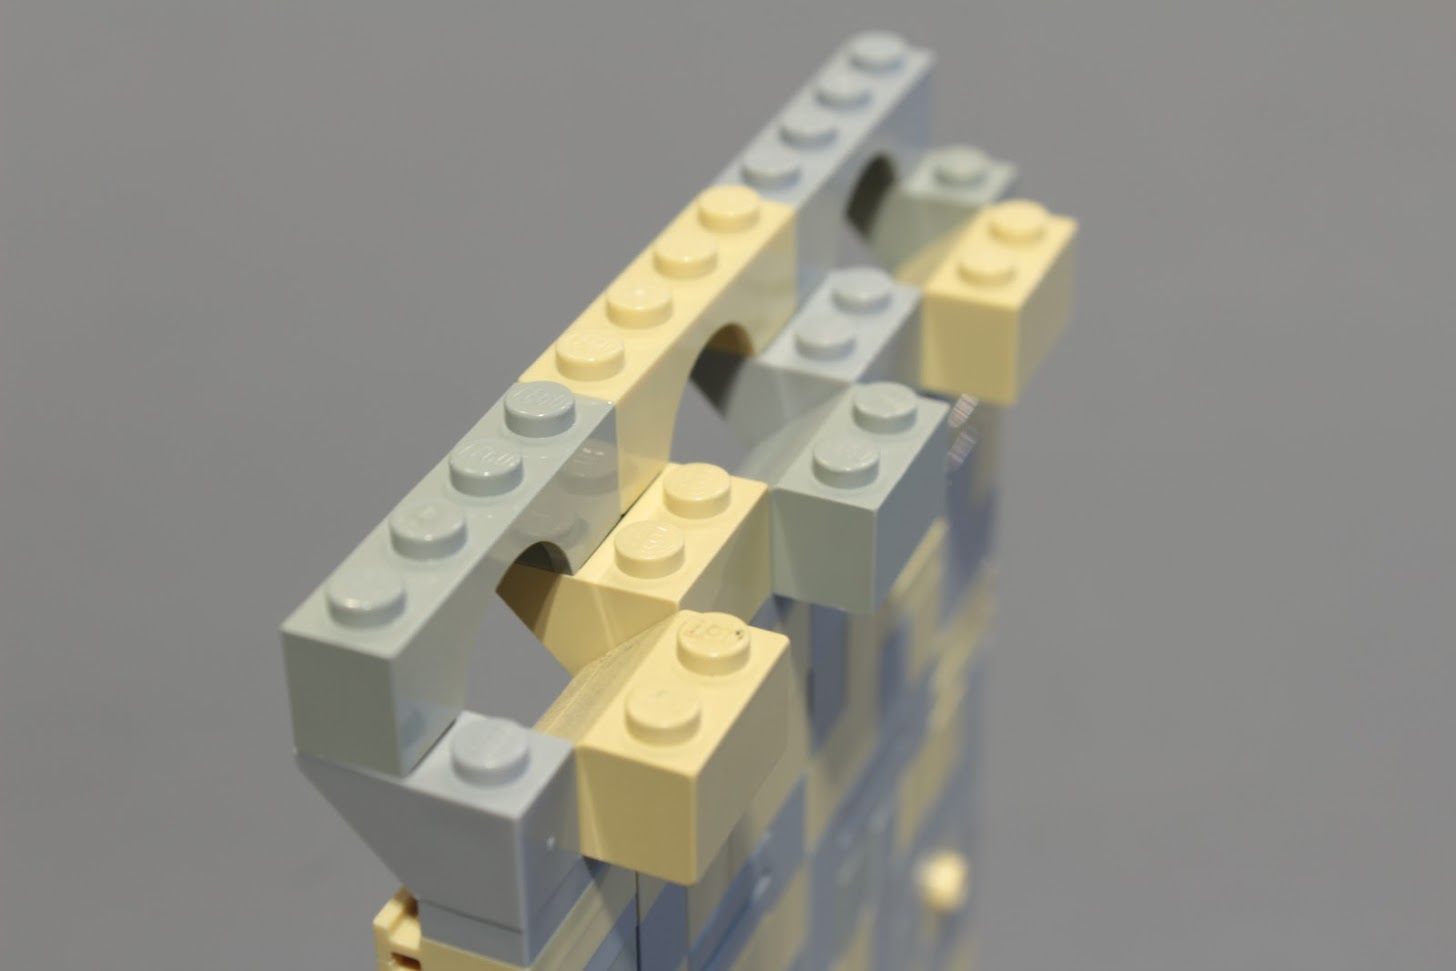
Next we will fill the 2 stud gaps with regular slopes, this leaves a nice gap for projectiles to be dropped or shot through at the enemy below.
Now I’m going to complete the back side of the wall section with regular bricks. If you know that this side won’t be seen in the finished project, you don’t have to be concerned with the color choices.
Build the back of the wall up until it is flush with the inverted slopes.
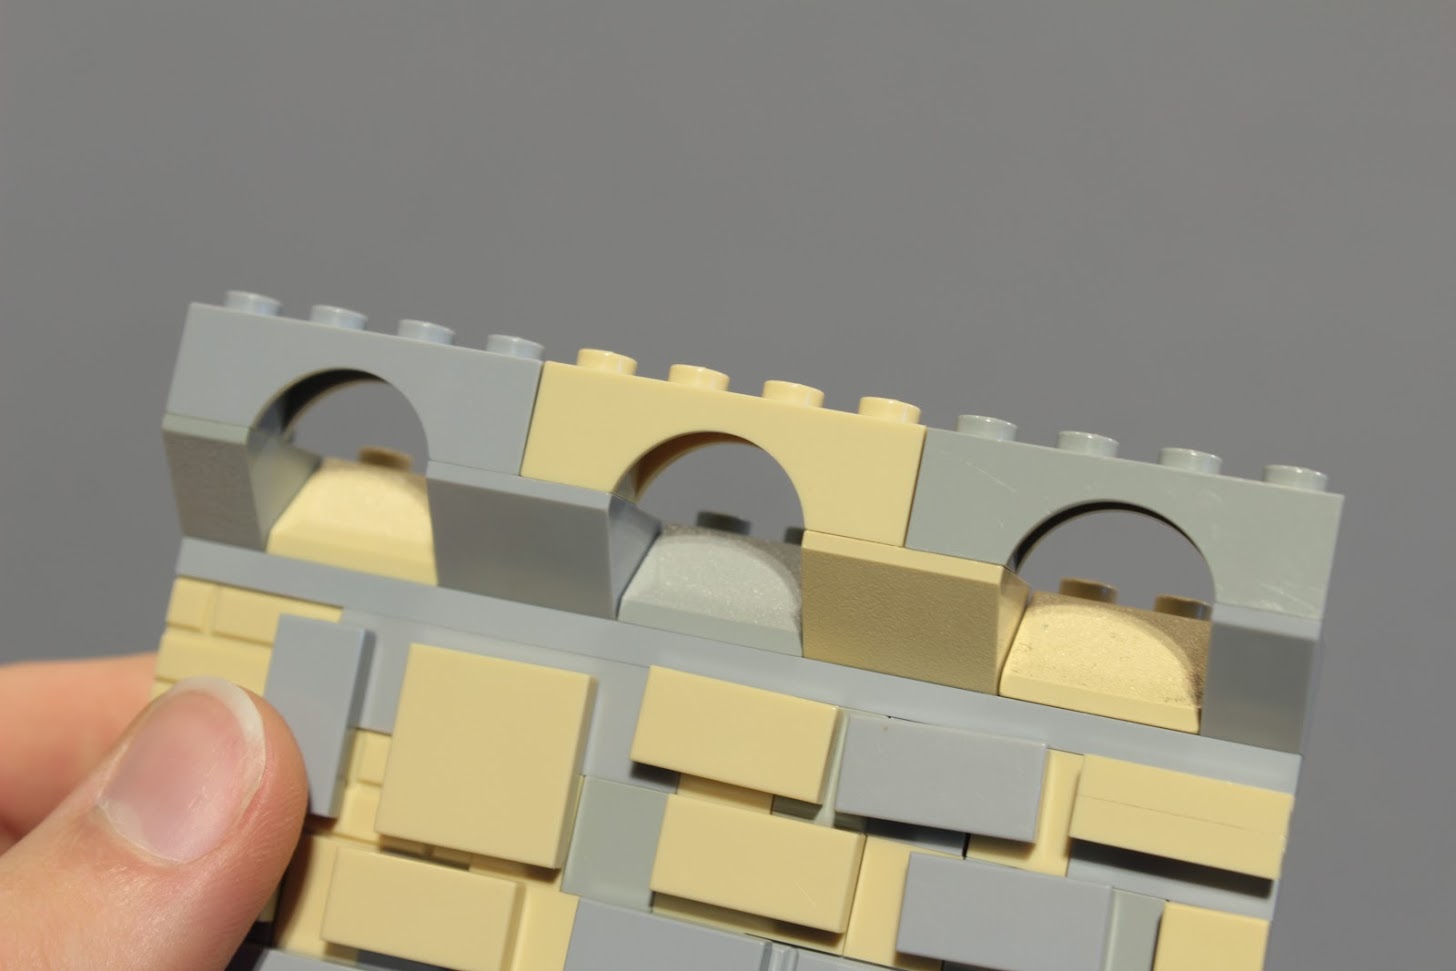
Add some regular bricks, slopes and tiles to complete the battlements.
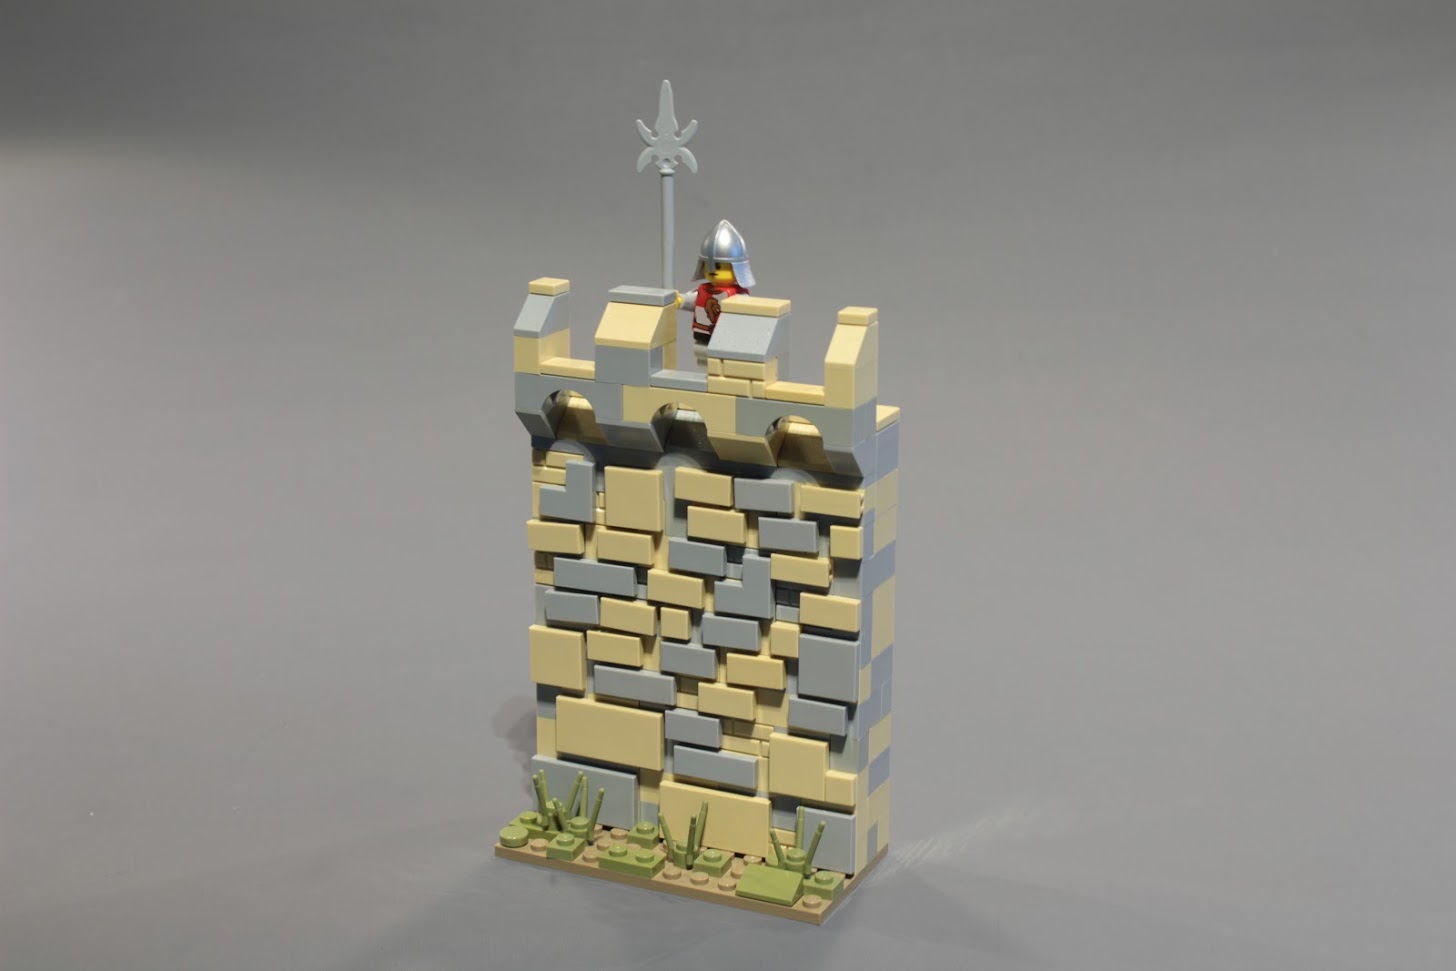
The final result is a nice little section of a castle wall.
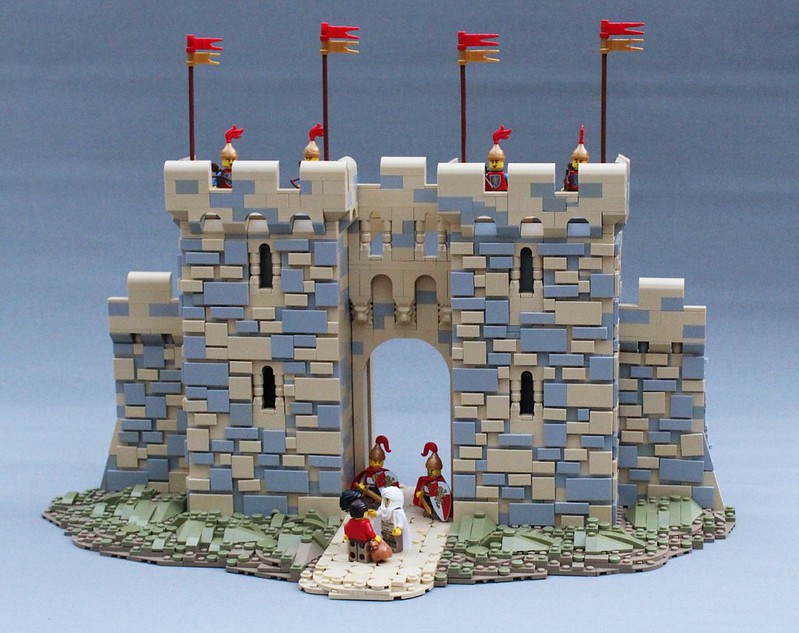
This technique is a lot of fun and provides a great amount of detail to an otherwise simple castle. The biggest drawback would be the amount of parts required to make it. If you are looking for some nice examples of this basic tiled wall design check out “The Western Gate”
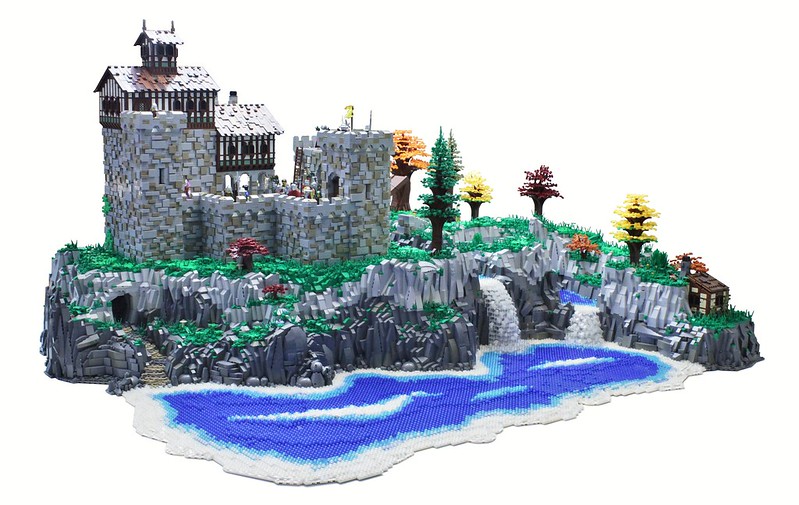
or “Clarendon Castle.”
Thank you, Mark, for that very useful guide on how to build a tiled stone wall!


A simple, but very effective technique!!! 😀
What Roanoke said! 🙂 Thanks for another great tutorial!