


Cozei shares his gorgeous round roof technique in this installation of our Featured Tutorials.
“Hello!
Today I am sharing my hut roof design. The goal of the roof was to sit comfortably on a round hut of stacked stones. To begin I was not sure how to make a faceted structure look mostly round and to connect those facets attached at a complex angle. My first thought was to use Mixel ball and socket joints. On their own these did not quite have the range of rotation needed, the arm of the ball end hit the socket sides. Adding a small turntable under the Mixel joint allows for some added rotation and a little forgiving float.
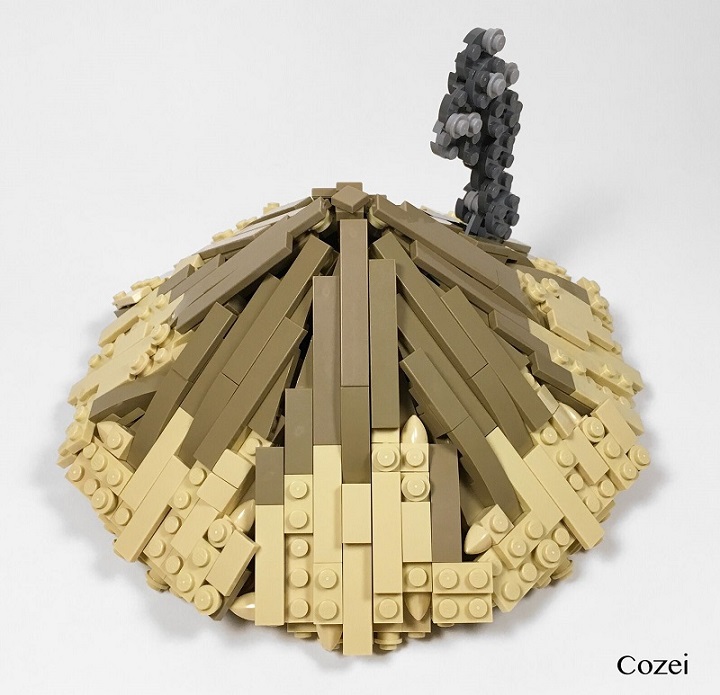
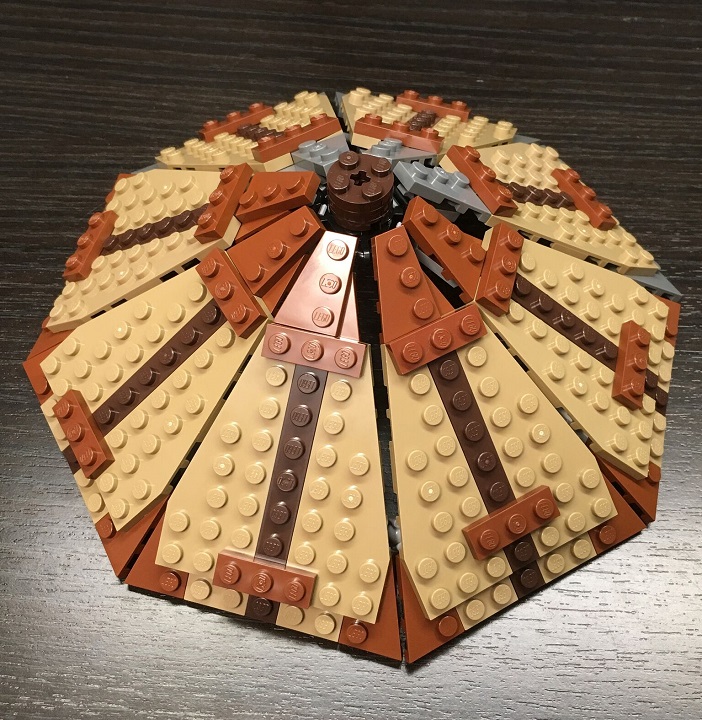
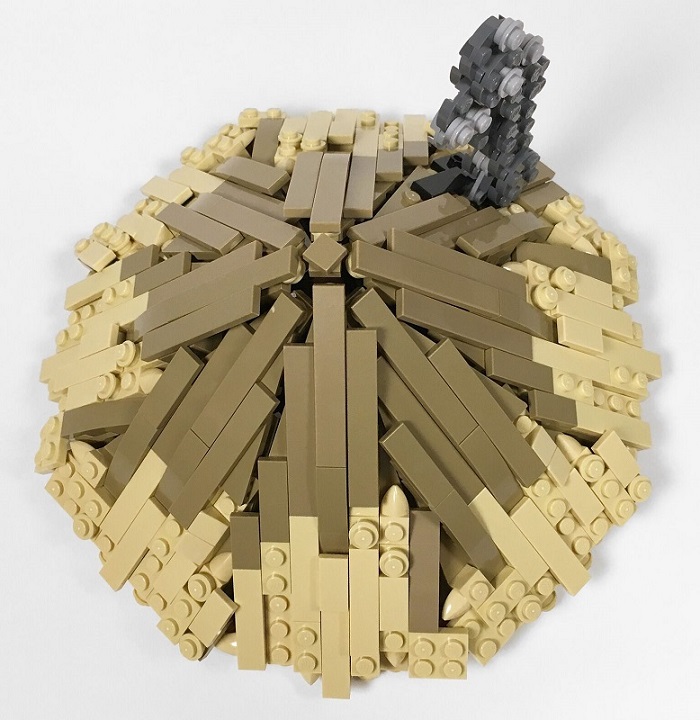
Here is the completed roof to start with some tile and studded plates to give a chunky thatched look. The grey rounds extending out are a column of smoke.
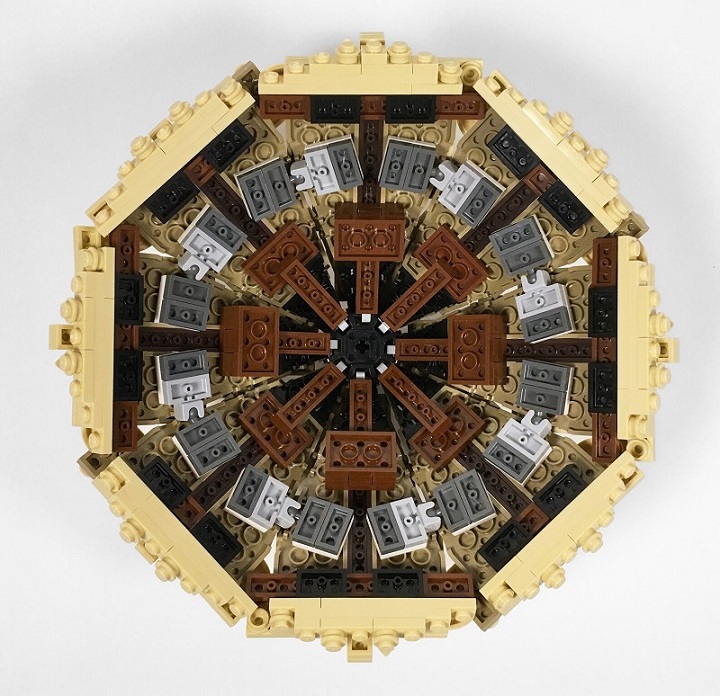
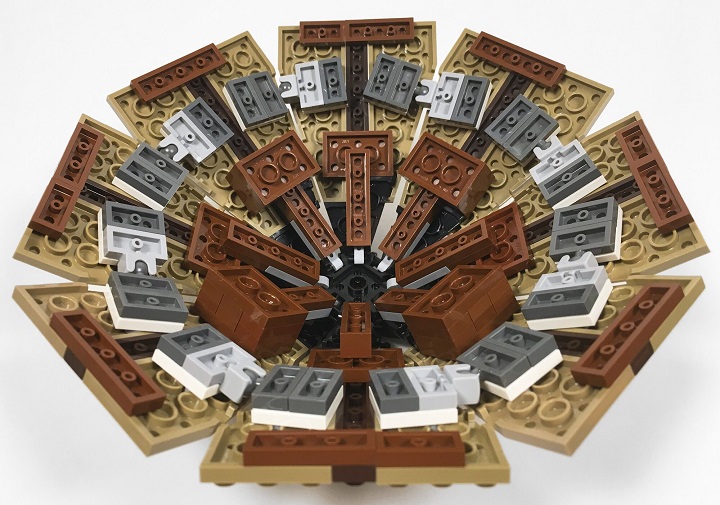
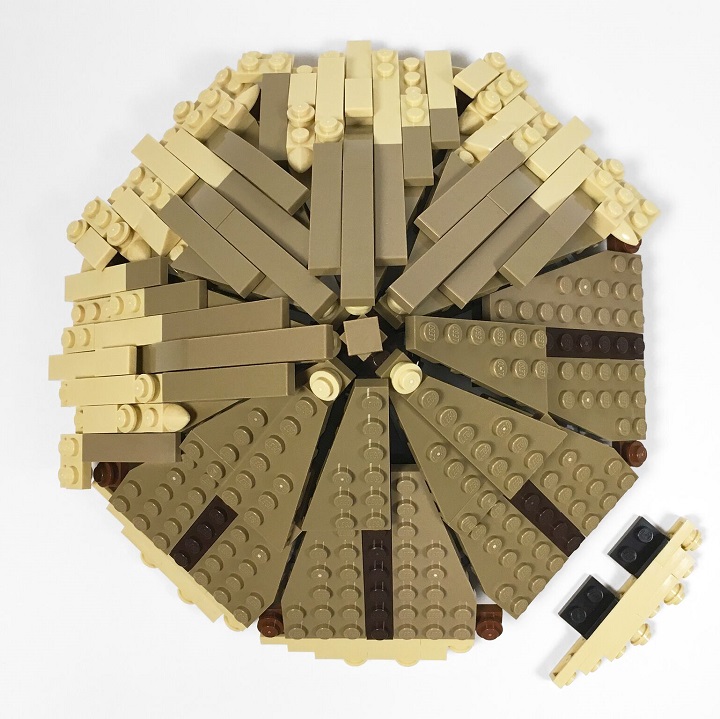
Here is a view of the complete roof underneath.
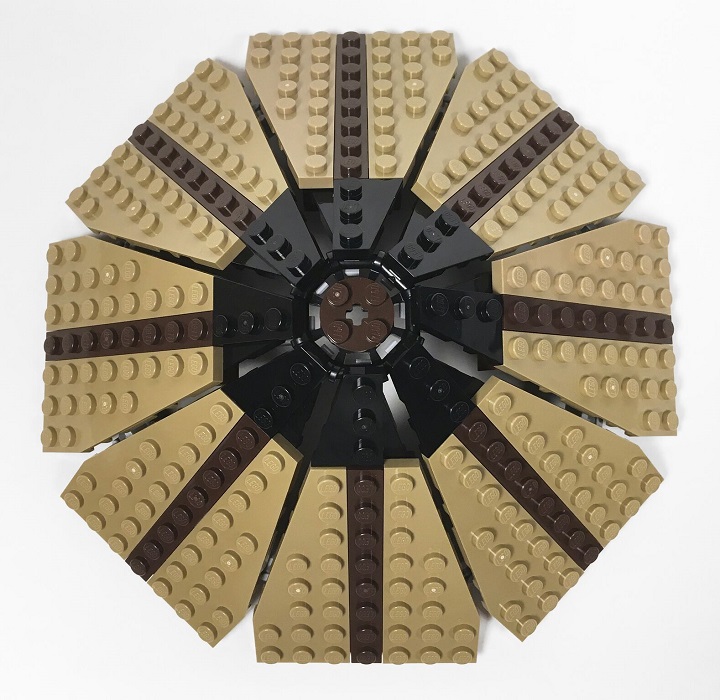
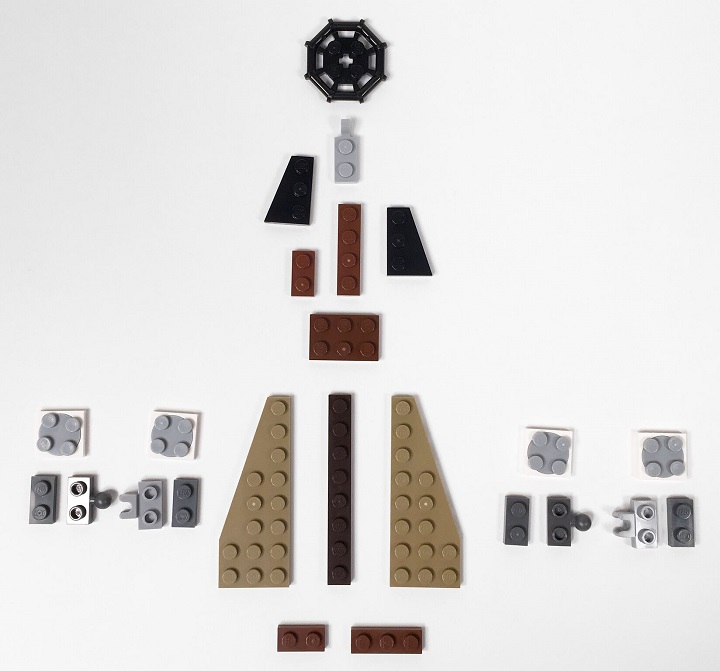
The roof structure before detailing is made of 8 roughly triangular panels. They connect at the top to an octagonal modified plate (with bar frame).
Each panel is constructed of 2 3×8 plate wedges, a 1×8 plate in the center, and 2 2×3 plate wedges. As well are a few connecting plates, a clip, and parts to make the ball and socket joints. The 2 small plate wedges are overlapped to make a single stud wide tip.
Here is a detail of the panel tip with clip.
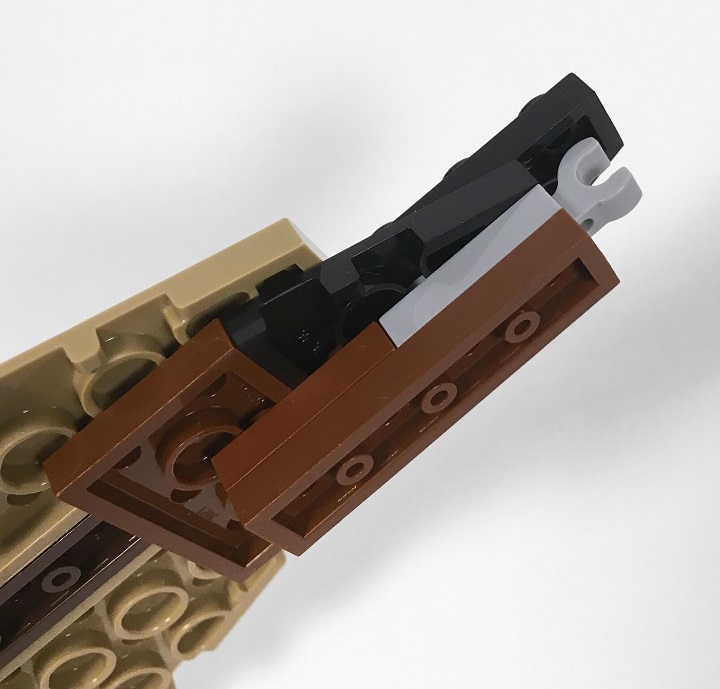
Each of the 8 panels clip into the octagonal center.
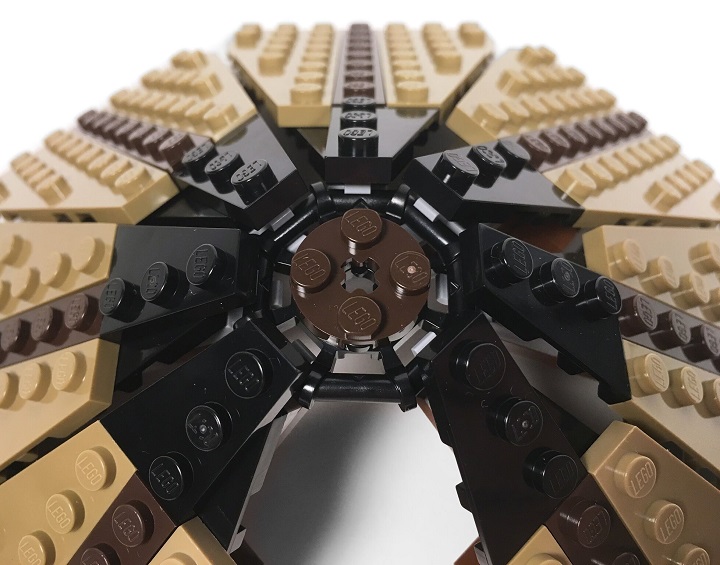
As you attach the panels to the center, the turntable + ball and socket joints can be added to span and connect the lower part of each panel. Note that each panel has some connecting 1x plates to span the outer edge dark tan 3×8 wedges and the center 1×8 plate. One solid spanning plate was not used because I also wanted a single stud overhang on each side to attach a 1×1 round (not show here), filling that gap in the end (visible in later images).
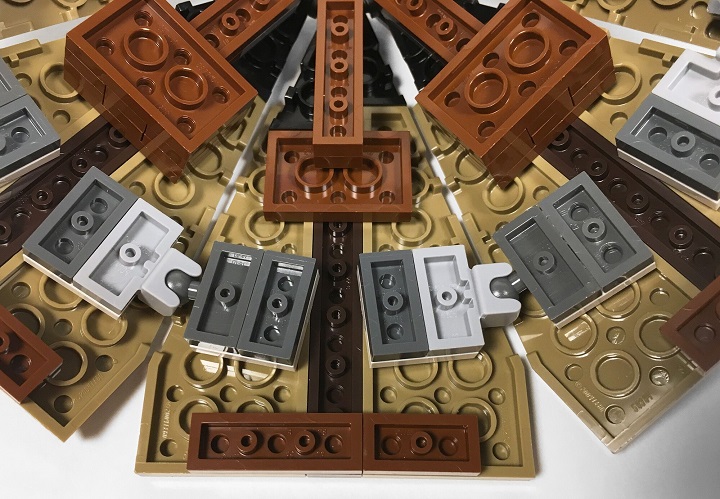
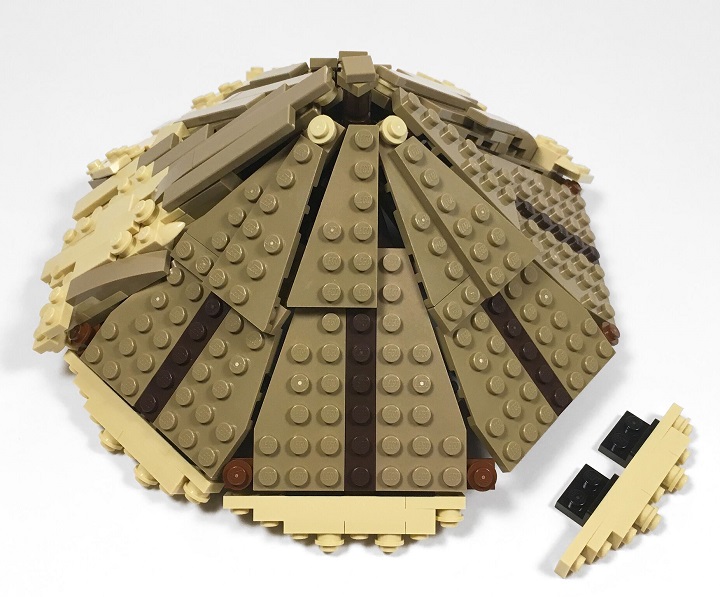
Last panel ready to attach.
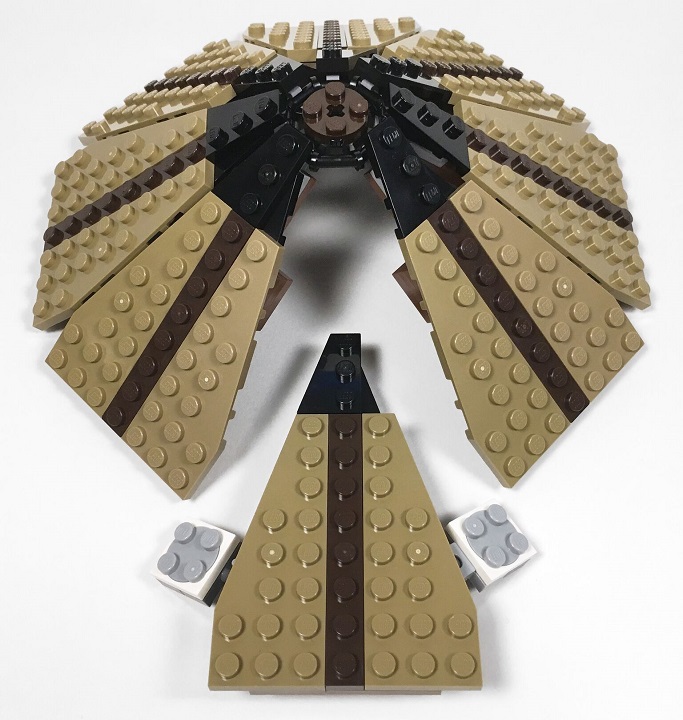
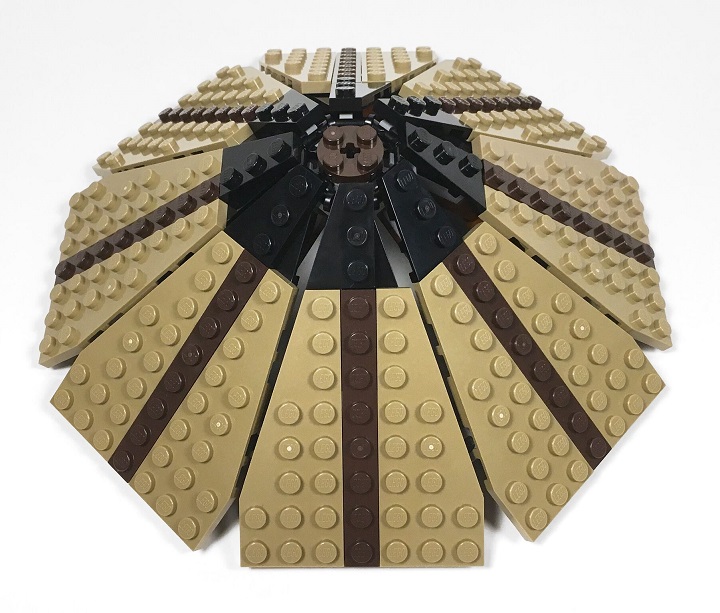
Once all the panels are constructed and attached this is the underside roof structure. The 4 blocky sections of 2×3 plates are just for reinforcement. Each panel could not have one as the corners will hit one another.
And as seen above this is the basic roof ready for detail.
Originally I had made each panel longer, but the roof over hung my hut walls too much. So a larger roof can be made with more or larger wedge plates. I liked how the corner panels were well filled in on the larger roof, but I solved the gaps at the edge in the smaller roof. I’m not sure if a yet smaller roof can be made with the 2×2 turntables. Without the center dark brown 1×8 plate the turntables hit each other. As well since each panel is an odd number of studs wide this allows for the 1 stud across point at the center. Something to try.
The gap between each panel is not too large. As I added detail pieces I tried to cover this more.
To save a bit on time and sanity I decided to work out 2 detailing schemes for the panels. Alternating the 2 sets of detail parts looked random enough for me. The roof is decently sturdy, but not immensely so. Repeating the detail sped up finishing and overall caused fewer fall-a-parts while figuring out part combinations.
I wanted the roof to have a chunky edge (like roof thatching) and something to breakup the octagonal lower edge even more. Here you can see the curving edges I added with brackets. In places I extended the top detail over these edge parts to obscure their connection, and hide gaps.
And we are back around again to a complete roof! I hope enjoyed the trip. :)
If you make a roof with the turntables and socket joints I’d love to see it. Find me on Flickr (Cozei) and message me. I’d love to see what you’ve made!!
Cheers,
Cozei”

Thanks for that very useful tutorial, Cozei!


Whoaaa. Now this is one I will make whether I use it or not. This is surprisingly simplistic!
Hi there, thank you for this.
How does your roof connect to your hut?
I would guess it rests in place – if you have the right diameter walls underneath it will naturally sit centered.