


Asian roofs can be quite a tricky thing to recreate in LEGO, but Jaap shares an excellent technique in this month’s featured tutorial.
“Hey there, Jaap here!
I guess that you are here for the tutorial on how to make curved asian roofs (and if you aren’t, you are still welcome!), so let’s not waste any more time and get started.
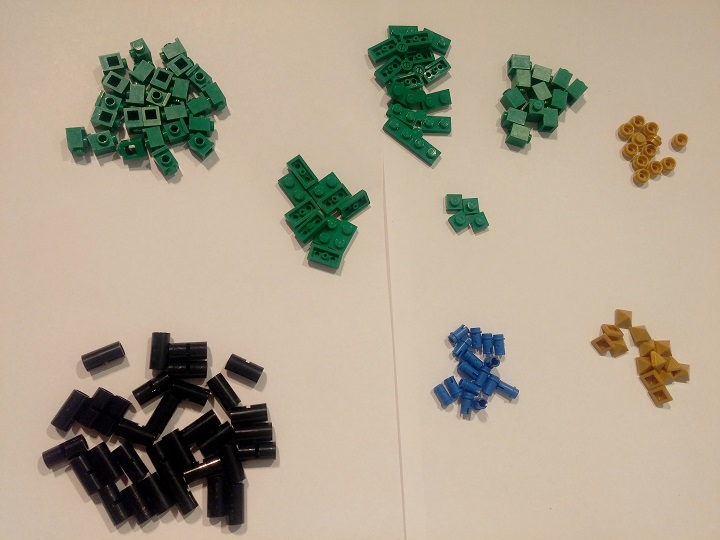
This tutorial shows you the basics of this roof technique, but it is very open for changes and different uses. So, when you look to the parts on the photo below, keep in mind that these are the parts I use to make the roof in this tutorial, but a lot of parts can be switched with different ones. Basically: the green ones are necessary(although replaceable for a different color of course), the gold ones you can easily swap and the black ones have some alternatives as well (like 1×1 round bricks) but the technic connectors are my favorite solution at the front of the roof.
Alright, you got the parts you need, so now we get to the real part: BUILDING!!!
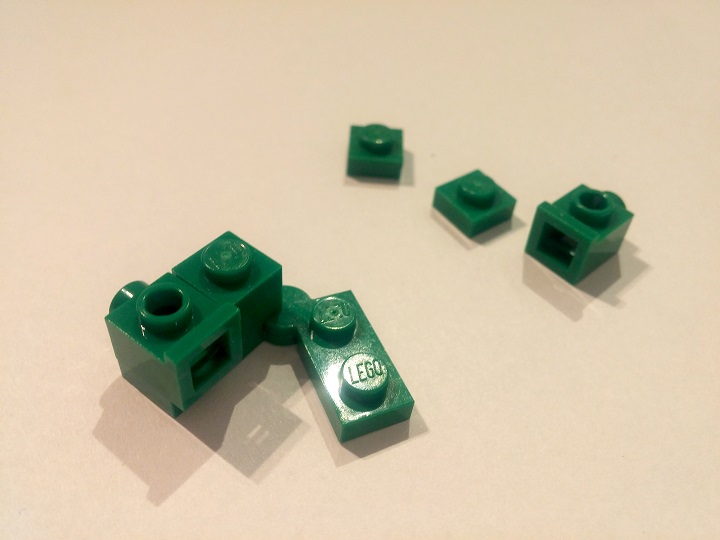
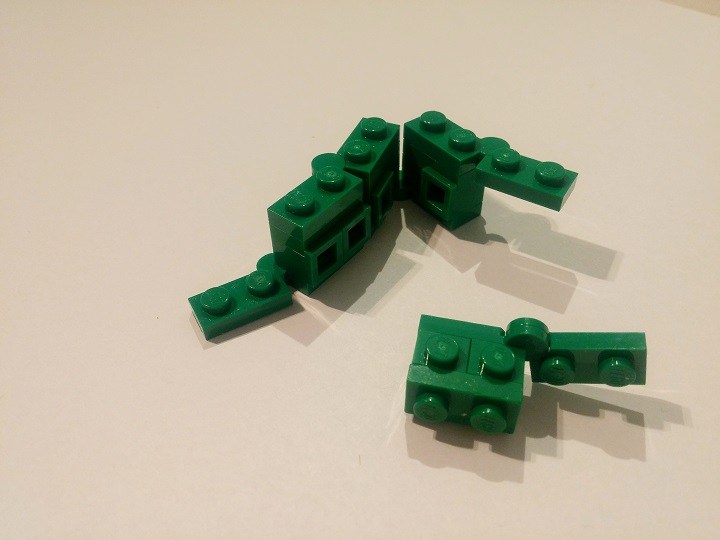
Start off with one of the hinges, stack 2 of the 1×1 plates and place them in the ‘middle’ of the hinge, with an headlight next to it (and the other side of the hinge mirrored), like shown on the photo below:
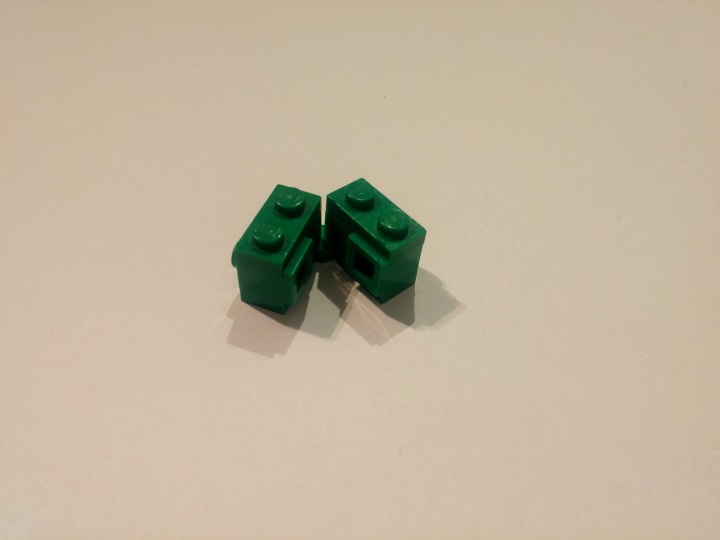
Add a 1×2 plate on top of it and you already have the biggest part of the middle of the whole roof! That was fast, right?
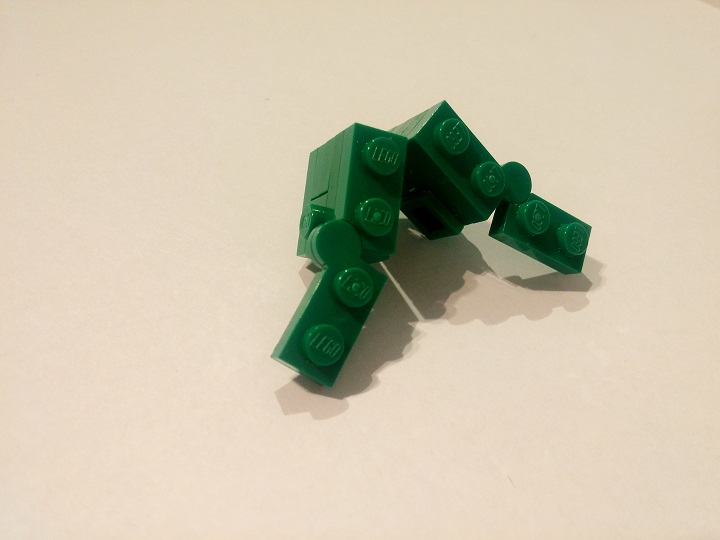
Add an hinge on top of the 1×2 plate, with the direction of the hinge in the other direction than the hinge you started with. Just as on the photo below:
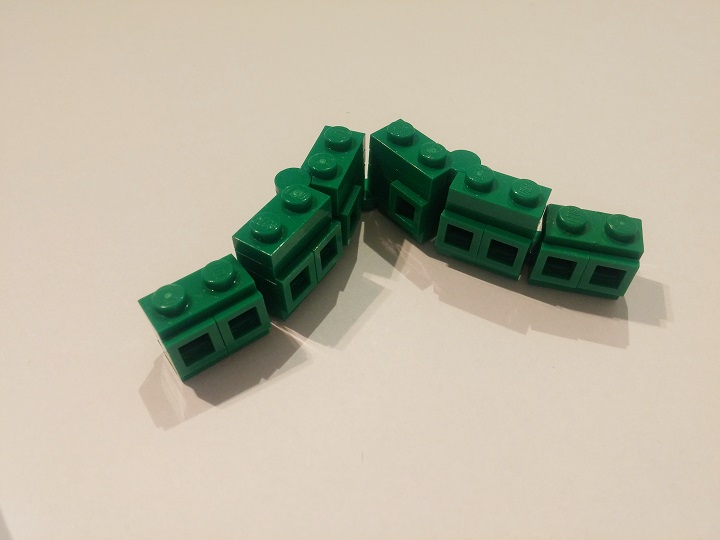
Next we continue with making the roof bigger. Take a hinge, put two headlight bricks on one side of it and finish off with a 1×2 plate. Also, make a mirrored one and than connect it to the part you built first, like shown on the photo below: (why am I even writing a tutorial, if you can just look at the photos?)
Add two headlight bricks to the other side of the hinges and add a 1×2 plate on top. Now you should be able to see the same technique repeat… And again, if you think my words don’t explain it clear enough, just look at the photo:
You can now make your roof as wide as you want. In this tutorial I added one more hinge on top, put a 1×2 plate beneath it, added 2 headlight bricks and finished off with another 1×2 plate(to replace the hinge if you don’t want a bigger roof).
The basic structure for the roof is finished, now we are going to make it look a lot more interesting.
Add headlight bricks to the bottom side of the roof, while alternate the direction of each next one by 180 degrees. Again, as shown on the photo below:
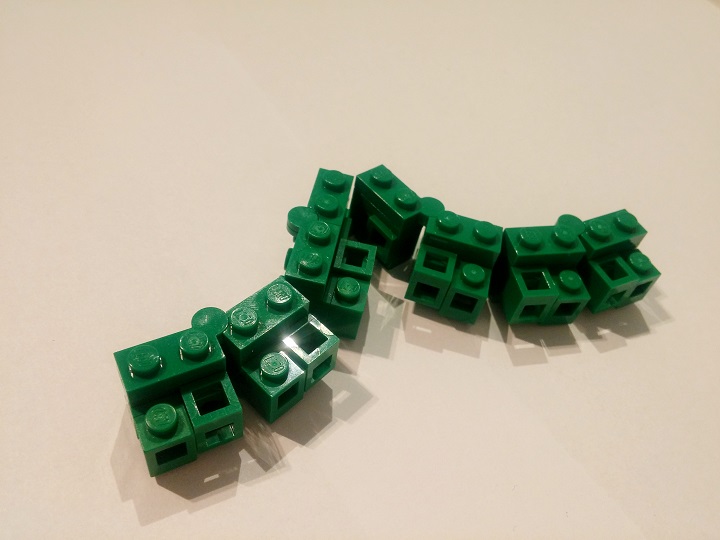
Next step is adding 1×1 bricks to the headlight bricks you just added to the bottom. Again, just look at the photo, not at my text…

The next steps add the decoration to the roof. Here you can vary as much as you want( I even encourage it…), but I show it the way I personally like it a lot.
I start with adding pearl gold 1×1 round plates to the 1×1 bricks, the same way as you added these to the headlights. Just look at the photo!
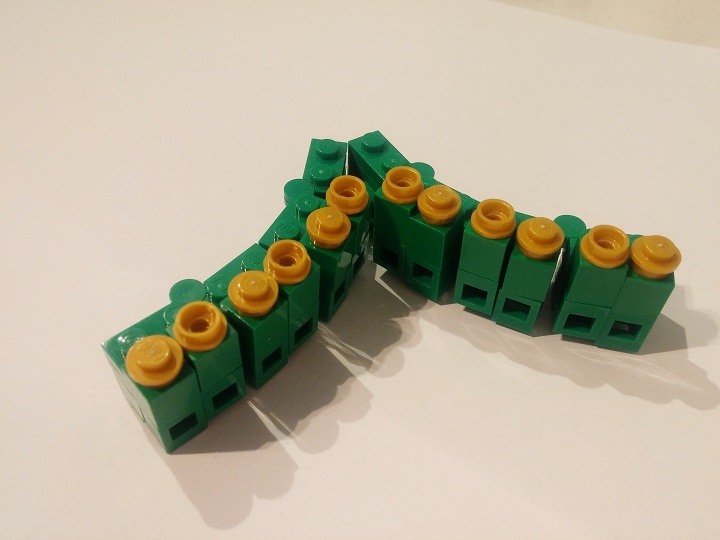
I was lucky enough to be able to buy pearl gold 1×1 pyramid pieces in Legoland Germany, and now I’m going to try and impress you with a very small amount of my collection of them… Don’t feel sad if you need to replace them with different pieces, but don’t forget to take a good look at the photo, and be impressed by the awesome pieces…

Now you can add the technic connector pieces to the studs of the hinges and make the roof itself. Just as easy as shown on the photo:
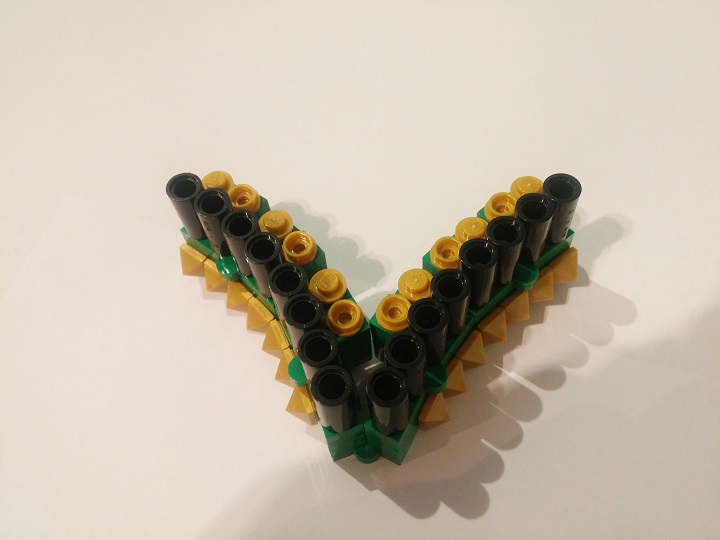
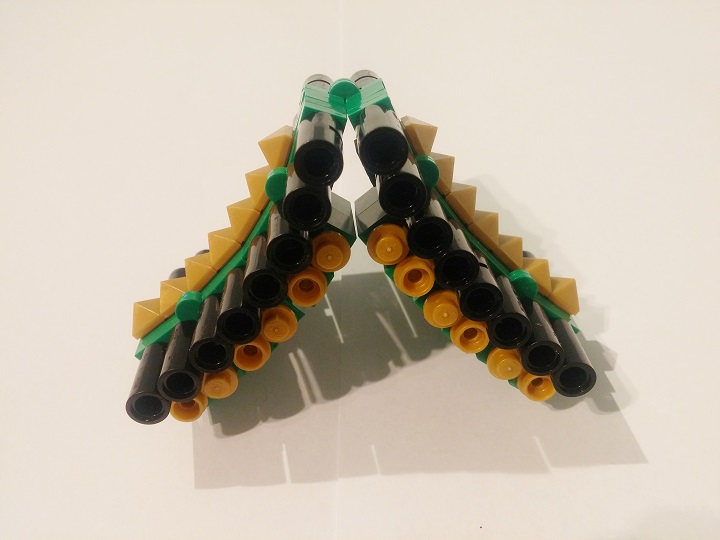
I added these connectors with technic-pins-with-stud to the back of the roof as well for this tutorial, but if you want to do that as well depends on the way you want to use this roof technique and how you are going to attach the roof to a building… Anyway, if you didn’t focus too much on the text I wrote, but looked carefully to the photos, you should be able to have a roof that looks somewhat similar to the one on the photo below:
Now you might think, cool technique, but how am I going to use it?
Here I have two builds I made using (variations on) this technique myself:


If you are enjoying this technique so much that you want to use it in your own builds, feel free to use it. But if you want you can tag me, so I can see what you guys come up with, while evolving this technique yourself!
Thanks for your attention, sorry if I wasted your time with writing text between the photos and I hope you have an amazing day!
Jaap (jaapxaap on flickr)”
Thanks for sharing that really clever design, Jaap!

