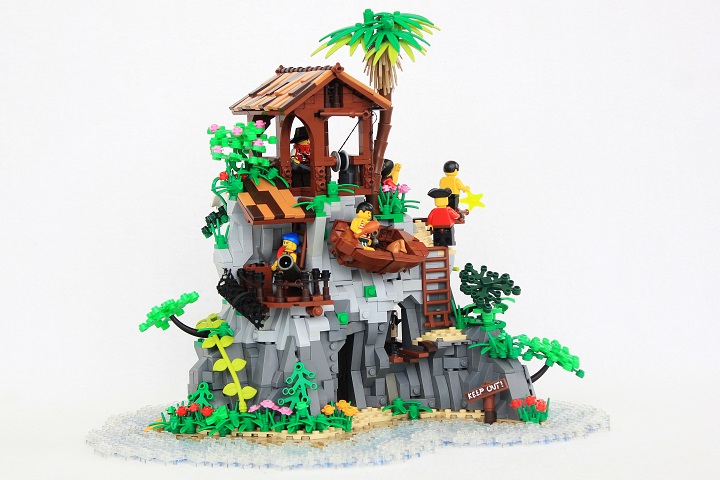
Today we’ll be taking a look at what went into creating one of only a handful of pirate builds I’ve done – Captain Hookey Hand’s Pirate Paradise. Let’s get to it!
To start things off, I built the base of the island. This consisted of dark tan plates to show the wetter sand, with medium azure under trans clear plates to form the water near the shore. You’ll also notice that the base is split in two halves – this is because I wanted the build to be able to pull apart, revealing a full interior built into the rocky cavern.

With the addition of regular blue plates, and more trans clear 1×2 plates on top of those, the water was done. The two blues give a nice transition to the shoreline, and also gave me the chance to finally put our medium azure 2×4 plates to use.

Continuing up the beach, I added another layer of dark tan plates and tiles, before switching to regular tan.

With the sand detailing completed, I could move onto the main part of the build: rockwork.

Since there was going to be an interior to the cave, I also wanted there to be a way to get into the cave – you know, just because that seemed like it might be a handy thing to have. I generally don’t use prefab doors, but in this particular instance, I thought it worked well.

The angled 2×6 wedge slope you see above the door was switched out for other parts later on, but it gave a pretty good idea of how I wanted the rockwork above the door to be shaped.

And still continuing on with the rockwork. There will be a lot of that with this build. One of the more interesting additions here is the rickety stairs leading up to the ladder. You can also see an attempt at a tropical-looking tree on the left of the island here – I didn’t end up using it in this build as I wasn’t entirely happy with how it turned out.

Here is what the inside was looking like at this point. I used wedge plates to create a rough stairway, which leads both to the stairs to go further up the island, and also to a little balcony area lower down that hadn’t been put on in this picture.

Every good pirate hideout needs a cannon, right? This little cutout in the rock was an especially fun part to build.

And even more rockwork. As you can see, I was mixing in some SNOT slopes in addition to the studs up slopes and bricks. I’m almost to the point where I start transitioning to light bley rock now.

A view of the backside of the island. Here you can see a little bit of the small balcony area I mentioned earlier.

Time to start doing light bley rockwork! I also added a small tree growing out of the rocks on the left.

The rockwork was starting to get a bit plain and boring, both to build and to look at, so I decided it was time to add another balcony area. It was pretty simple, with just a rolled up net and simple string railing. Still, it broke up the monotony of the rock face.

A view of the back, without the tree that I attempted earlier.

Almost there! Nearly all of the rockwork was at about the height I wanted it, which only left another platform/building area that I wanted on top. With that and a few other details added, the build would be done.

The finished product. I am very pleased with how this build turned out, although all that rockwork got to be pretty tedious!
I hope you enjoyed this build log, and be sure to let us know if you have any suggestions for future posts!


Thanks for sharing this, I have some plans for castle themed builds with lots of rockwork but didn’t know where to start because I lack experience. Your step by step insights will help a lot with overcoming my inhibitions!
You’re very welcome Tammo, glad you found it useful! Really looking forward to seeing your castle builds! 🙂