


Putting roofs on round towers is usually quite challenging, but Nick has come up with a beautiful design that he was happy to share with the rest of us.
“This roof was designed to sit on top of a 16 sided tower made using 1×4 swivel hinge plates (2429c01). I first encountered this style of round tower in the work of Derfel Cadarn, my first and greatest inspiration. There’s a short guide to it tacked onto the end of his ‘Guide to building a detailed medieval village‘.
His tower has more sides, 22 to be precise, but the principle is very similar. A lot more could be said about building these towers, but that falls outside the scope of this tutorial.
With that said, let’s build us a dang roof!
All up, here’s what you’ll need:
Plates:
32 1×1 plates (3024) (Black)
8 1×1 plates (3024) (Roof tile colours)*
32 1×2 plates (3023) (Black)
8 1×2 plates (3023) (Roof tile colours)
8 1×3 plate (3623) (Black)
16 1×6 plate (3666) (Black)
12 2×2 plates (3022) (Black)
4 2×3 plates (3021) (Black)
4 2×4 plates (3020) (Black)
1 2×6 plate (3795) (Black)
3 2×8 plates (3034) (Black)
88 1×2 jumper plates (3794) (Black)
57 1×1 round plate (4073) (Black)
9 1×1 round plate with open stud (85861) (Black)
16 1×4 swivel hinge plates (2429c01) (Light Bluish Grey)
8 1×2 modified plates with clip horizontal on end (63868) (Black)
2 2×2 modified plates with bar frame octagonal (Black)
Bricks:
48 1×1 bricks (3005) (Black)
8 1×2 bricks (3004) (Black)
8 1×2 bricks (3004) (Light Bluish Grey)
112 1×1 round bricks (3062b) (Roof tile colours)
4 2×2 round bricks (3941) (Black)
Tiles:
8 1×1 tiles (3070) (Black
8 1×2 tiles (3069) (Black)
8 1×8 tiles (4162) (Black)
8 1×1 modified tiles with clip (2555) (Black)
Slopes:
16 slopes 30 1x2x2/3 (85984) (Black)
8 slopes inverted 2×2 (3660) (Black)
8 2×1 curved slope (11477) (Black)
1 1×1 cone (4589b) (black)
1 bar 6L with stop ring (63965) (Black)
1 flag 4×1 wave (4495) (whatever colour you feel like)
1 wagon wheel (4489b) (Black)
* You could do all the 1×1 round bricks in the same colour if you wanted to, but I found that randomly combining 2 or 3 colours gives a really nice effect. I used Red, Dark Red and Dark Brown. I even threw in a few 1×1 cones (4589b) to mix it up a bit more.
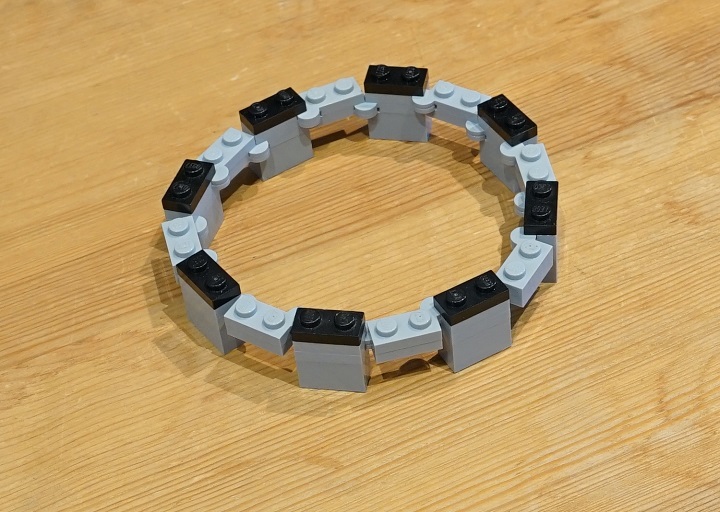
Make a circle out of swivel hinge plates, and place 1×2 bricks on the bottom and 1×2 plates on top. Don’t worry about making a neat circle, that will sort itself out soon enough. Note that the 8 1×2 bricks are only there to make the roof easier to work on during this tutorial. Think of the ring of hinge plates as the end of your round tower and the beginning of the roof.
16 1×4 swivel hinge plates (2429c01) (Light Bluish Grey)
8 1×2 plates (3023) (Black)
8 1×2 bricks (3004) (Light Bluish Grey)
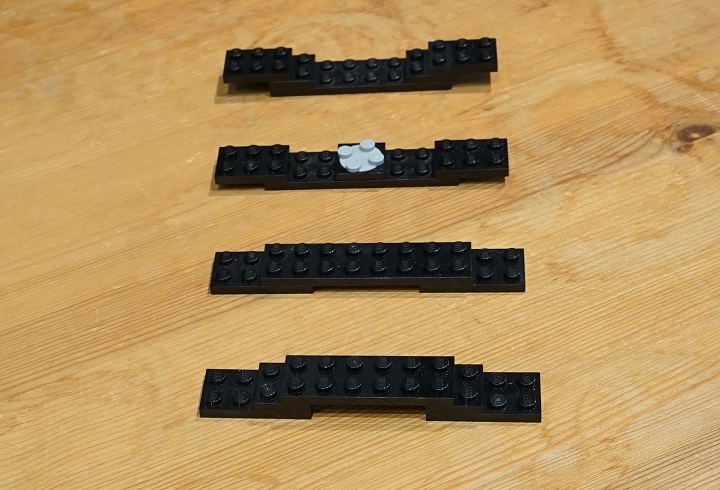
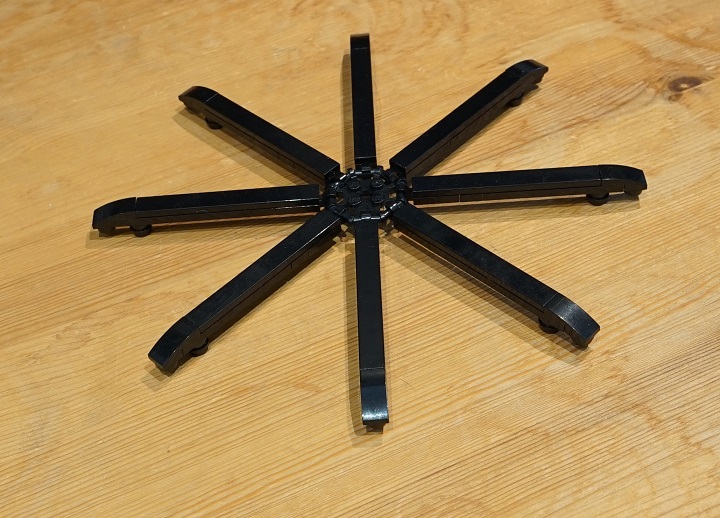
Build 4 support beams. While you could build the support structure underneath the roof in any colour, I stuck to Black, because the roof does end up having some gaps, and a black underlay does the best job of hiding these.
4 2×2 plates (3022) (Black)
4 2×3 plates (3021) (Black)
4 2×4 plates (3020) (Black)
1 2×6 plate (3795) (Black)
3 2×8 plates (3034) (Black)
1 turntable (3680c02)
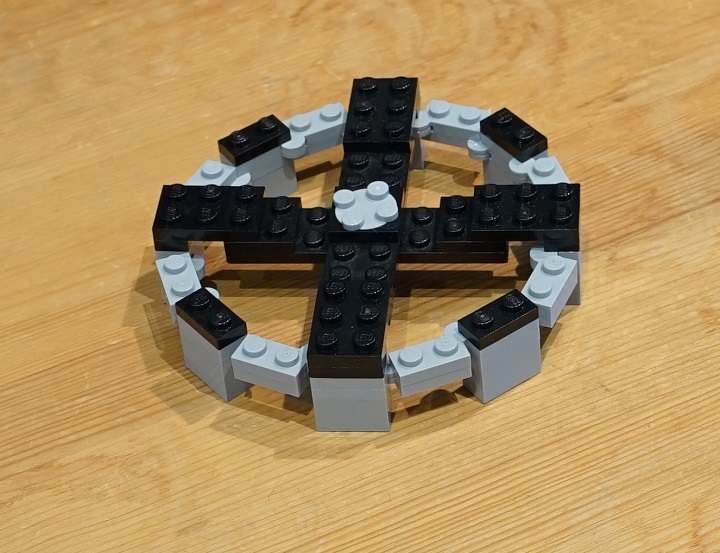
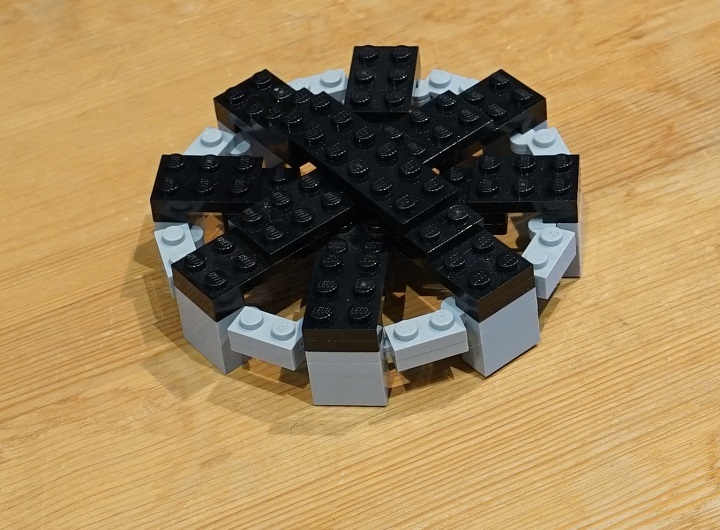
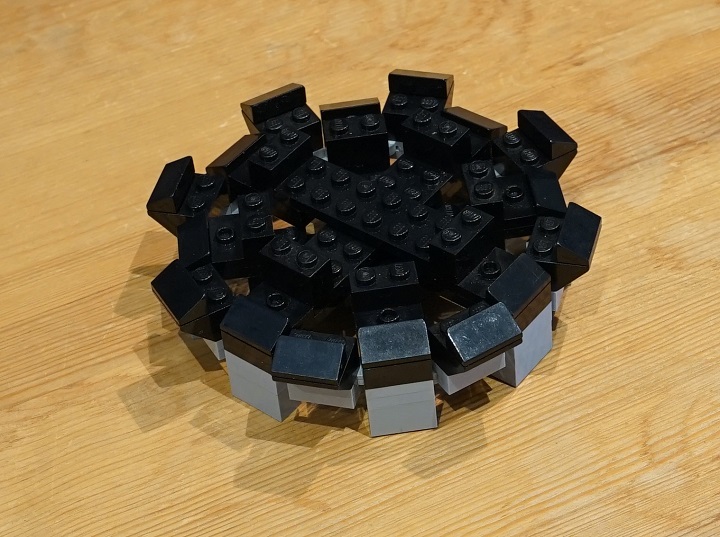
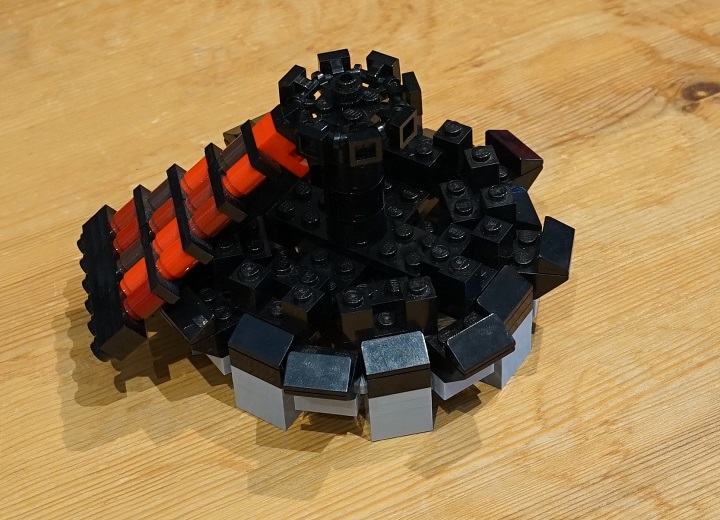
Place the 4 support beams around the circle in sequence.
Make 8 of these.
8 slopes 30 1x2x2/3 (85984) (Black)
8 slopes inverted 2×2 (3660) (Black)
Add the 8 elements from the last picture to the circle. Add 8 slopes to the ends of the beams, then 8 jumper plates behind those, then 8 bricks behind those.
8 1×2 jumper plates (3794) (Black)
8 1×2 bricks (3004) (Black)
8 slopes 30 1x2x2/3 (85984) (Black)
Make 8 of these.
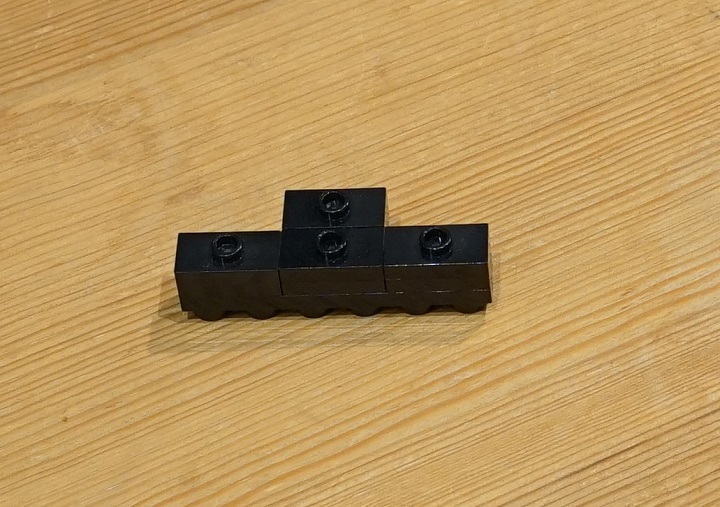
16 1×1 bricks (3005) (Black)
8 1×3 plate (3623) (Black)

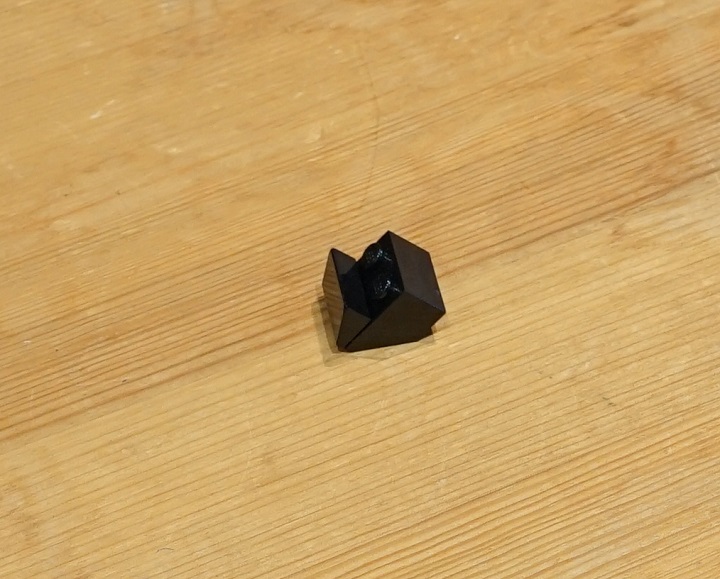
Stack a 1×1 round plate and a 1×1 round plate with open stud in the center of a 2×2 modified plate with bar frame octagonal. Be sure to place each tile with clip exactly in the middle of the bar frame section. This will ensure that the roof panels sit neatly and align well.
8 1×1 modified tiles with clip (2555) (Black)
1 2×2 modified plate with bar frame octagonal (Black)
1 1×1 round plate (4073) (Black)
1 1×1 round plate with open stud (85861) (Black)
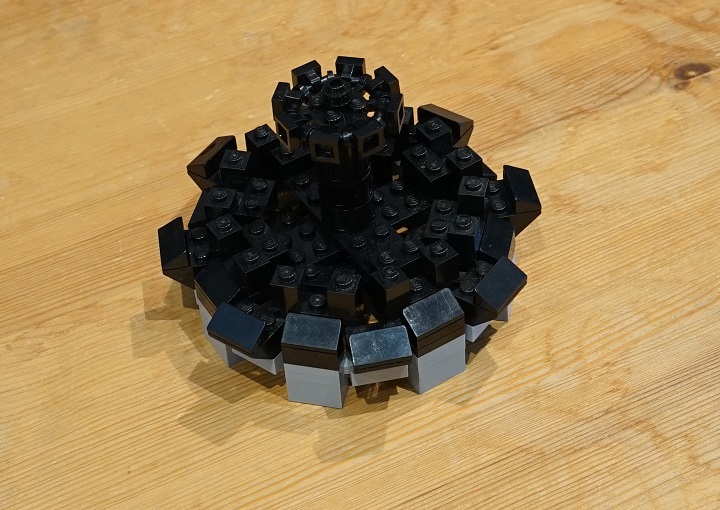
Place the 1×3 plate with 1×1 brick assemblies on the jumper plates around the circle, and place recently completed assembly on top of a stack of 4 2×2 round bricks in the center of the assembly.
4 2×2 round bricks (3941) (Black)
Make 8 of these.
48 1×1 round plate (4073) (Black)
32 1×2 jumper plates (3794) (Black)
16 1×2 plates (3023) (Black)
8 1×6 plate (3666) (Black)
8 2×2 plates (3022) (Black)
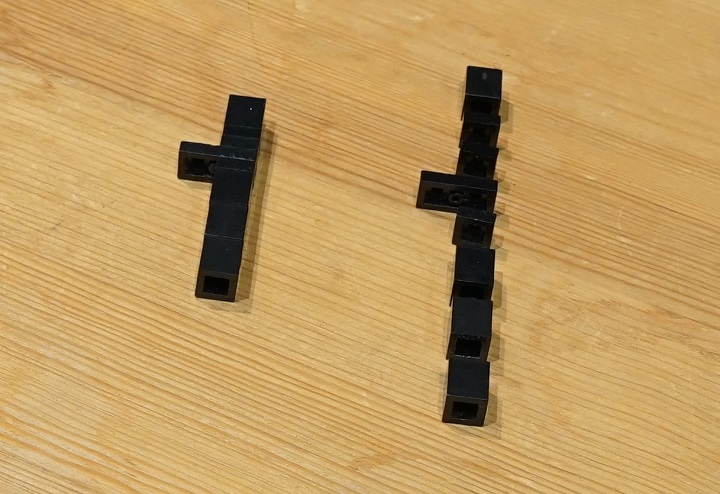
Make 8 of these as well. These are the support beams for the tiled sections.
32 1×1 bricks (3005) (Black)
24 1×1 plates (3024) (Black)
8 1×2 plates (3023) (Black)
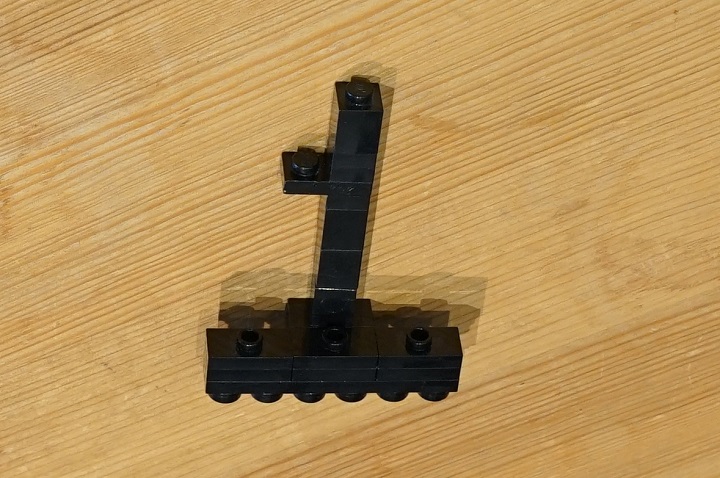
Combine the elements from pics 10 and 11. Make sure the 1×2 plate in the support beam is always pointing in the same direction, otherwise you’ll get in trouble during the final assembly.
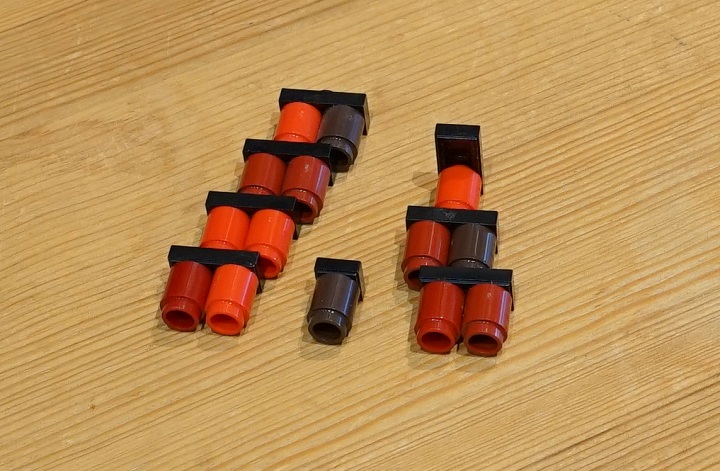
Make 8 of each of these. They’re the actual tiled sections. Note the 1×2 tile sticking out at the top of the second largest piece.
112 1×1 round bricks (3062b) (Roof tile colours)
48 1×2 jumper plates (3794) (Black)
8 1×1 tiles (3070) (Black)
8 1×2 tiles (3069) (Black)
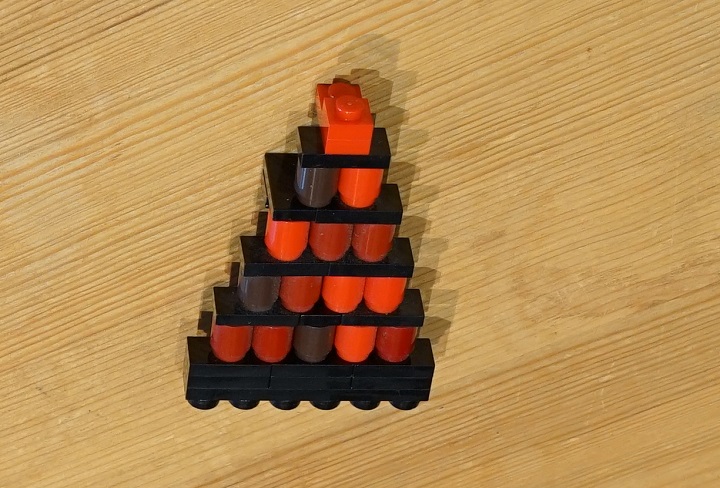
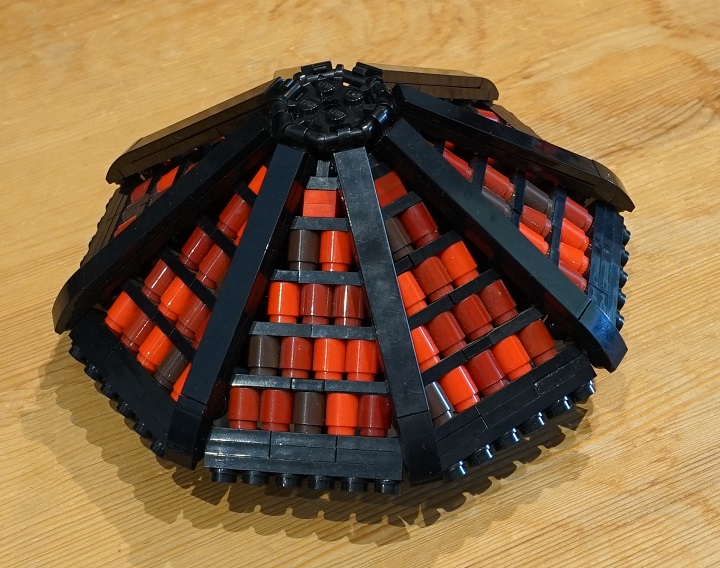
Combine the elements from pics 12 and 13. Place the smallest piece in the middle, then add the next largest piece, then the largest. Note that the 1×2 tile attaches to the 1×2 plate on the support beam. Finish the panel off with a 1×1 and a 1×2 plate in the same colours as your 1×1 rounds.
8 1×1 plates (3024) (Roof tile colours)
8 1×2 plates (3023) (Roof tile colours)
Attach a panel to one of the tiles with clip attached to the bar frame octagonal plate. Push it down gently, until it’s sitting snug between the 2 1×1 bricks.
Do the same with the remaining 7 panels.
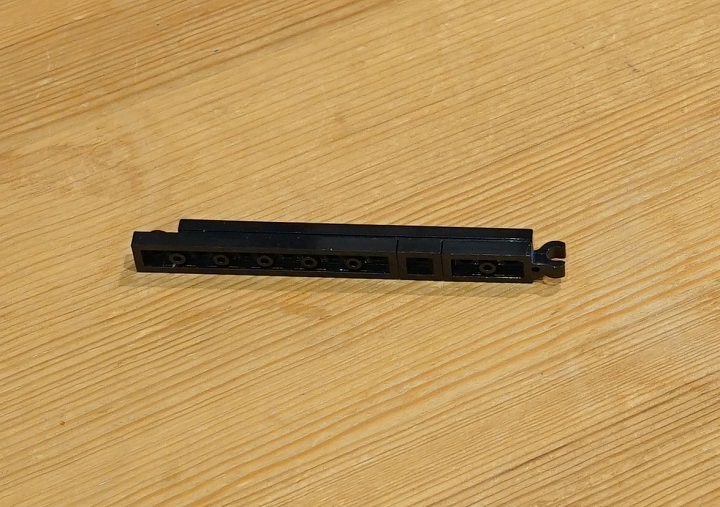
Make 8 of these. These beams will hide the gaps between the roof panels.
8 1×8 tiles (4162) (Black)
8 1×6 plates (3666) (Black)
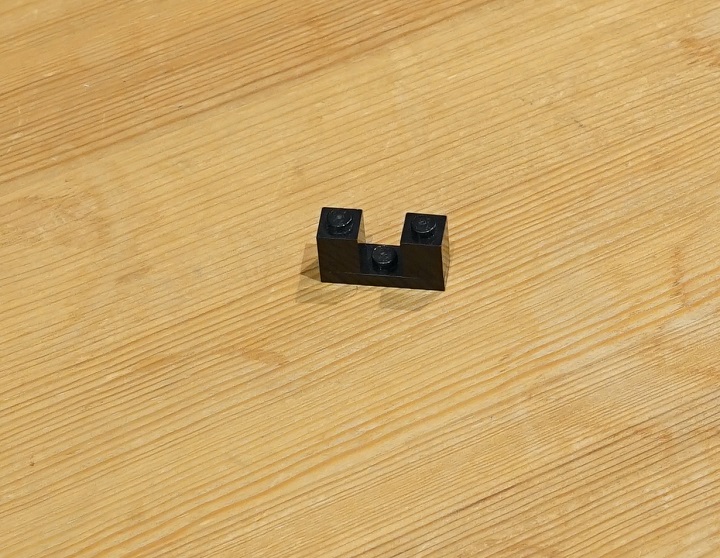
8 1×1 plates (3024) (Black)
8 1×2 modified plates with clip horizontal on end (63868) (Black)
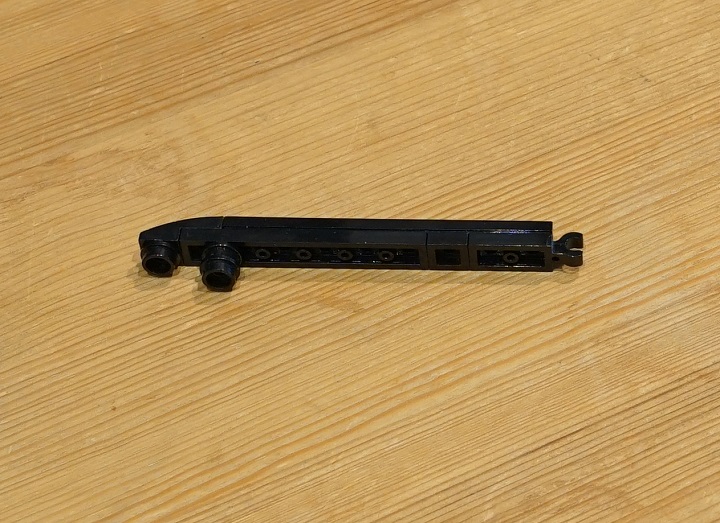
Stack a 1×1 round plate with open stud on top of a 1×1 round plate and place it on the last offset on the underneath of the 1×6 plate. Add a 2×1 curved slope and another 1×1 round tile.
16 1×1 round plate (4073) (Black)
8 1×1 round plate with open stud (85861) (Black)
8 2×1 curved slope (11477) (Black)
Place the 8 beams around another bar frame octagonal plate. Again, be sure to place them neatly in the middle of the bar.
1 2×2 modified plates with bar frame octagonal (Black)
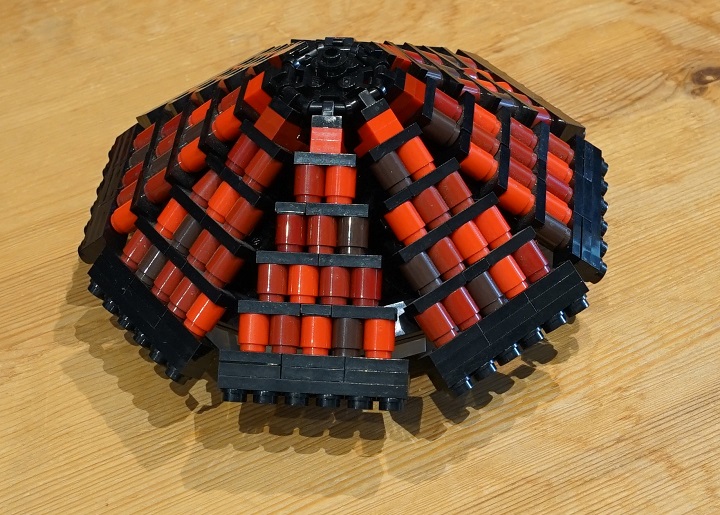
Attach to the top of the roof and push the beams down. The 1×1 round plates should fit neatly into the gaps.
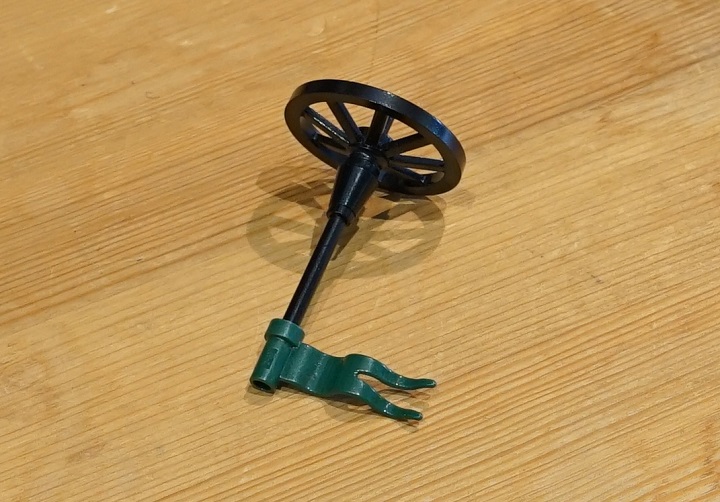
Attach a flag to the side of the 6L bar that has the stop ring. Slide a cone and a wagon wheel onto the other side.
1 1×1 cone (4589b) (black)
1 bar 6L with stop ring (63965) (Black)
1 flag 4×1 wave (4495) (whatever colour you feel like)
1 wagon wheel (4489b) (Black)
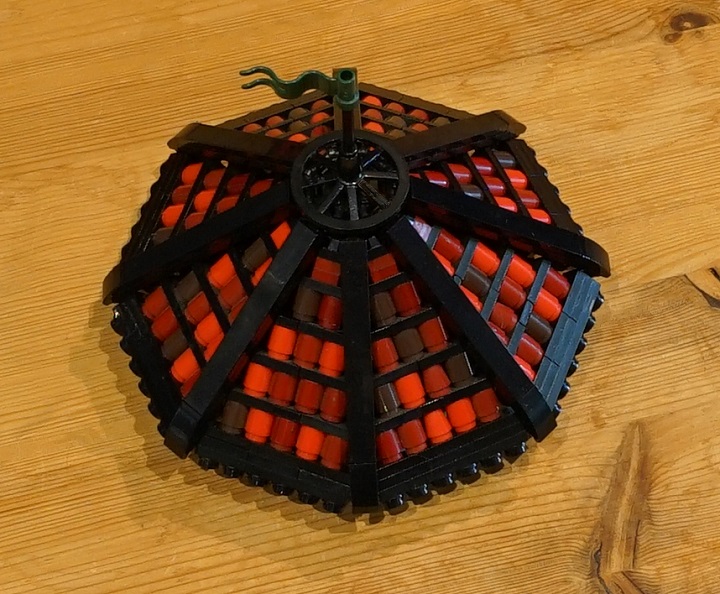
Stick this assembly to the top of the roof and that’s it! You’re done 🙂
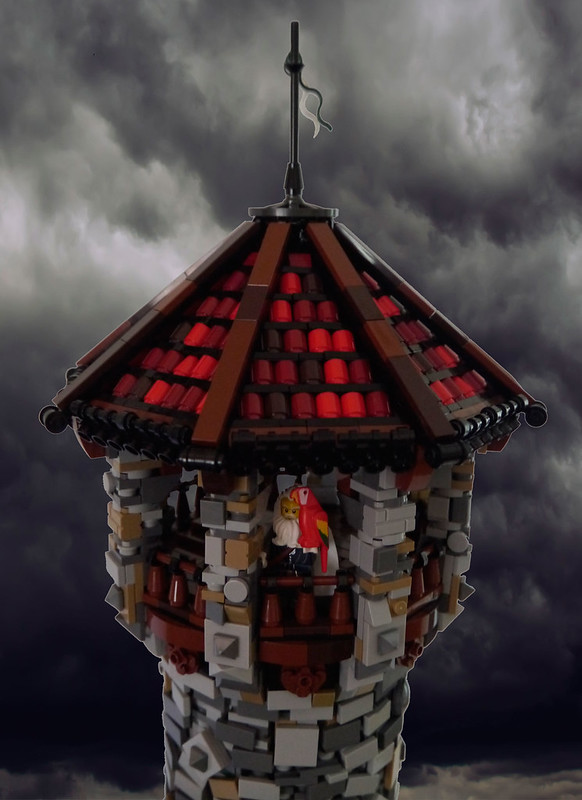
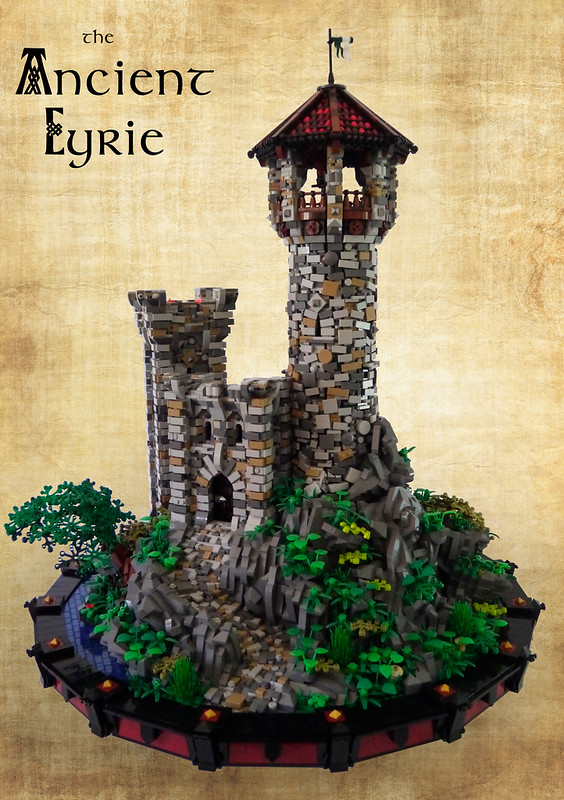
I used a roof very similar to this one on The Ancient Eyrie:
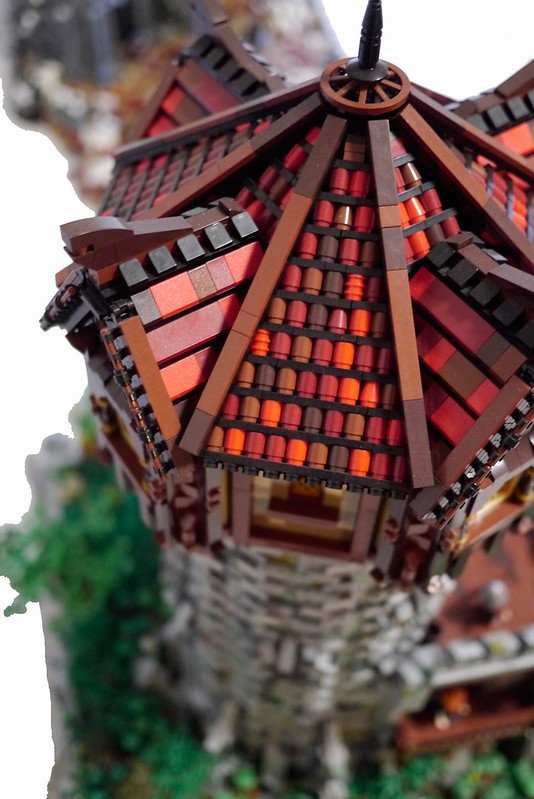
And also on Bridge of Lost Souls:”
Beautiful roof design, and one that I’m sure I’ll find useful myself in future builds! Thanks for sharing Nick.


I really liked your tutorial on your 8 sided roof. I’m making a little MOC of an African village and the roofs perfectly fit the hut I had made!!! Do you have any tutorials on making trees? I appreciate your step-by-step directions. So clear. Thanks again.
Thanks, great to hear it was helpful for you!
We do indeed have quite a few tutorials on trees.
Superb! Thank you.