


This month Garmadon shares his technique for a lovely rope bridge.
“You will need:
2 2×6 brown plates
1 2×4 brown plate
2 1×2 brown plates
1 1×6 brown plate
4 2×2 brown corner plates
4 1×4 brown tiles (or the equivalent)
27 1×4 brown plates
26 1×1 brown plates
28 tan elephant tails
52 studs (color is unimportant)
2 black strings, medium length (31L, I believe)
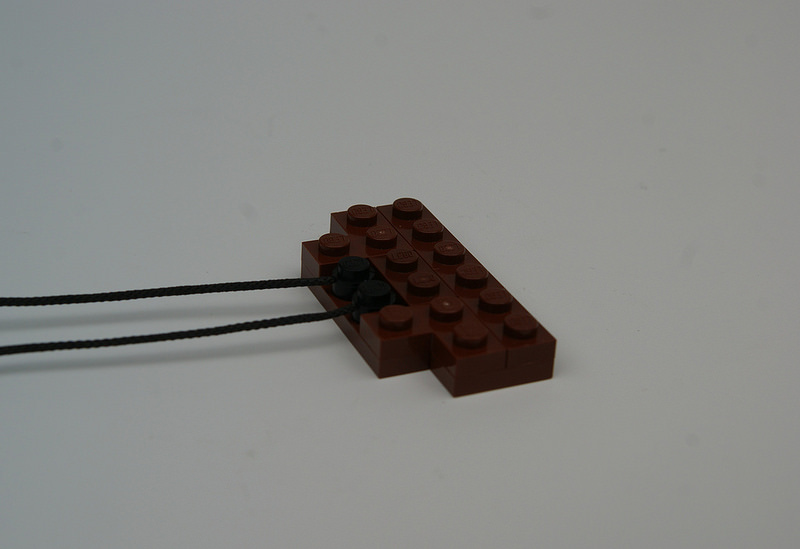
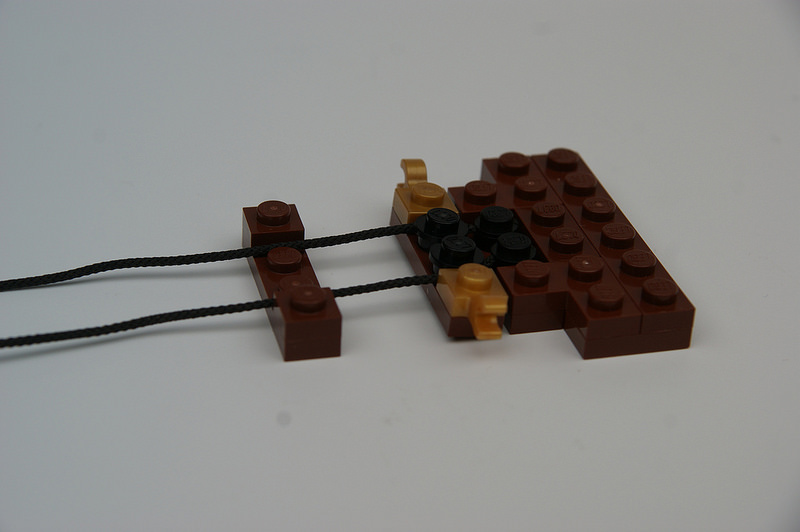
To start off with, let’s put together the two ends, attached, which are fairly straightforward:
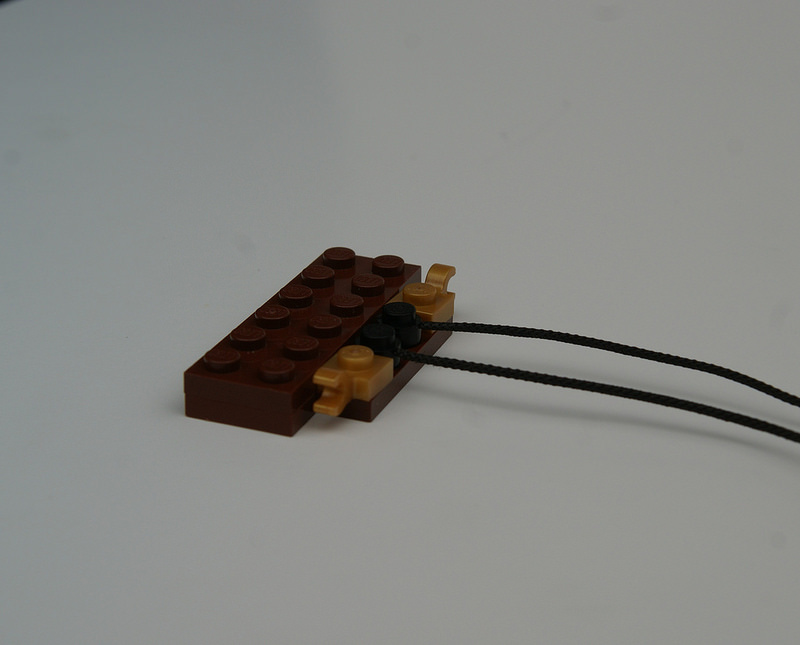
Next, we’ll take the first of the 1×4 plates with the clips attached on either end, and place the string running right next to them.
Then place the two black studs in the center, making sure the string can run through the little groove on the side without difficulty (usually, just moving the string back and forth a little as or after you get the stud in place will do the trick).
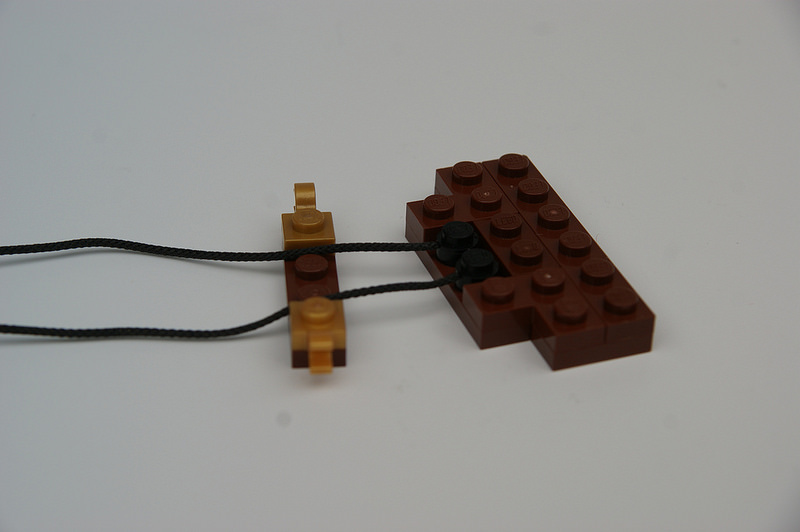
Then we’ll run that one up to the end, and do the same thing with the next plate, except that this one will have 1×1 plates on the sides, instead of clips.
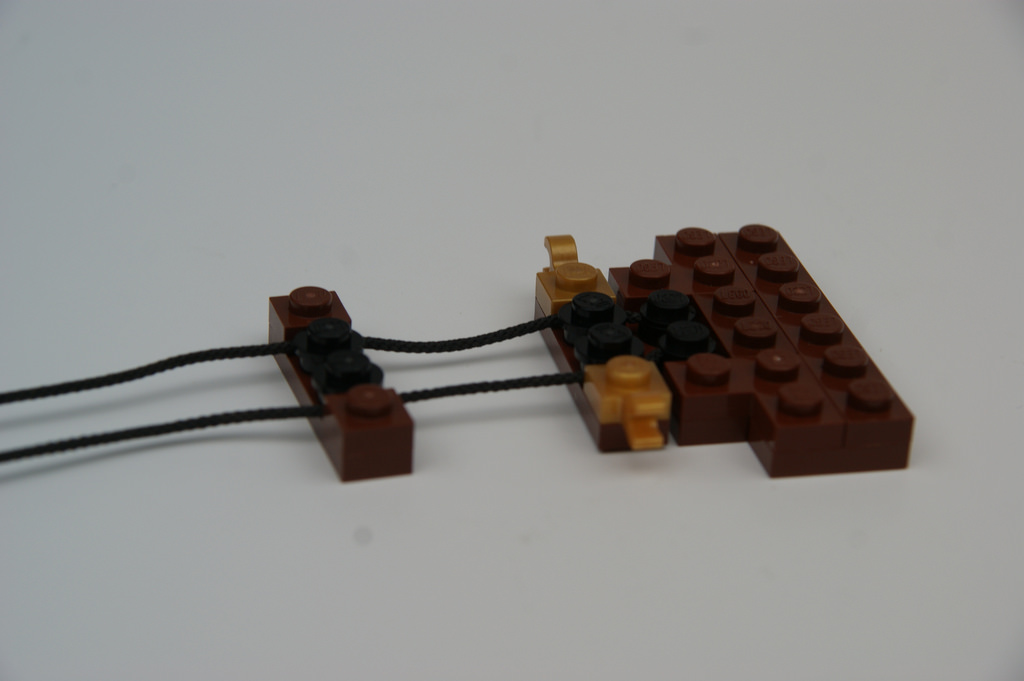
Rinse and repeat!
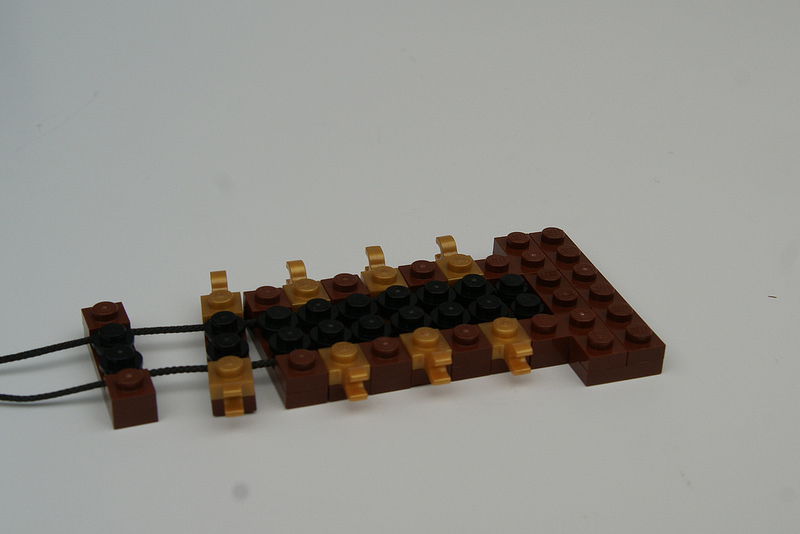
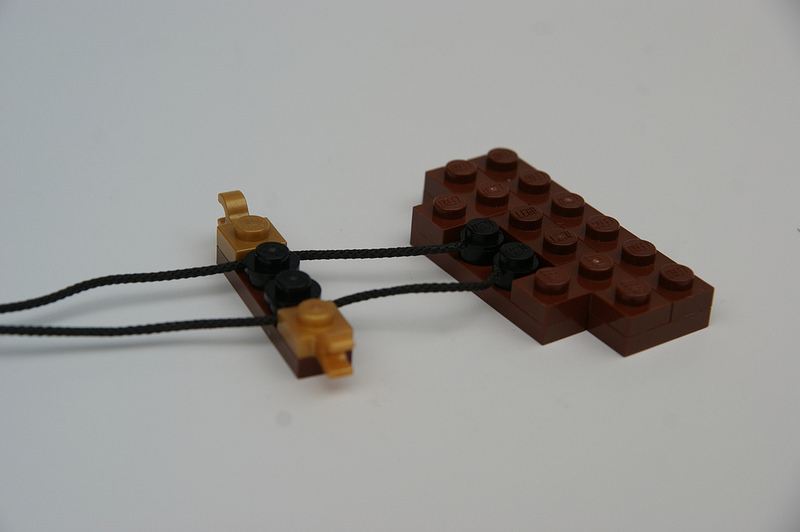
Once we’ve got those on we can clap on some 1×4 tiles on top (if you have the slightest difficulty getting them on it’s a sign that you have the string under the stud instead of running through the grove – be sure to correct that instead of trying to force it on).
Then we can attach the squiggly pieces – elephant tails if you want the official name for ‘em!
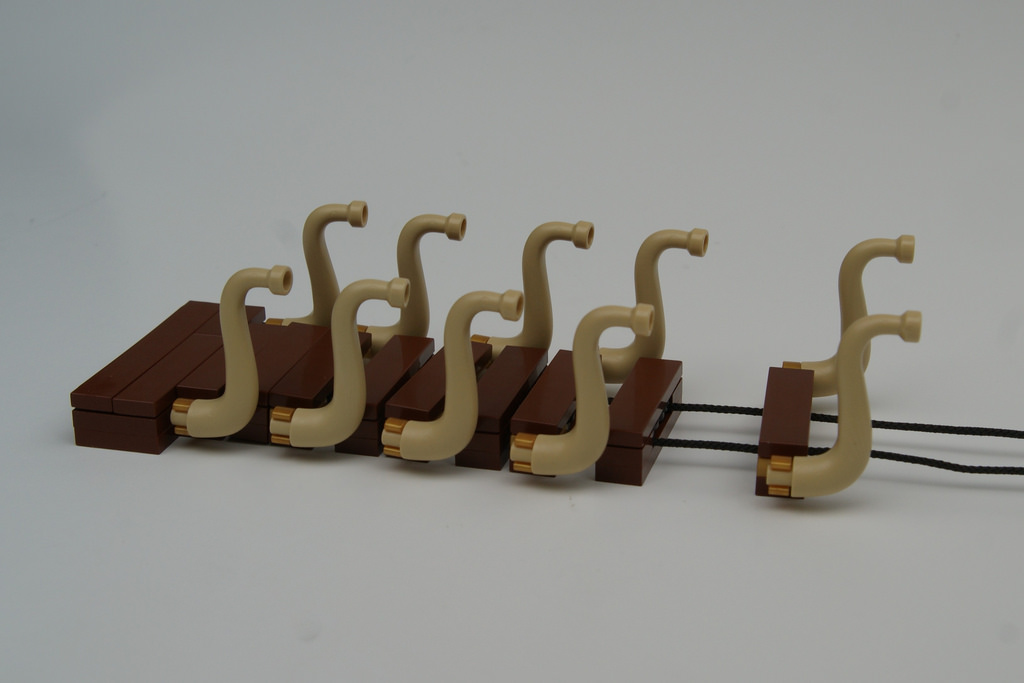
Run them all together (if you haven’t already), and repeat the process until the entire length of the string has been taken up.
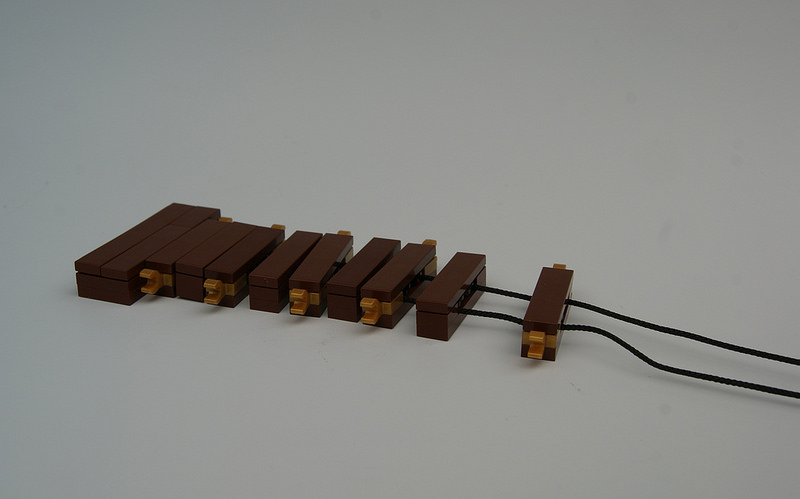
The final result?
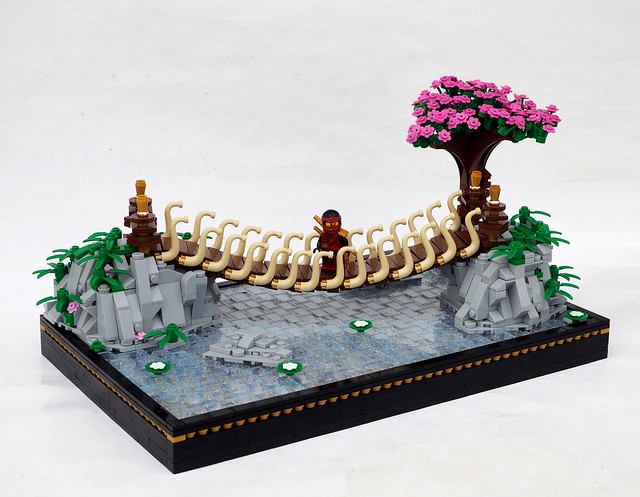
The end platforms can be spiced up with a couple of these things, or any other decoration you’d like to include!
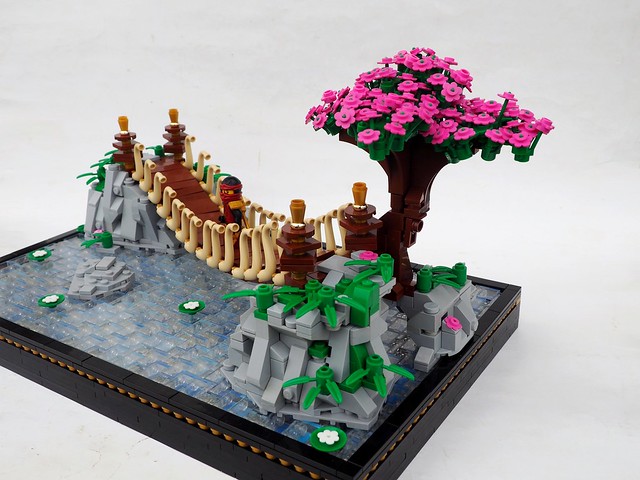
(Do note that, because of the elephant tails’ curve, they are placed closer on one end of the bridge than they are on the other – one on the closest stud, and the other on a jumper).
Thanks for sharing your technique, I especially like how sturdy the bridge design is!

