


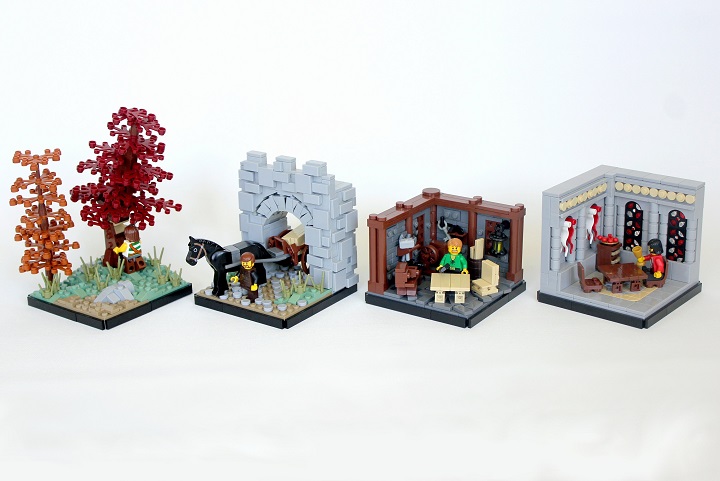
This is somewhat of a unique build log, in that it covers four builds at once! Each of these vignettes was based around the medieval timber industry, and they were all prizes in this year’s Summer Joust.
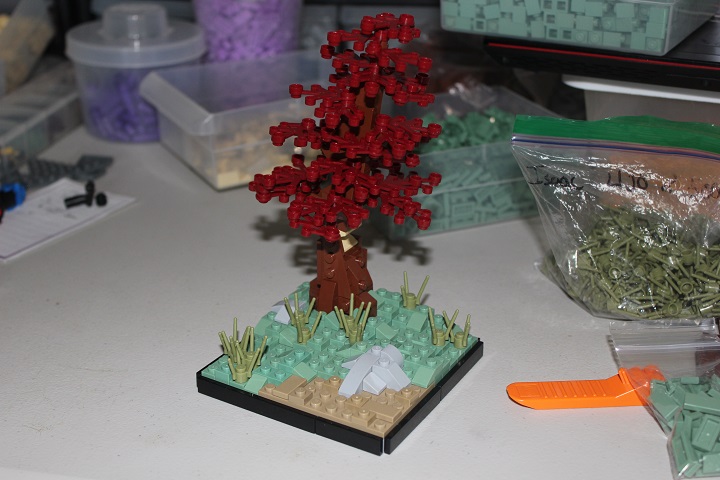
I started off with the forest scene, which was the one I was least excited about building. Mainly due to the challenge of making a decent forest scene on such a small base, and trying to make it a desirable model to win.
Every one of the builds was 12×12 in size, with a SNOT tile border.
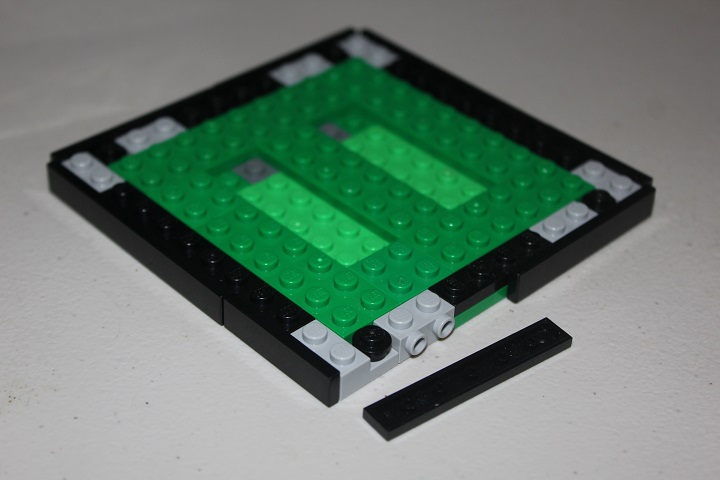
A tree being chopped down was an obvious choice for this scene, and I started with that. This was my first attempt, using some SNOT elements.

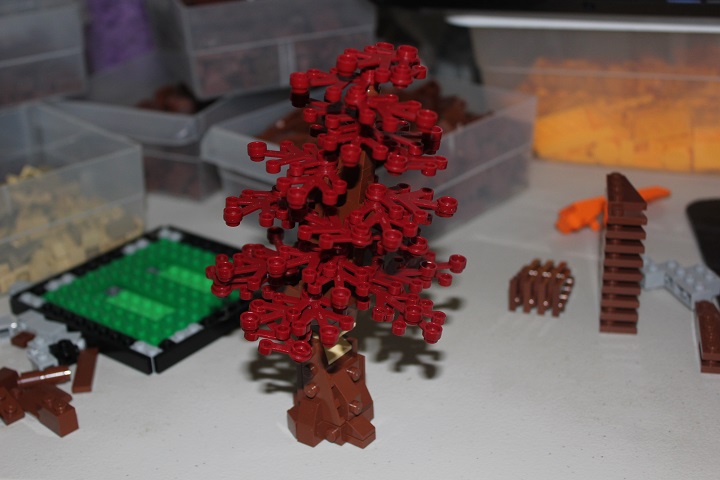
But I wasn’t very happy with that, and then moved onto trying plate with clip attached to 1×1 tile with clip to allow the upper half of the tree to tilt.
Which had the side effect of reversing stud direction and led to me building the branches upside down.

I chose dark red for this tree as dark orange and dark red are our most plentiful leaf colors currently, and I knew most people would appreciate getting more of them.
Sand green and dark tan fit well with the leaf colors so I used those for the landscape.
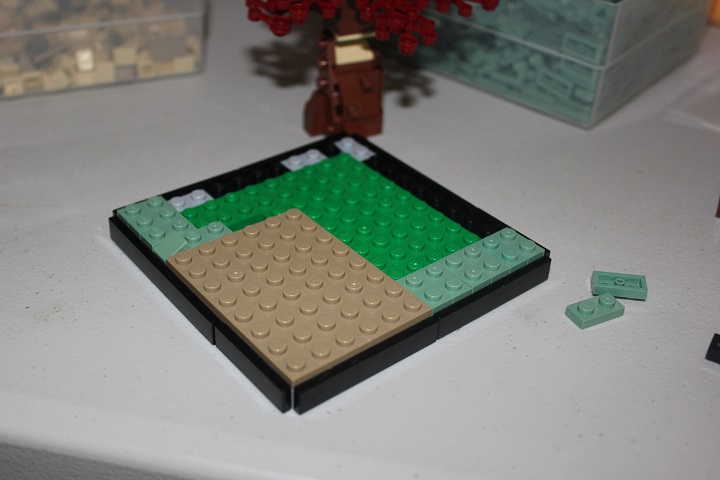
A good sized rock helped to spice up the ground, and I also made sure to have some elevation change.
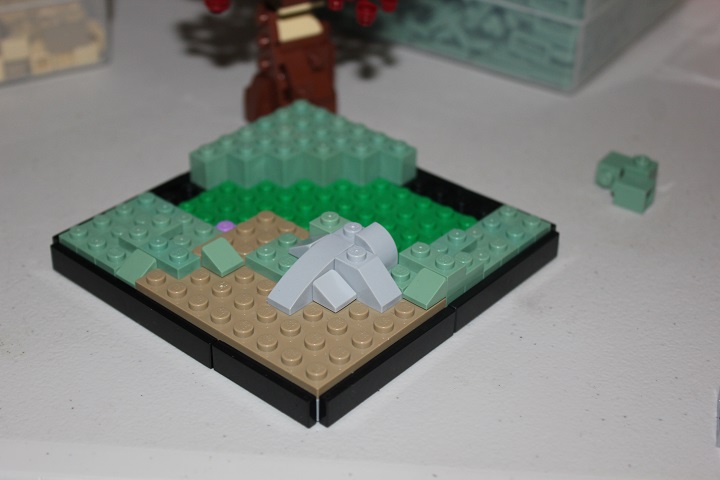
I added one more small rock, and then some olive grass to finish off the sand green areas. While a couple plates and tiles kept the large dark tan plate from being too plain.
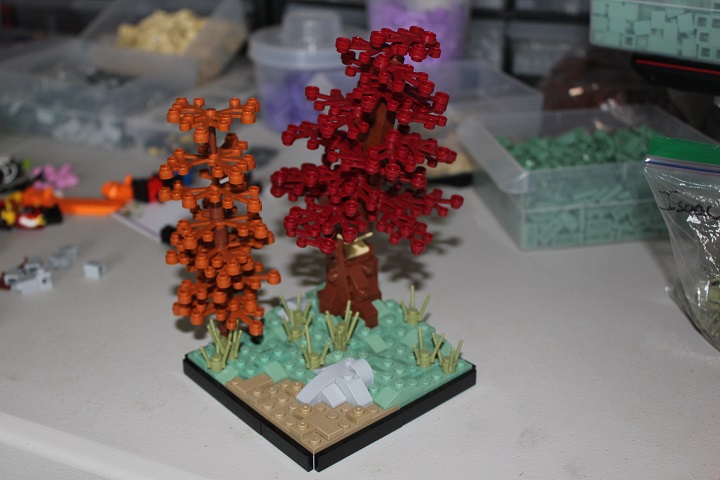
Lastly I added another smaller tree using the flex tube design (though actually using bars here) that can be found in our tree tutorial.
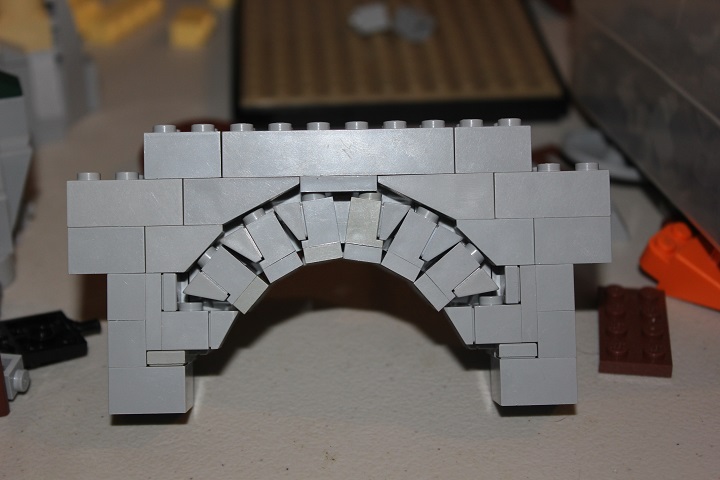
For a transport scene I wanted to have a wagon load of wood going through a city gate. Though fitting that on a 12×12 area would be a challenge I knew.
I started off by figuring out how big of an arch I could fit, without having the wall on either side look super tiny.
Here’s the design I ended up using, based off of Mark’s technique.
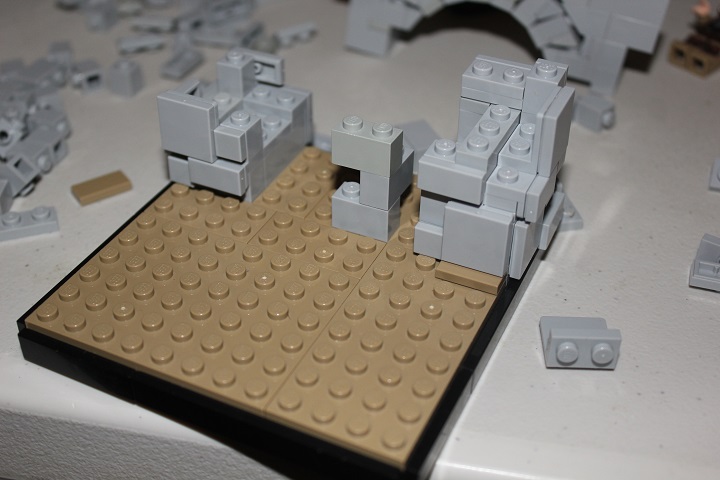
Again I used dark tan for the dirt color, and would add sand green later for the grass.
The stonework design is very similar to what I used for Bjarn-dar Keep – lots of brackets, and brick with stud for different depth SNOT tiles.
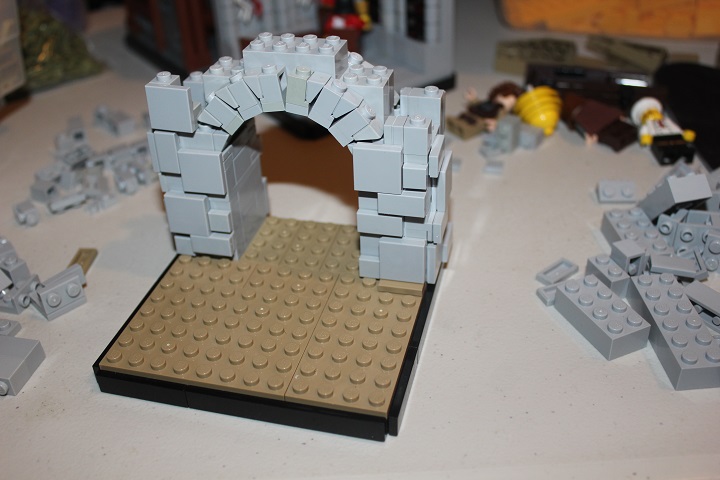
I left the inner walls of the archway smooth to give enough space for the wagon to fit through easily.
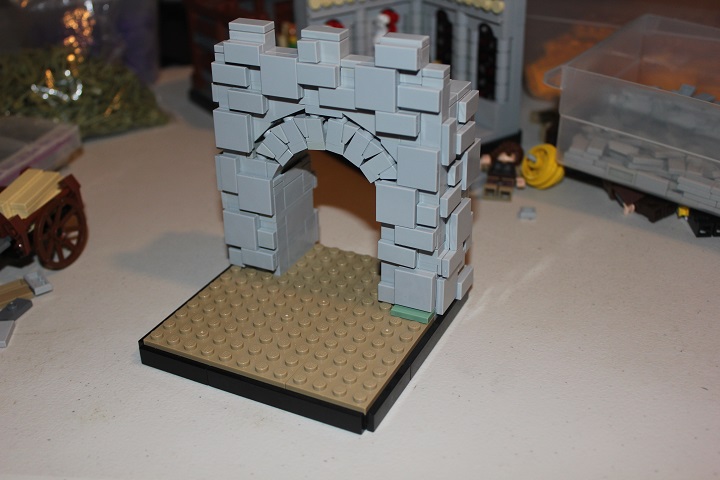
And for the cart design itself, I just needed to come up with a decent looking solution that fit on the build. Tan worked well to give the impression of freshly sawn lumber.

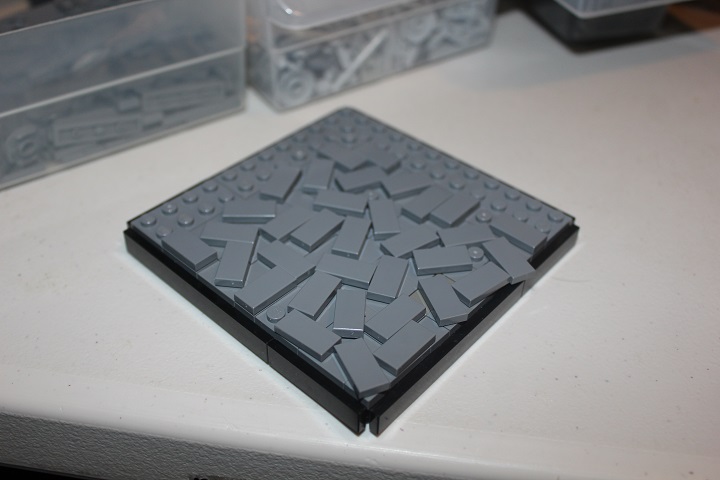
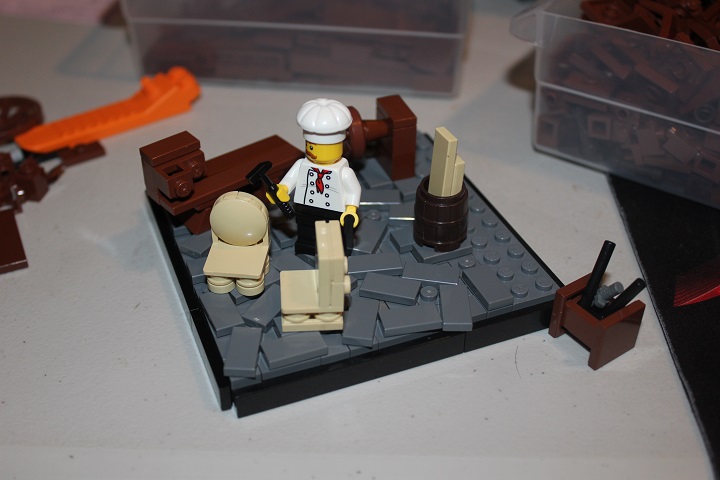
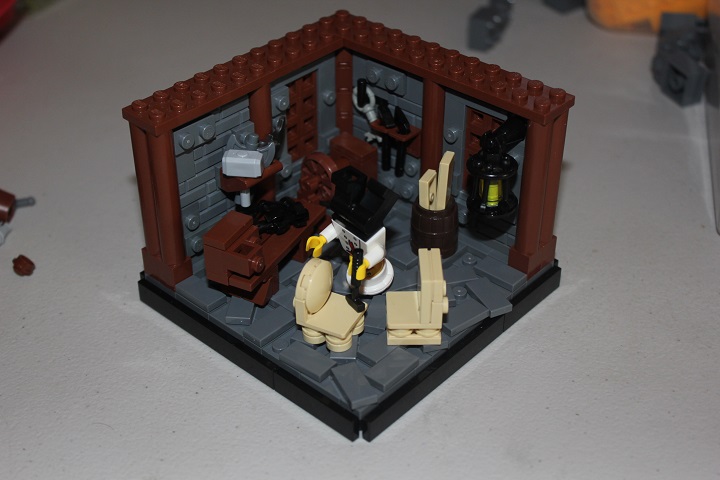
Which brings us to the carpentry shop! I wanted to have an interesting floor design here, but SNOT would have been difficult to incorporate with the small area and low border edge. So after looking through some of my flickr favorites, I found this technique by Colin.
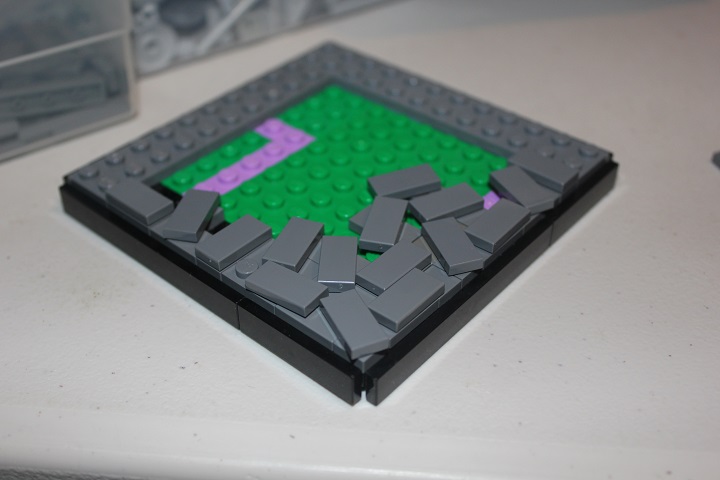
It took some practice to get the hang of the design, but eventually I had the floor finished. And every tile is actually attached as I wanted these models to be able to withstand shipping well. Some of these tiles would end up being replaced by jumpers to allow for things to be attached.
Next I came up with a bunch of different furniture items the carpenter could be working on. All in tan – again working off the idea of that color being freshly sawn and unweathered wood.
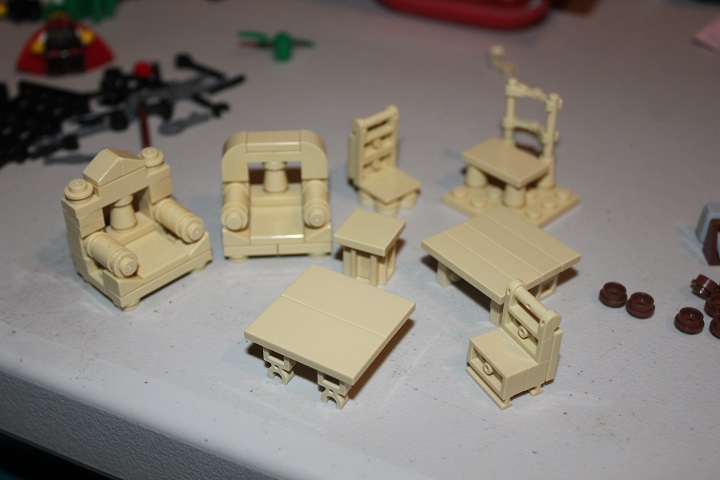
These were two of the chair designs I liked most, though the left one ended up being removed as I didn’t think it looked medieval enough.
I also added a small wood lathe and work bench with drawers – one of which is even open! I’m a little disappointed that the box of various tools didn’t end up making it into the final model.
A combination of stone and wood was fun to work with for the shop walls. And I made sure to have plenty of tools and other details keep the walls from being boring.
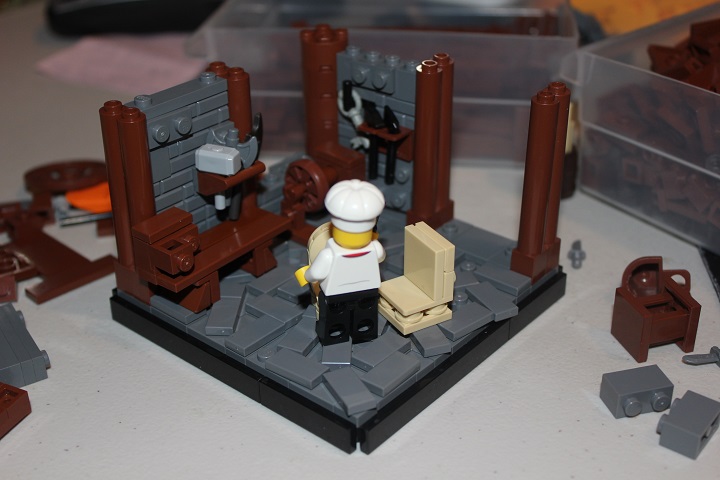
Reversed 1×1 plates gave a neat look for the window in the back wall.
Here my for scale minifigure assistant celebrates the near completion of the model. That lantern design is pretty finicky, but I liked its look.
The item on the workbench is meant to be a hand saw.
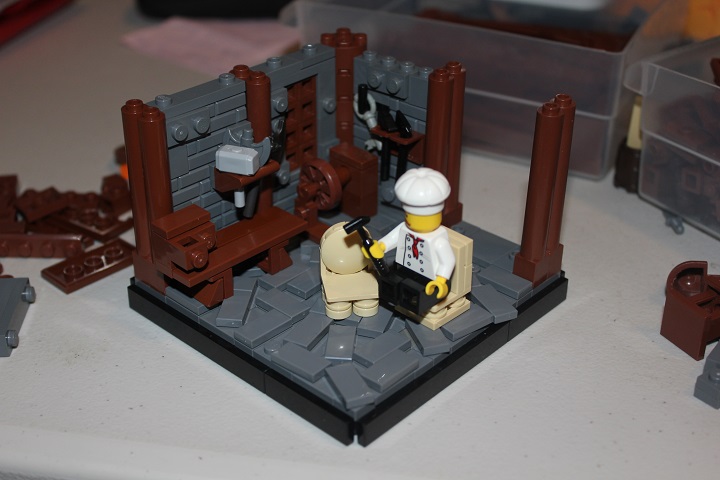
Then I just had to tile off the wall top, and switch out the round backed chair for a sturdy table.
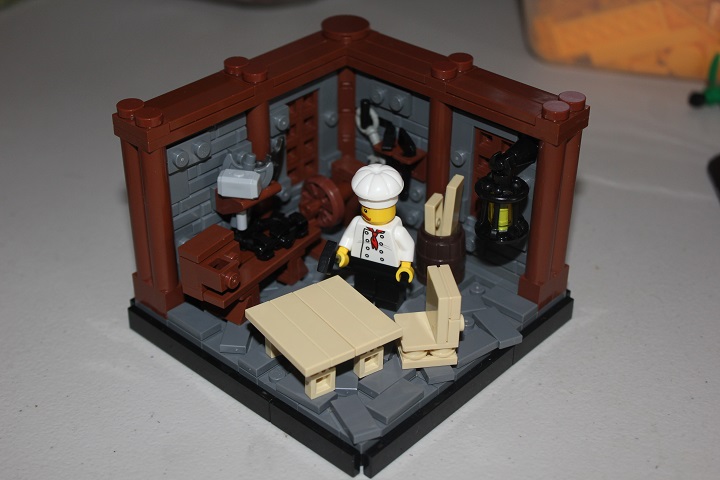
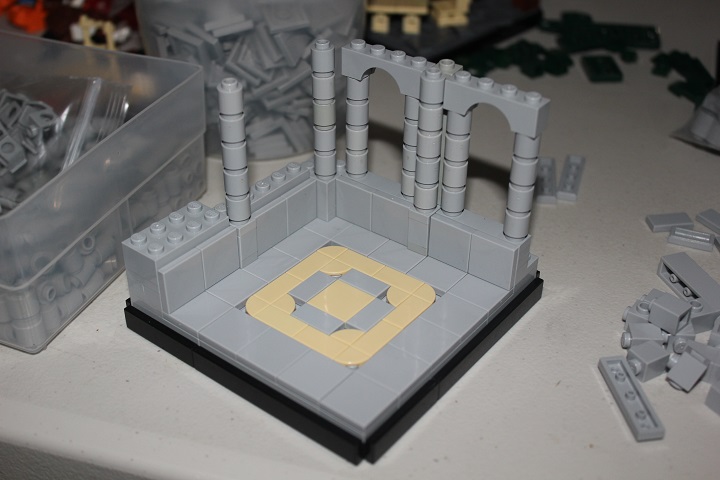
That same table would end up featuring in the final vignette, though in reddish brown not tan. I experimented with several patterns using tan quarter circle tiles before settling on this one which fit nicely in the center of the floor.
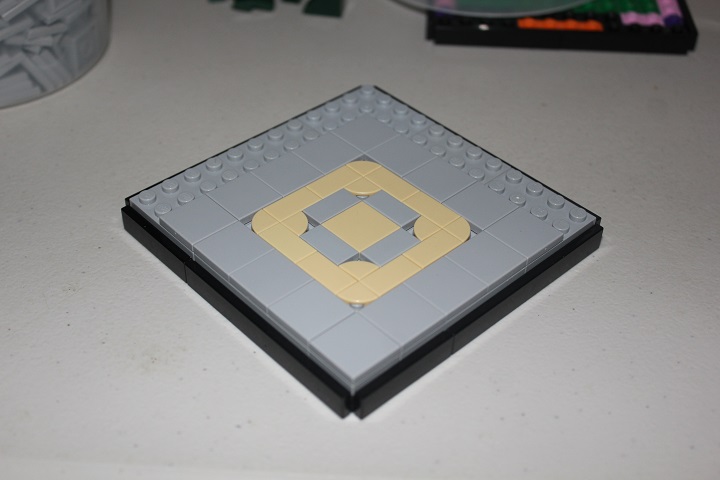
I like experimenting with different offsets when working with small interiors like these. In this case I used half stud offsets on the 1×1 round columns which was nearly matched by the SNOT tiles at the base of the wall.
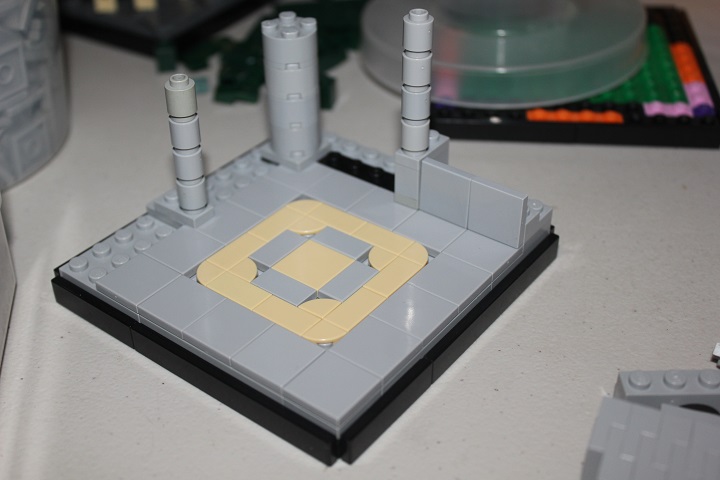
The adjacent stacks of round bricks were meant to replicate medieval composite piers.
Then at the top of the offset stacks, I added another jumper to bring them back into alignment with the rest of the wall.
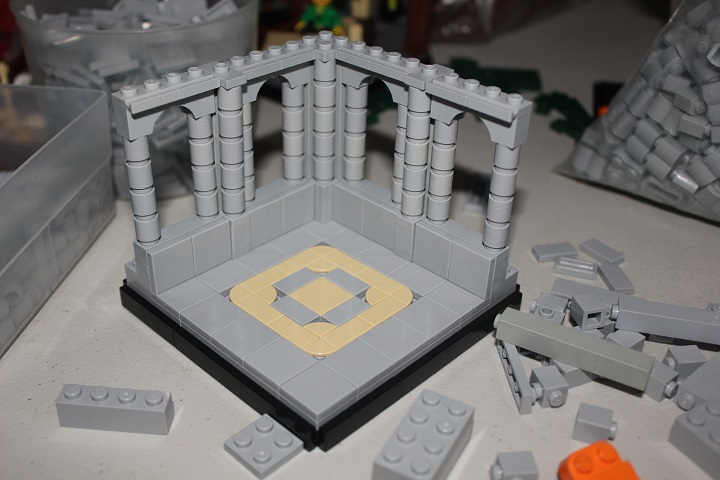
More tan detailing at the top of the wall tied in with the floor below, and gave some additional decoration.
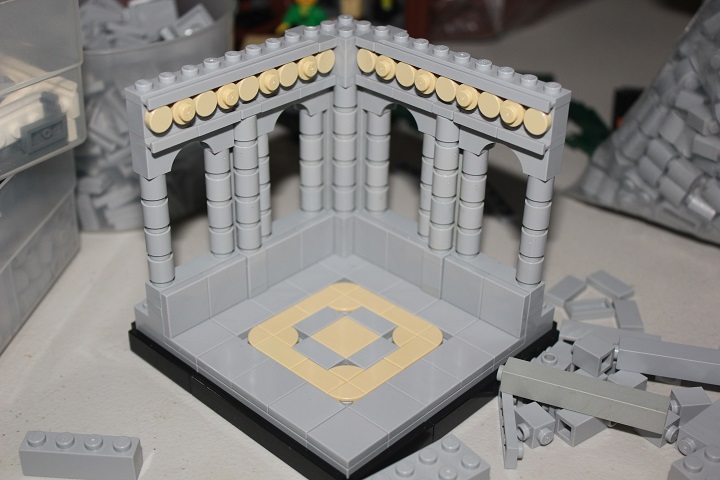
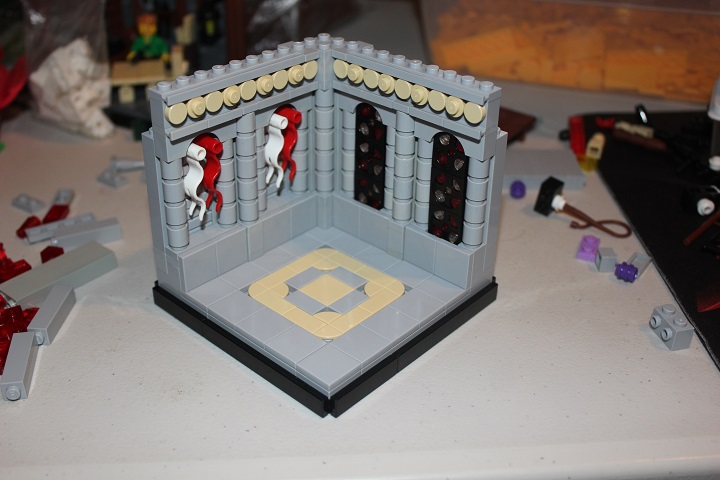
Then I added a couple stained glass windows using the old turntable design, along with flags in the other alcoves. At which point, all that remained was adding the furniture and capping off the wall with some tiles.
Thanks for reading, and we hope you enjoyed getting to see inside the build process for these models.
Let us know if you have any questions, or something you would like us to cover in a future post.


Some great techniques here, thanks for sharing. Magnificent prizes!!
love it! Thank you for sharing!
You are very welcome! I’m glad you found it an enjoyable read.