


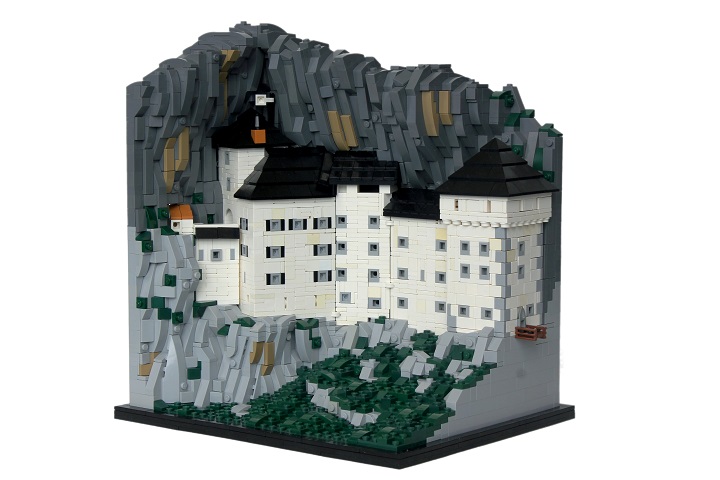
Ready for another extremely detailed build log on a Marchitecture build?
Then let’s get going!
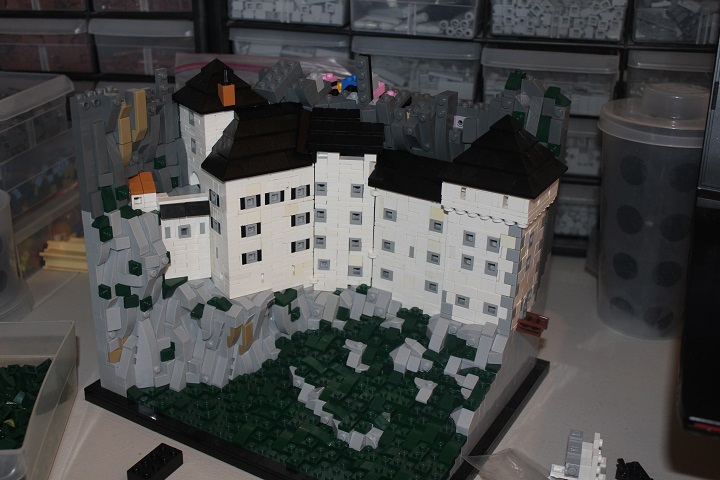
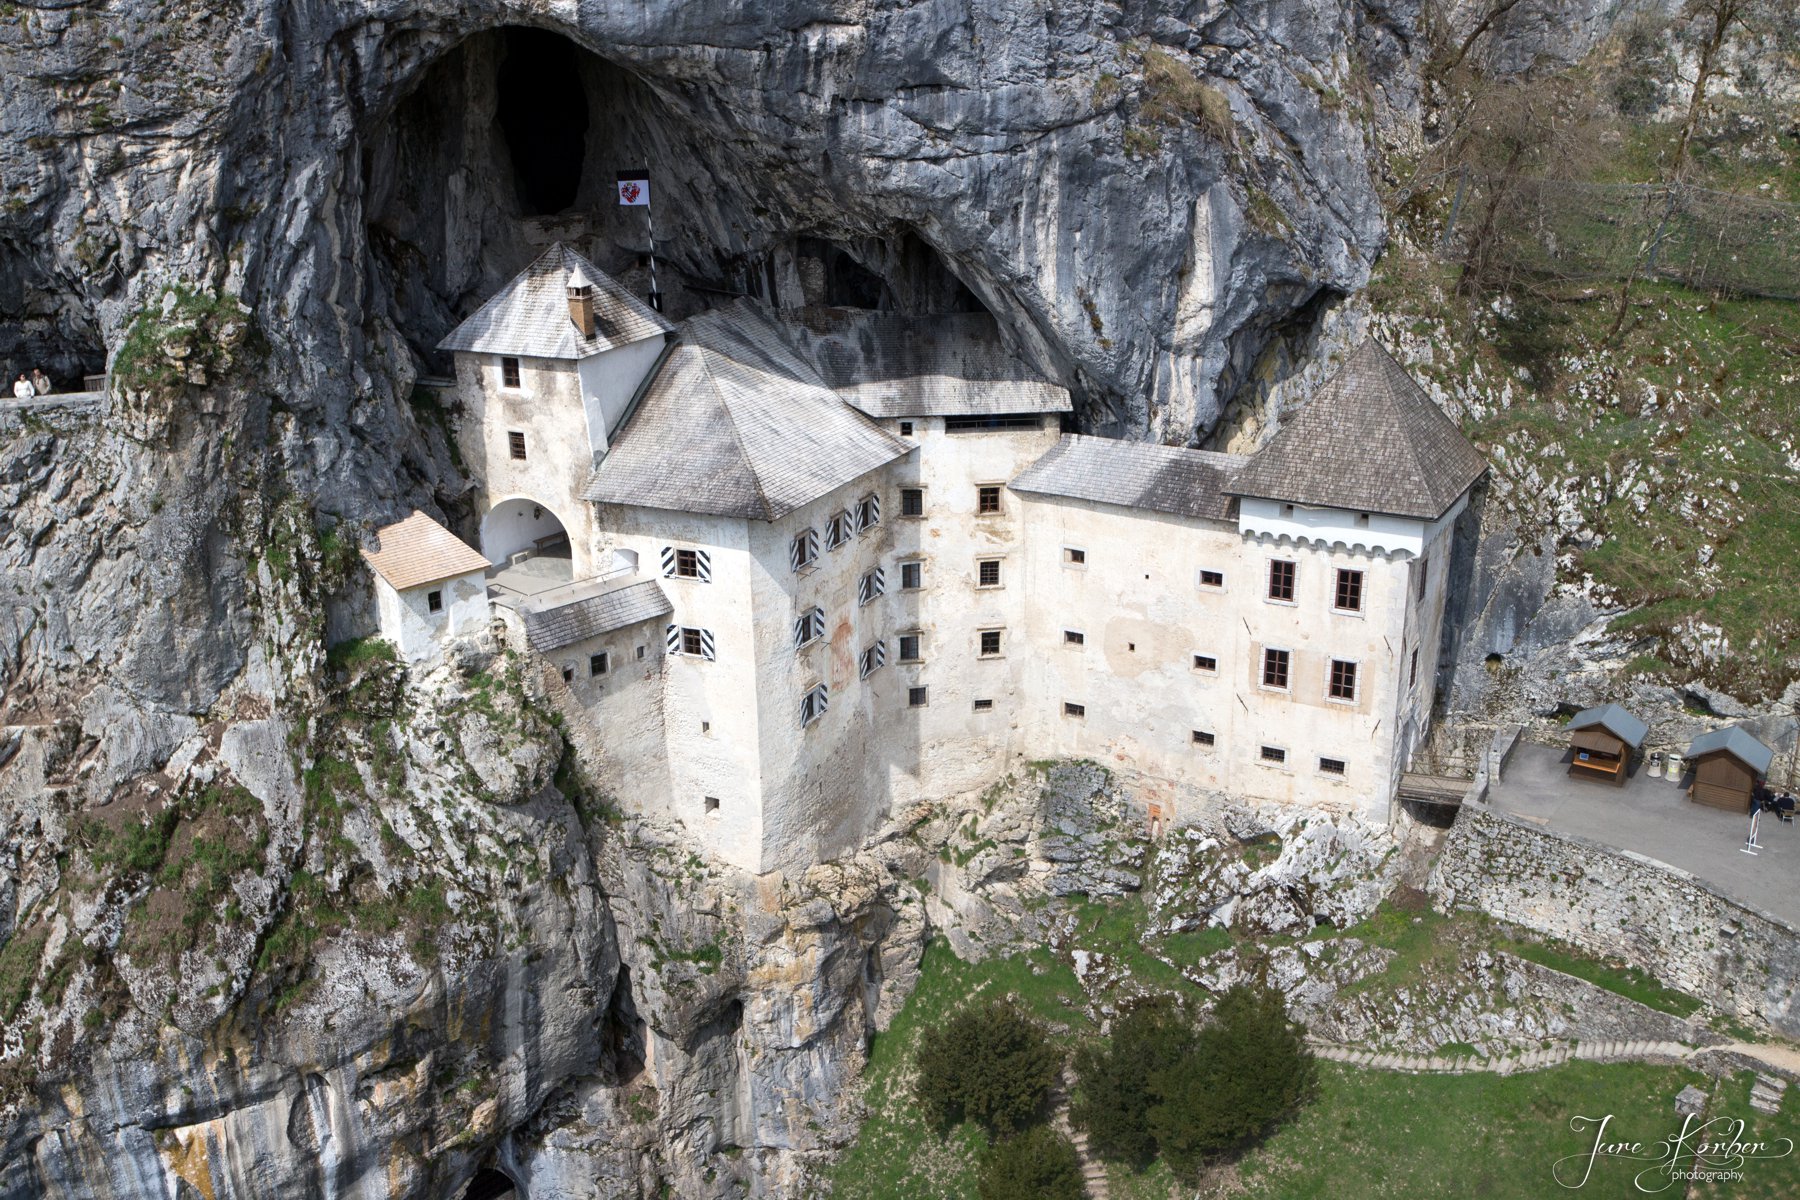
You might want to check out my main reference image as you read.
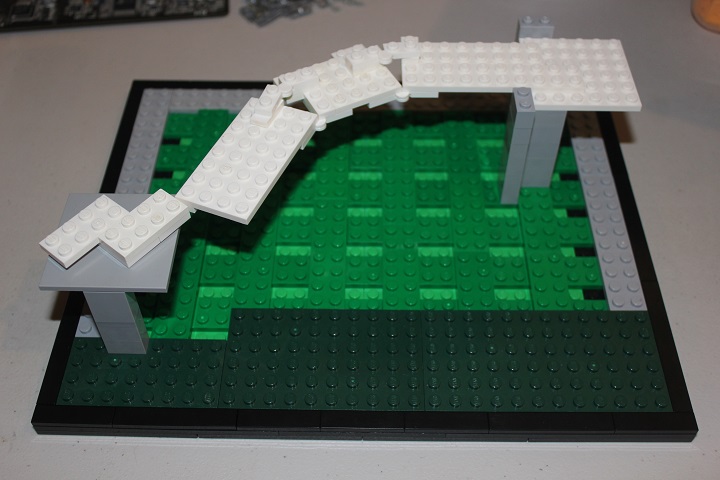
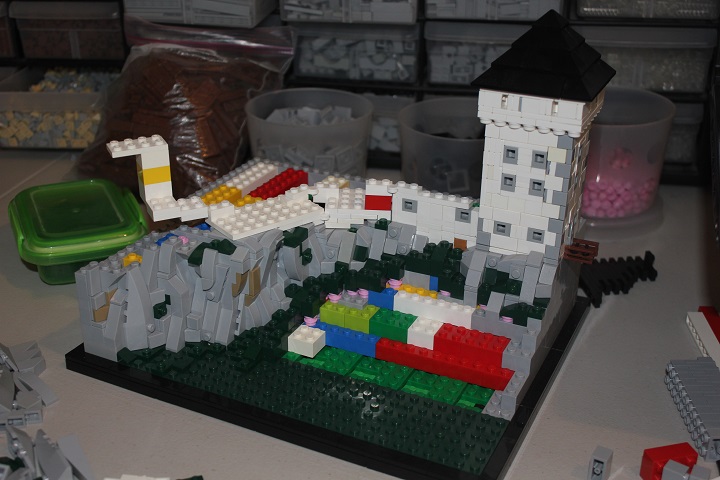
The maximum width of the base was 32 studs to comply with Marchitecture rules. So I went with that, and left some extra space in front and behind the castle for cliffs. Some plates laid out quickly gave me an idea of the castle’s size.

Since the main feature of Predjama Castle is its incorporation into the rock face, I set the castle base on stilts and planned to build rockwork up to it.
That way I could be sure the cliffs supported the building as they should, rather than building cliffs first and trying to get the castle to fit on after. As usual I used a mix of studs up and sideways building for rockwork.
The streaks of different colored rock in the cliffs were a unique feature that I made sure to incorporate.
I also tried to follow the rough shape of the real cliffs and use dark green elements as moss occasionally.
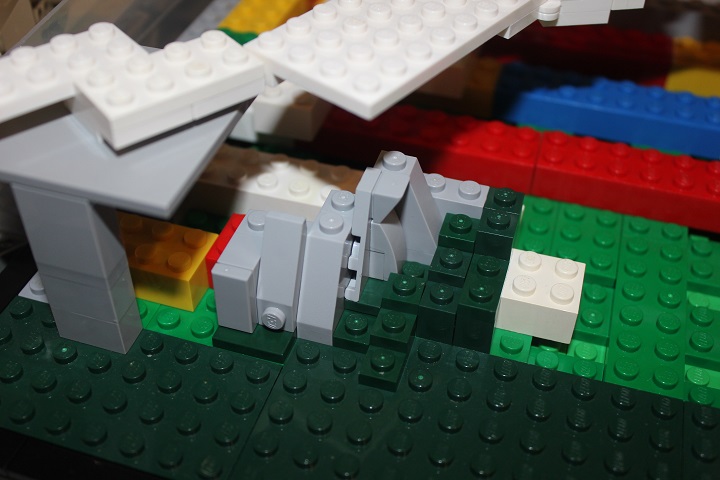
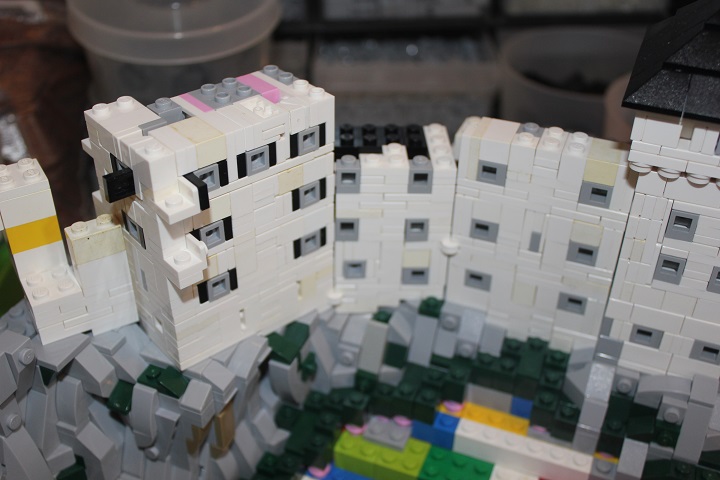
Rockwork is easy enough though, and the castle itself would prove to be the main challenge in the build. It took me some time to figure out a good solution for the end tower. Especially incorporating windows after I settled on this tiles and plate stonework technique for the corners.

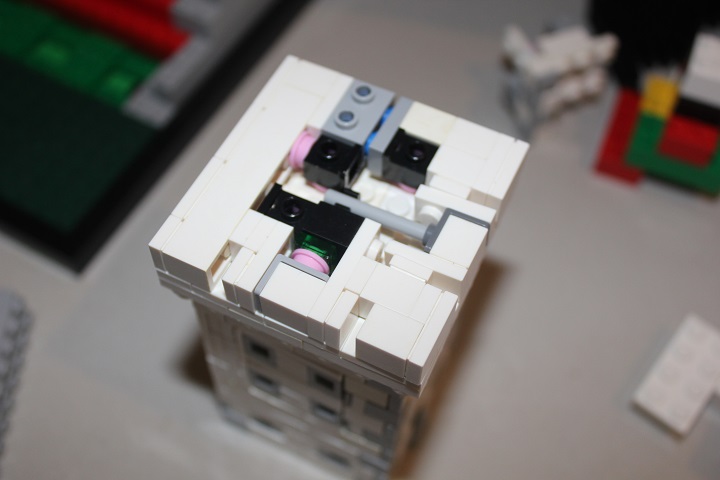
Here’s a look inside at the tower’s structure – though it got much more cramped and complicated once I finished detailing the adjacent side.
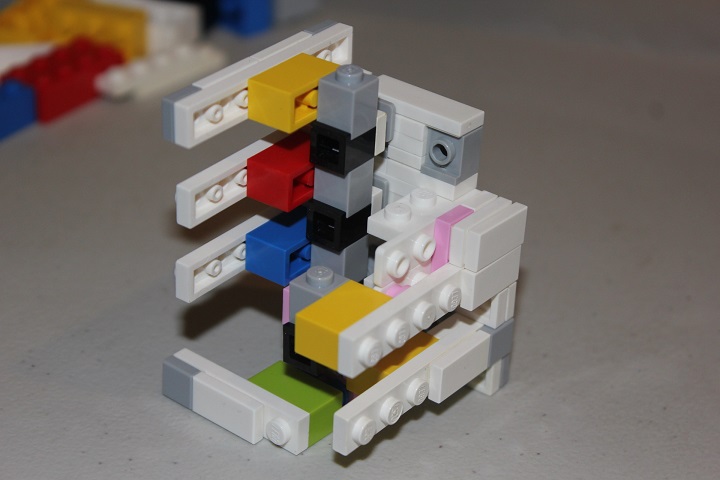
Even the top layer of windows were an interesting design to puzzle out. The bley and dark bley neck brackets were place holders as I didn’t have enough in white. Later I ordered those to finish the build.
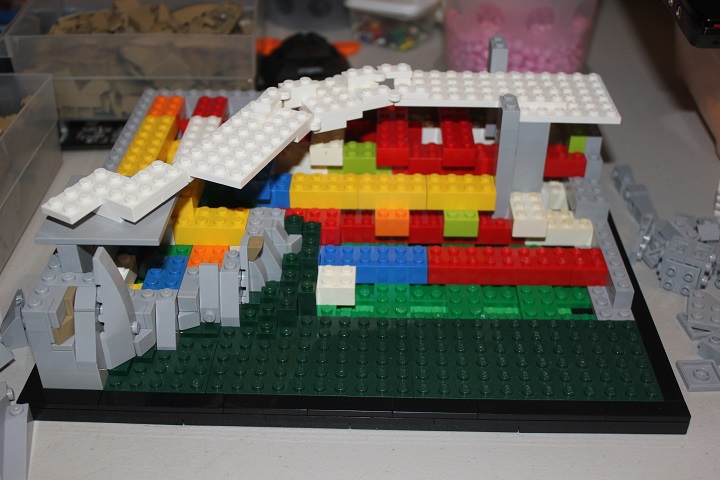
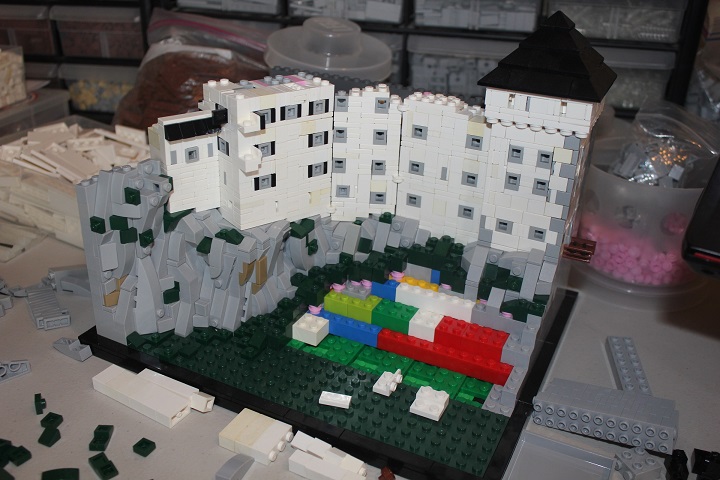
I was super pleased with how the tower looked though, and at this point had the cliffs far enough to start putting more of the walls in place. Only a small portion of dark green grass was built around the bottom of the rockwork as I planned to finish the landscape later.
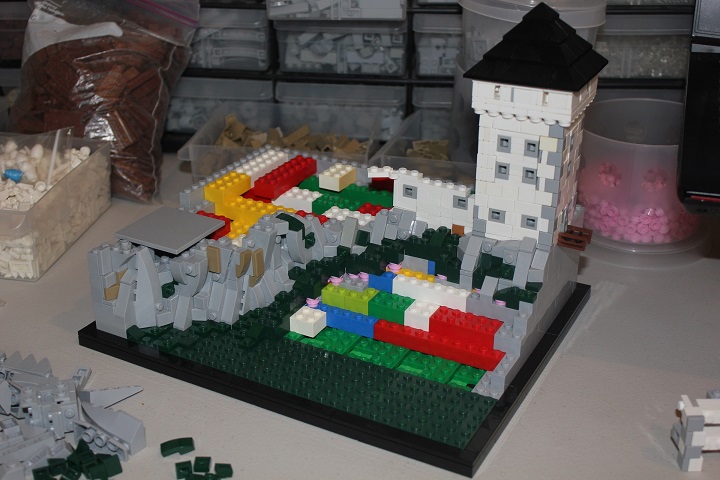
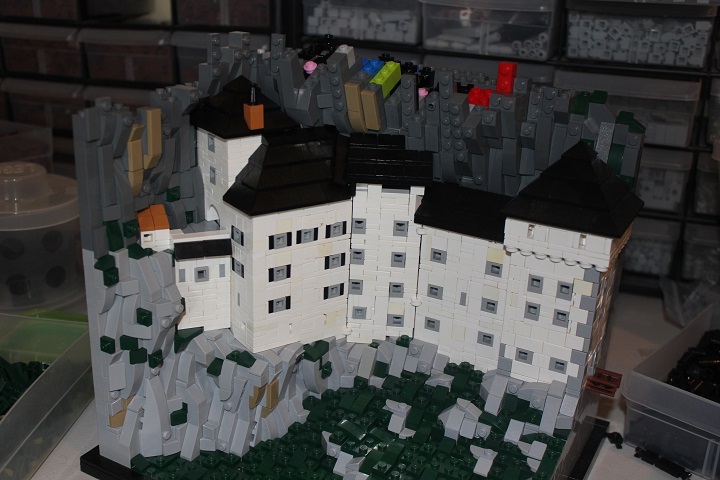
It’s always satisfying to get the full building’s base in place. And that was fun to accomplish here with the various angles and slight steps in elevation. Still it came together fairly quickly.
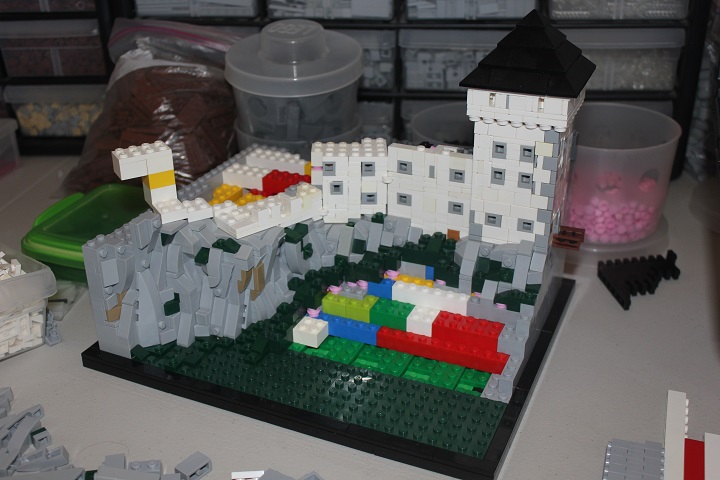
Those of you who remember Lichtenstein Castle should recognize the bridge design used here. You can also see a single MDF 1×1 brick in the wall just to the left of the tower – that was my attempt at replicating a detail in the reference image, but ultimately I felt it was distracting and removed it.
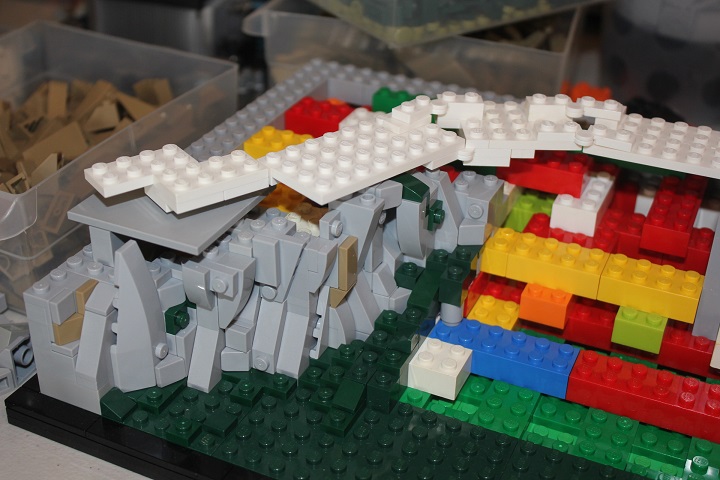
Headlight bricks in various orientations were what I used most for the windows, with occasional backwards 1×1 plates or bricks mixed in as well. With all the SNOT sections in the walls it was sometimes tricky finding a place where I could add another hinge plate or two to connect the different angled sections.
Here is one of my early attempts at the shuttered windows. It was too big compared to the others though. The backwards headlight brick window protruding from the wall was later switched to a backwards 1×1 plate so it could sit flush like all the other windows.
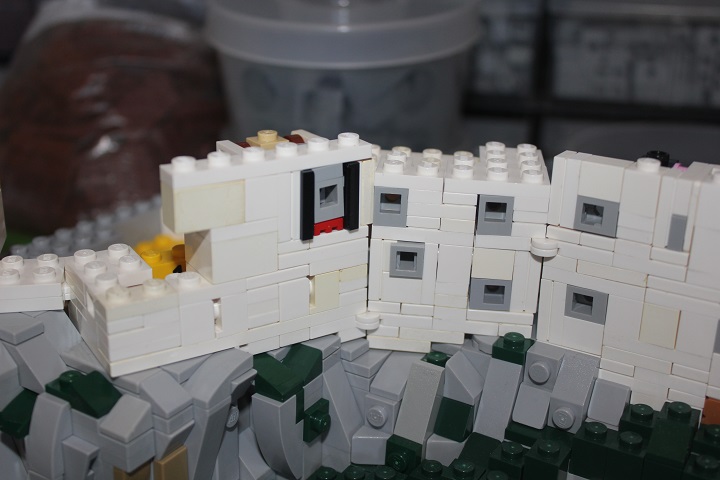
To achieve windows on adjacent corners of the main keep I needed the new 1×1 brackets in white (1×2 temporarily in place here). So I ordered those along with the neck brackets.
Fitting all three windows across the top of the wall here involved some very convoluted building. Some brackets and panels worked to eliminate nearly all gaps though.
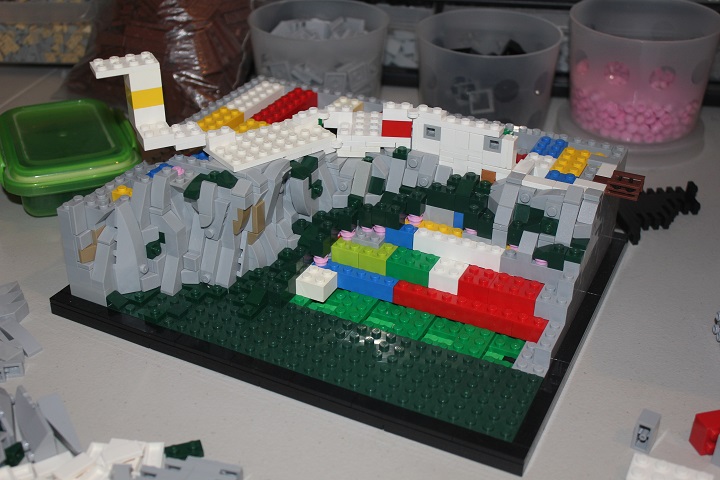
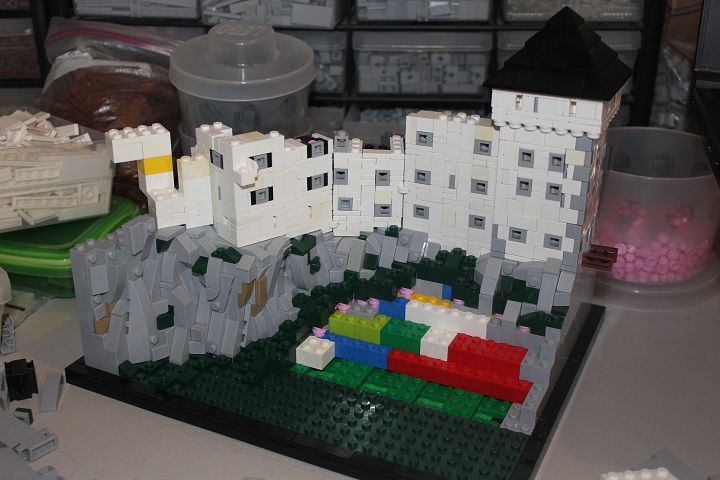
After getting so far on the castle I could continue work on the cliffs.
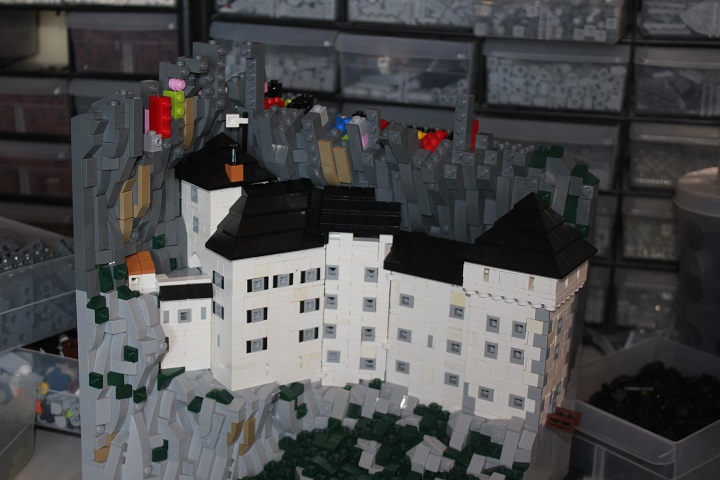
Next it was time to figure out the roofs. Which I wasn’t looking forward to…
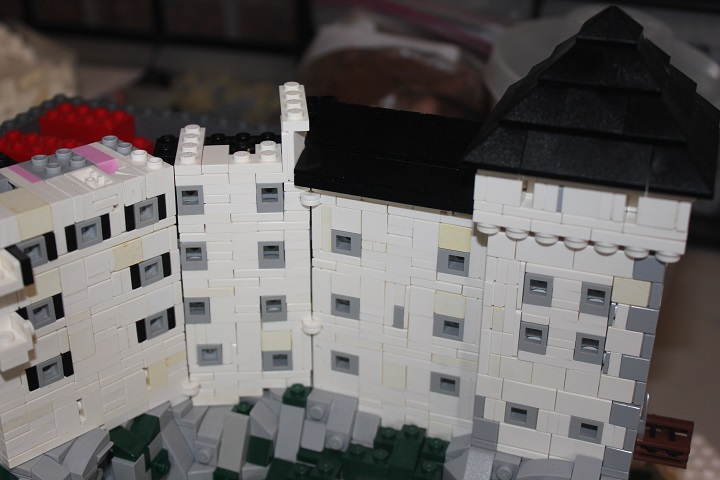
It ended up working easier than I anticipated, though some joints definitely took more than a few tries. For instance, one of the seams is covered by a black 1×4 tile with broken bamboo leaf inserted into the tube on the bottom so it can just sit in place.
After so long working on the castle it was a nice change to switch to the landscape. We still have loads of 1×1 dark green bricks from Pick a Brick, so I used plenty of those.
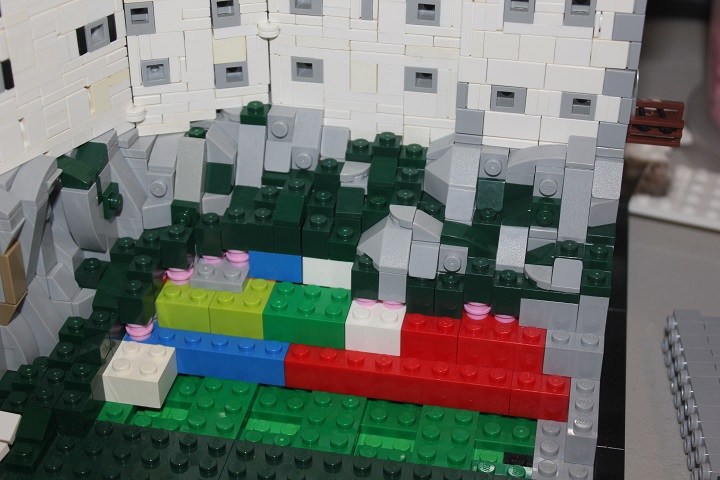
Around now was when I was truly convinced this project would work out.
Quick unrelated note on a section I was rather pleased with: the joint between angled sections under the 1×4 arch on the upper left of the castle – a 2×4 wedge plate fit nearly perfectly against the 2×4 tile.
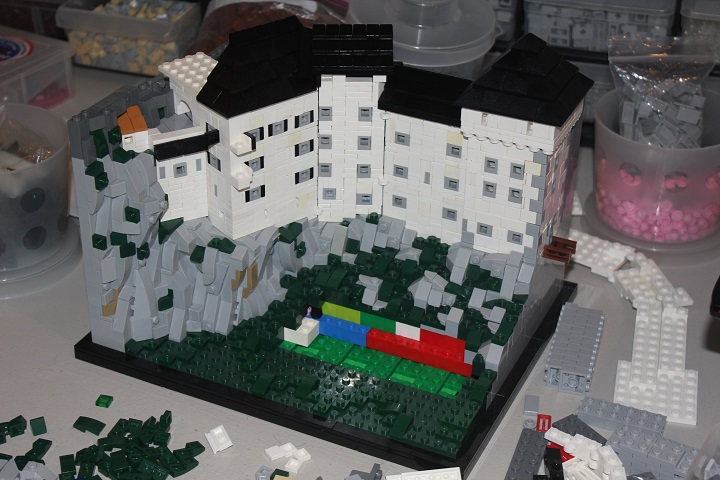
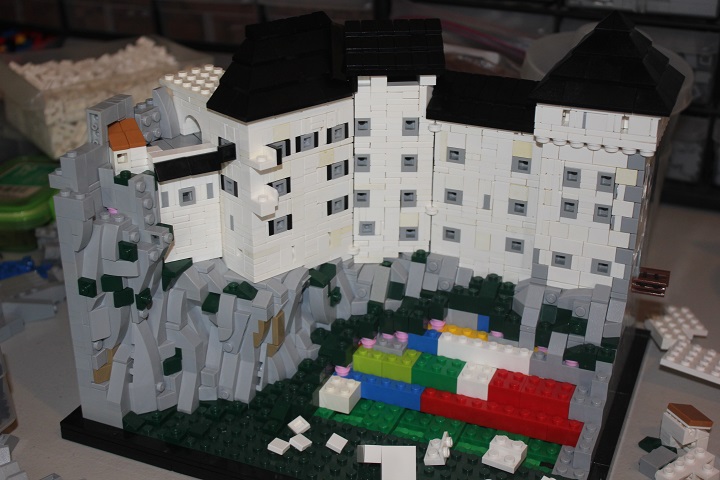
It was a lot of fun building sections of rock mostly buried under the dark green moss/grass. And then it was time to transition the cliffs to dark bley.
Still working in some dark tan streaks occasionally. The left side had very little depth so I mainly used standard sideways building for the rockwork. Whereas the cliffs behind the castle had enough room for my slanted rockwork.
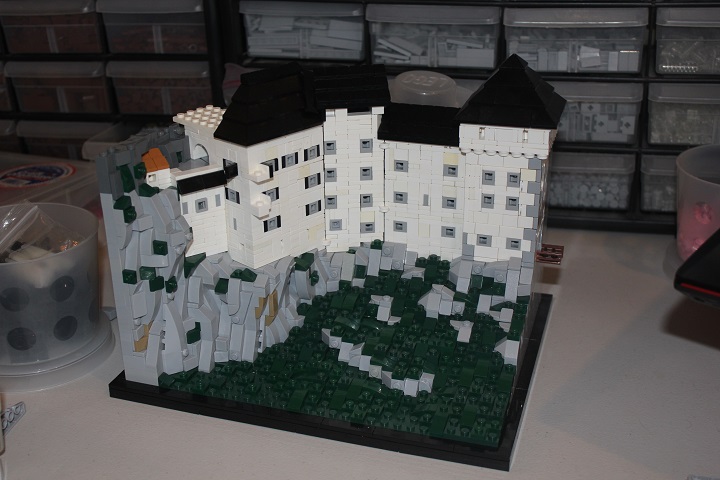
And that design worked well to give a clean fit against the roofs.
I wasn’t sure where I wanted to stop the cliffs for the model, as in real life they continue for quite a ways!
Around here I figured was high enough. Though I continued the back corner up a bit higher to give nice organic edge across the top.
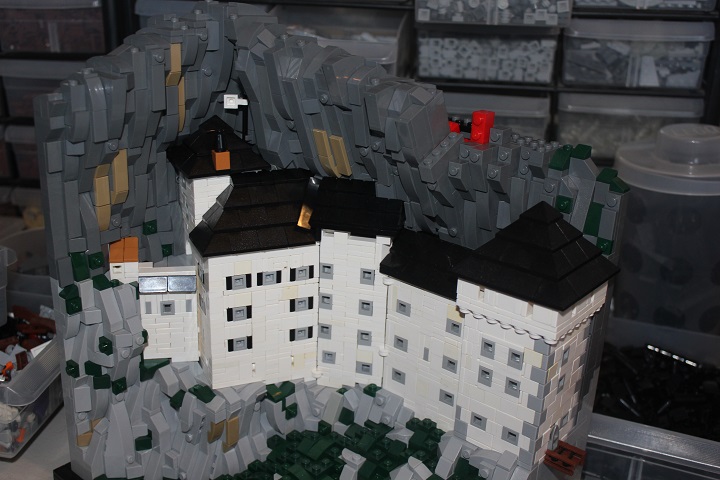
The little flag pole on the highest roof is actually attached via clip to the rockwork.
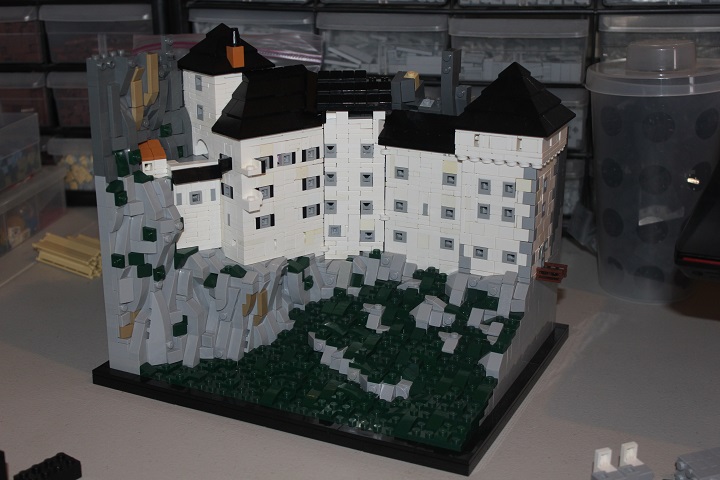
One of these days we’re going to need to replenish our dark bley brick supply, as this project consumed a surprisingly large quantity of those.

When I finished this, I thought Lichtenstein was still my personal favorite out of my Marchitecture builds, but now I definitely rate Predjama as my best.
What do you think? Predjama, Lichtenstein, Chartres, or Chenonceau?
I hope you enjoyed that look inside building Predjama Castle, and thanks for reading!


I was really looking forward for seeing this build log, thanks Isaac for posting it. The stone work used on the corner of the first tower is an eye-catcher for me, great work overall 🙂
Thanks Lech 🙂