


Today we’ll be taking a look a how to create the type of trees used in my Allanar Forest build, and most recently, my Isles of Aura: ‘Shrooms! creation. Let’s get to it!
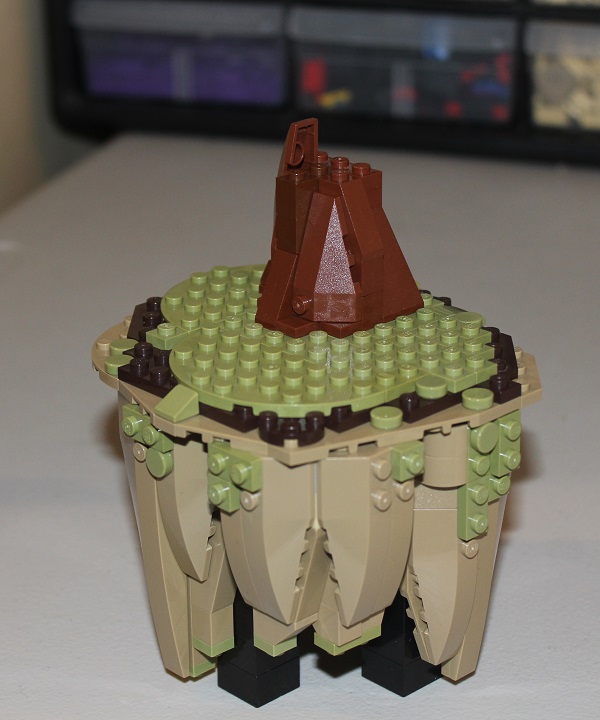
The first thing we need is the trunk of the tree. I typically use a standard studs-up design, using slopes and regular bricks to create a nice slopes at the bottom. A few SNOT wedge slopes can look good too, if you have any available.
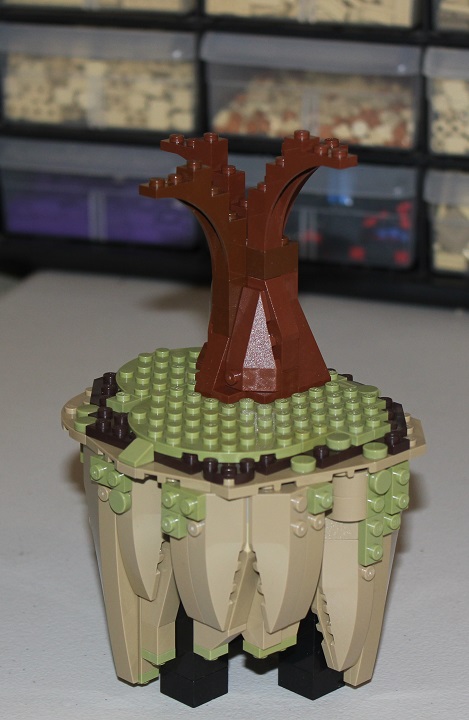
Once you have built the trunk up 4 or 5 bricks, you can start adding branches; I typically use 1x5x4 arches, but you could use inverted slopes or a different type of arch if you want. Make sure that not all of your branches are on the same brick level, or else the tree won’t look as natural. I recommend having 1 or 2 bricks of height difference between them.
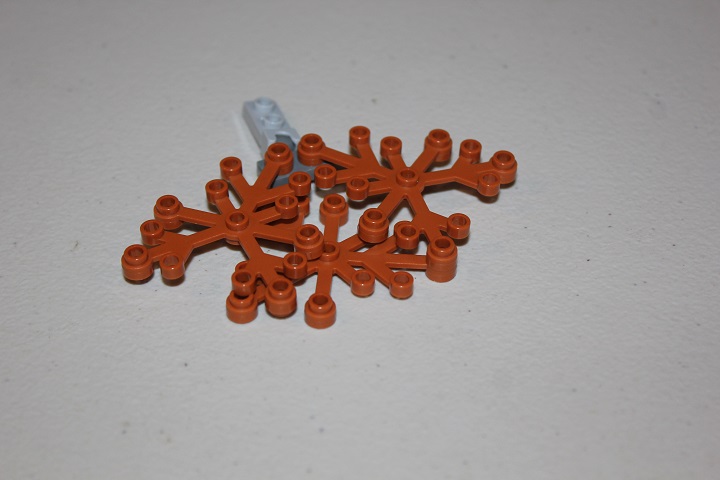
Now comes the fun part: adding leaves! To create a sturdy connection, as well as the ability to angle the leaves how I want them, I use mixel ball joints. Start with two large 5×6 plant leaves, attaching them to the mixel joint as shown in the picture.

Take another leaf piece and attach it to the under-side of the two leaf pieces. Below is a picture showing which points should work nicely as connections. These 3 leaves form a pretty sturdy base for the branch. On top of them you can add leaves however you think they look good.
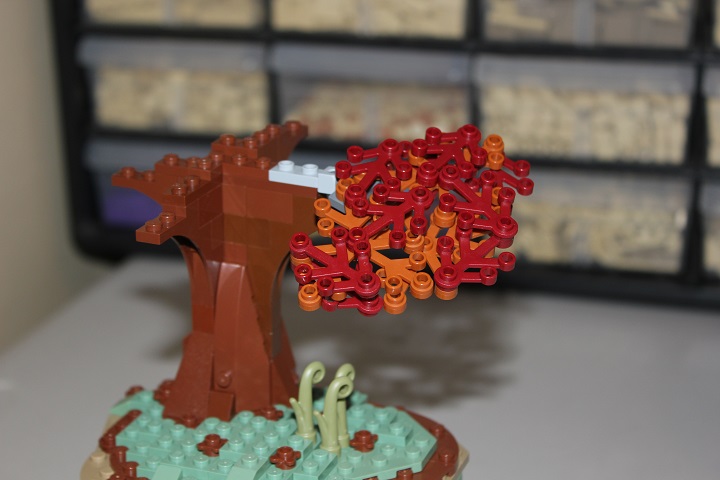
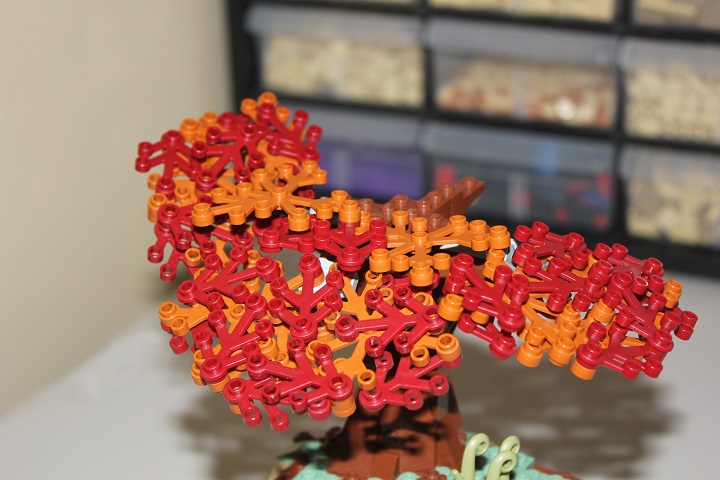
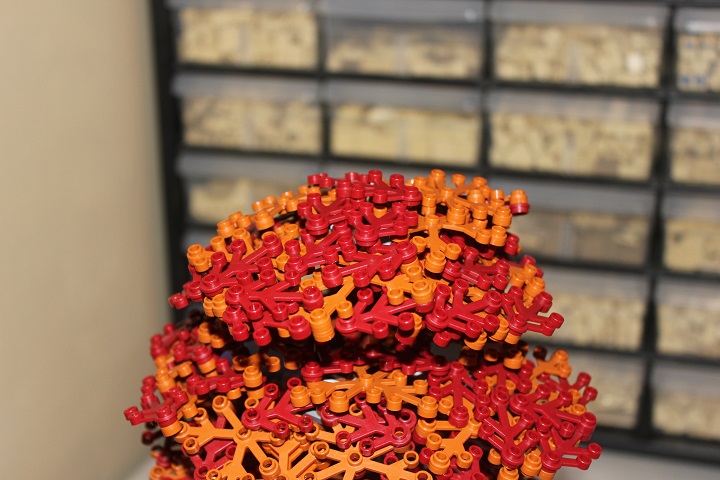
As you can see here, I mostly used small dark red leaves over the 3 dark orange ones, which gives a nice mix of colors. You could also use other color combos: bright green, regular green, dark green, lavender -whatever fits best for your specific build.

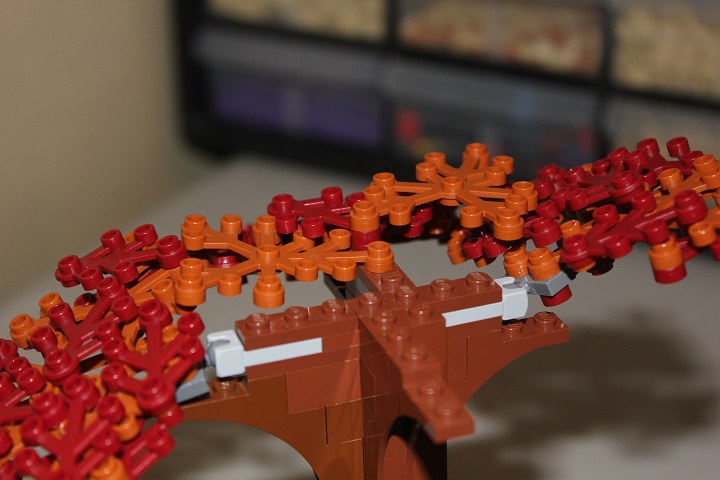
Once you are satisfied with how the branch looks, it’s a simple task of attaching it to the arch we put on earlier. To give the mixel joint enough clearance so that we can rotate it to get the desired effect, you’ll need to make sure it’s raised a plate or two above the front two studs of the 1x4x5 arches.
To complete the first layer of branches, just make several more assemblies with mixel joints and leaves, and attach them like we did the first one. Angling them in various directions creates a very natural effect.
It’s quite possible that after adding the branches, you’ll have a few spots where the leaves don’t overlap with each other, creating a rather unsightly opening in your tree. To cover these up, you can simply attach a few studs up leaves. Below is an example.
Once you are satisfied with how the first layer looks, and you’ve minimized the gaps in the leaves and branches, you can continue with the trunk of the tree, and prepare to add another layer of branches.
A few bricks above the first layer of leaves, you can add more arches.

And proceed just like you did with the first layer: adding leaves to the mixel joints, and then attaching the assembly to the trunk of the tree.

Once you reach the desired height for your tree, you’ll need to top it off: this is pretty much just like the rest of the tree. First, build up a few bricks up from the height of the previous layer.
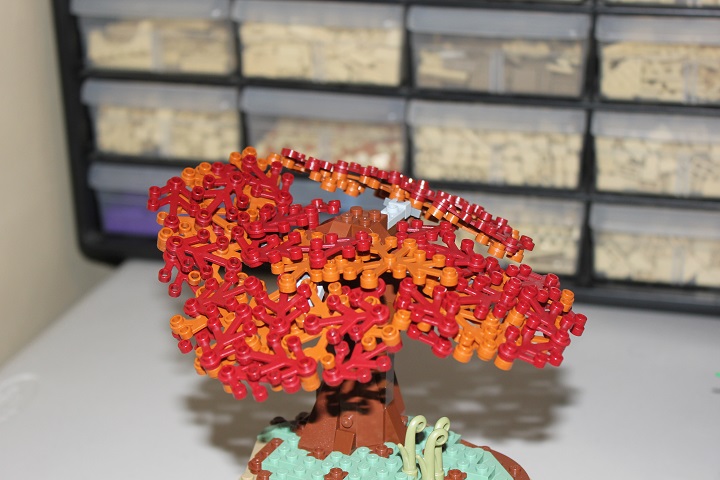
Then, just add a few more leaf and mixel joint assemblies.
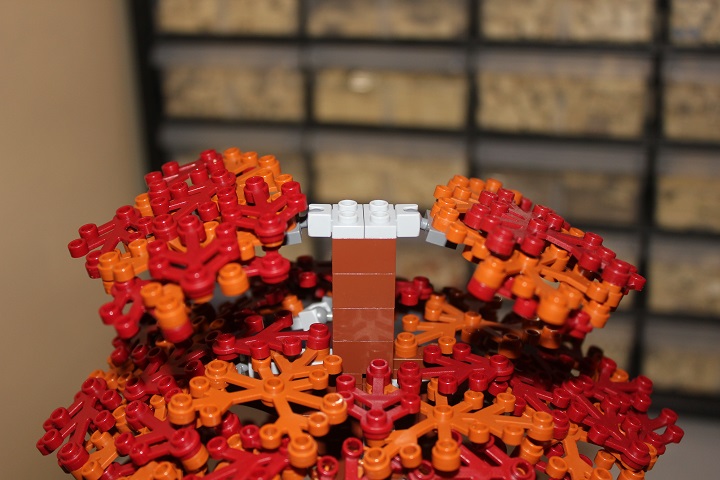

Once you have all 4 assemblies on, you’ll need to cover up the empty middle section. This can be done quite easily with just a few studs-up leaves.
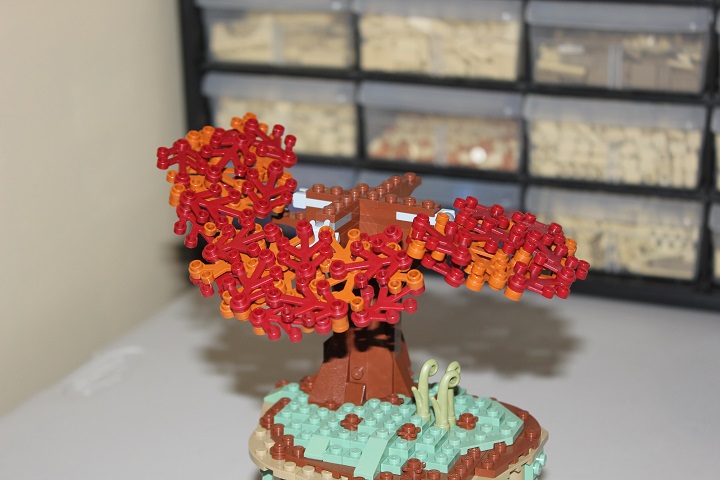
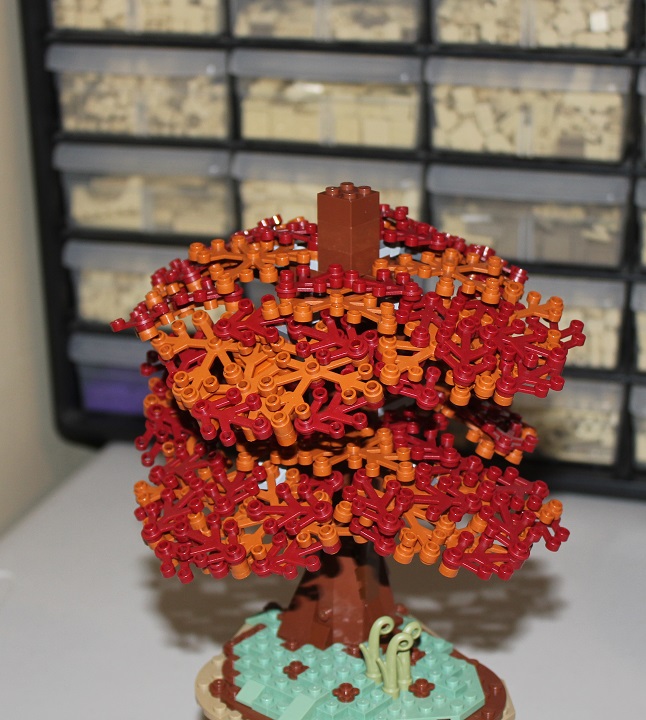
Voila! Your completed tree could look something like this.

I hope you enjoyed this tutorial, and if you have any suggestions for future posts or tutorials, please let us know in the comments!


Great tutorial! Very useful, now I wish I just had more mixel joints…
Thanks Carter, glad it was useful to you! We were fortunate enough to get quite a lot of mixel joints from our nearest PaB wall. They’re an incredibly useful piece to have. 🙂
Another awesome building tutorial! Thanks for taking the time to put these together 🙂
Glad you enjoyed it, Ross! Thanks for taking the time to comment, it means a lot to us 🙂
Very useful tutorial, because these trees look very good. Doesn’t require any hard-to-find pieces, so I will definitely try this soon!
Thanks Olav, glad you like it! Looking forward to see you use the technique. Thanks for commenting as well, we really appreciate hearing from our viewers 🙂
That’s a pretty nice technique! I’m not very good at building trees, so I’ll have to try this sometime!
Thanks a lot Sam, glad it was useful to you! 🙂
Simple stuff, yet makes for such an interesting! I’d just like to say I love all the work you guys do with this site! Your tutorials are fantastic!
Thanks a lot, Elijah, we really appreciate it! We’ll try our best to keep them coming for all of you! 🙂
Nice! Looks really nice in the end! One question, is that olive and dk. green in the first picture? Or is that just the lighting? If so, are those 4 x 4 circular corner plates Lego and what sets do they come in?
Thanks Roanoke, glad you like it! In the first picture there’s dark brown under the olive green. The rounded plates are actually 4×8 round plates, from the Ninjago dragon forge.