


Looking to for a semi-circular round tower design for one of your upcoming creations? Today we’ll be taking a look at one such design that I have found to work quite well for castle gatehouses. Let’s get to it!
The base design is quite simple, consisting of plate hinges, 1×4 brick modified with studs, and a few basic plates.
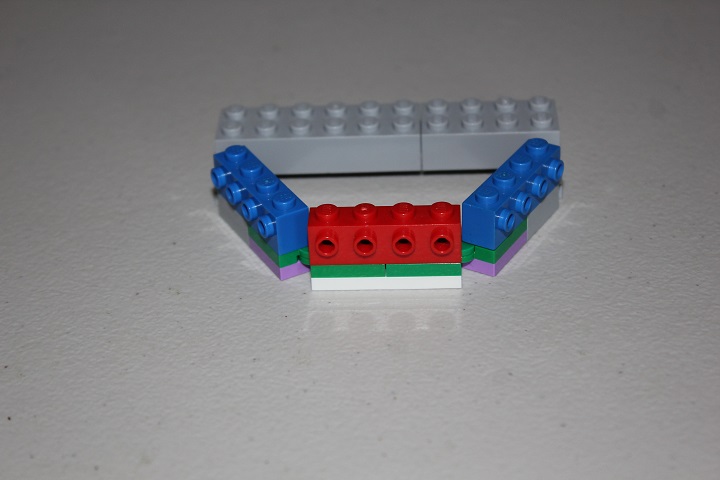
The pattern you see below, with brick modified with stud on side being attached after every layer of 2 plates, is the basic core of this design. We’ll be attaching 2×2 curved slopes to the brick modified later, which will give the tower a nice, rounded front.
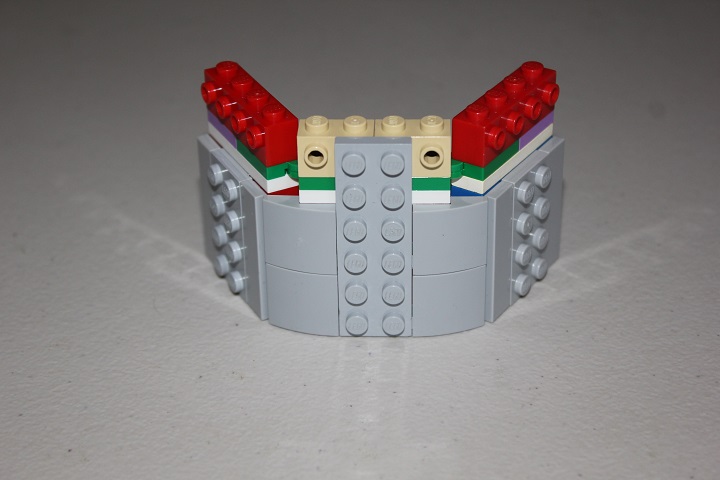
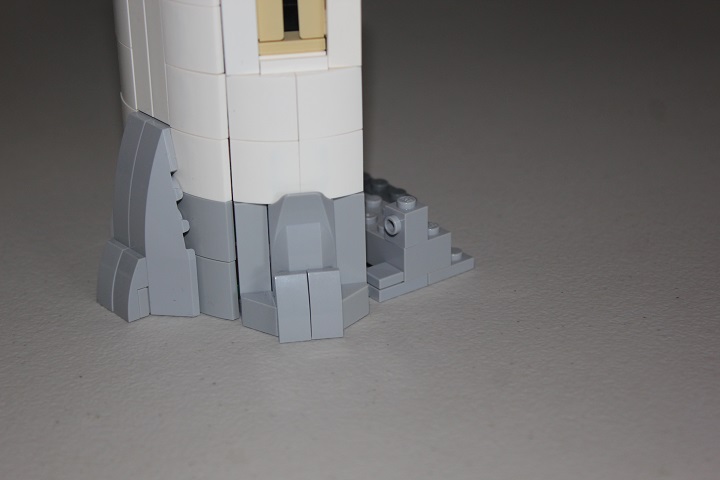
And now we can start adding the curved slopes! On this particular tower, I did a 4-stud tall stripe of light bley at the bottom, to make the tower a little less plain. In addition to the stripe, I thought some buttresses might look nice – which is where the 2×6 and 2×4 plates come in.
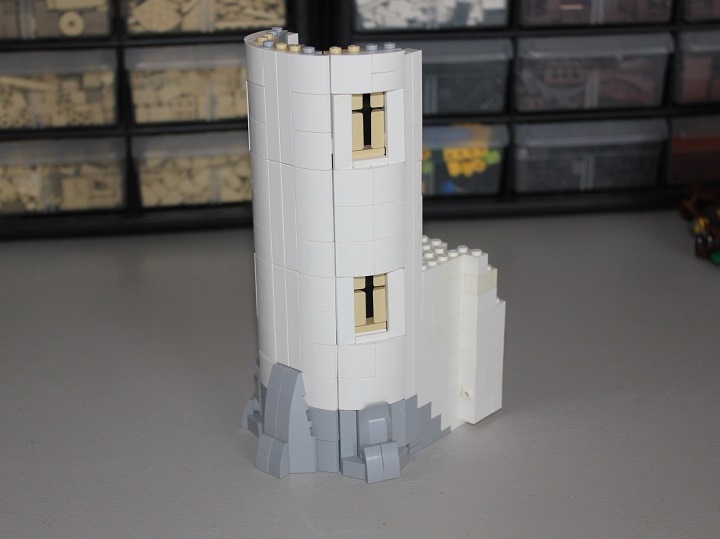
With the bottom stripe of light bley finished, I transitioned to white curved slopes.
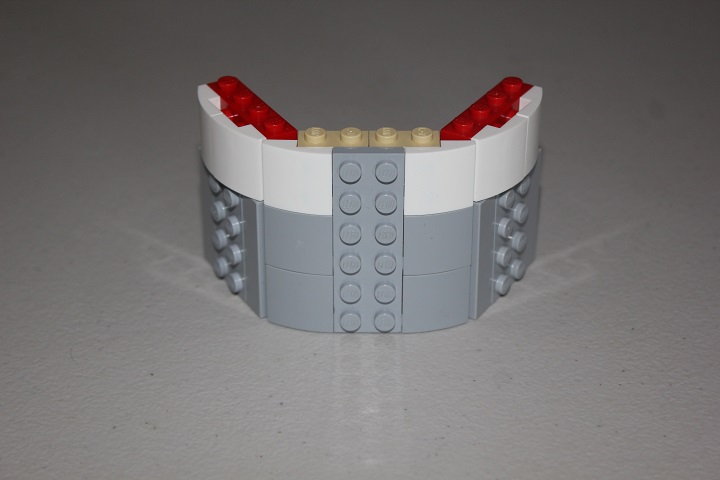
And now it’s time to make some buttresses! It was a lot of fun playing around with different buttress options, but I eventually decided on the designs you see below.

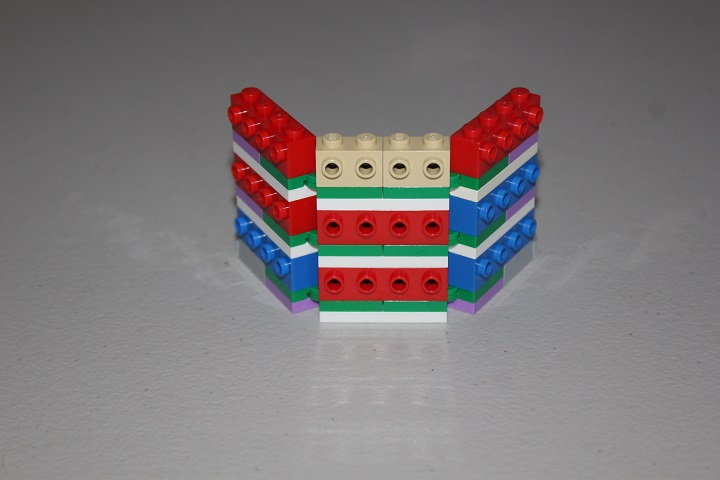
And now, just keep adding more hinges, 1×4 plates, and brick modified with stud.
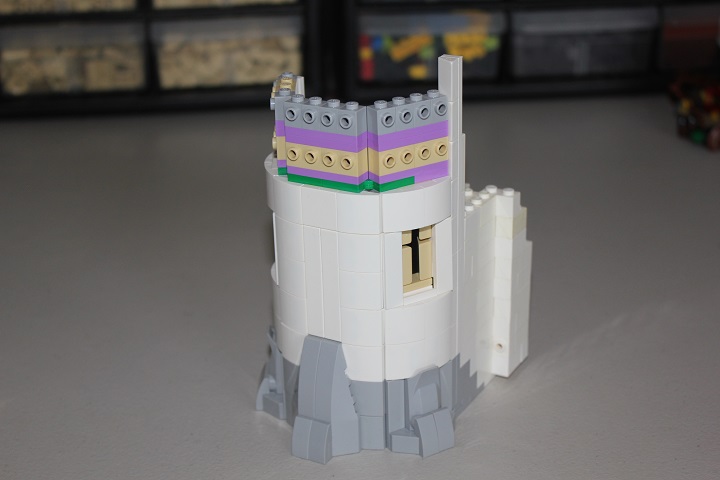
At some point, you’ll want to put some windows in your tower. The design I used start out with 2 headlight bricks on their backs, a 1×2 plate with rail in white, and a 1×2 tan tile.
Then stack two plates on top of the headlights.

Make sure to put some black bricks behind the window too, or else you might be able to see to filler brick used inside. They are attached to the white 1×2 plates from the previous step.
At this point, the window is very simple to complete – all you need are some cheese slopes and 1×1 brick modified with stud.
You may have been wondering what the headlight bricks we put on at the beginning were for. Well, now that the rest of the window is in place, you can attach a 1×4 plate with a 1×4 tile on it, so that the entire window blends smoothly with the entire tower.
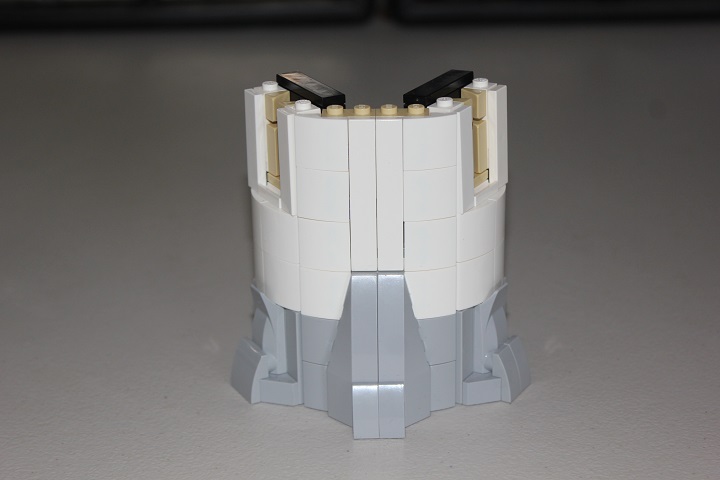
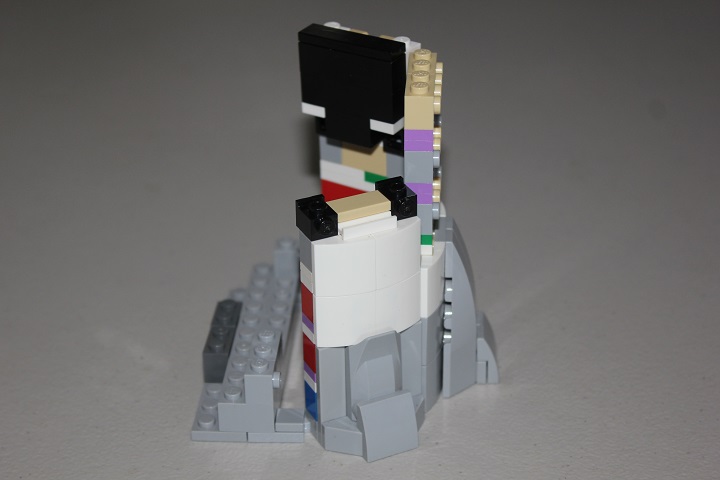
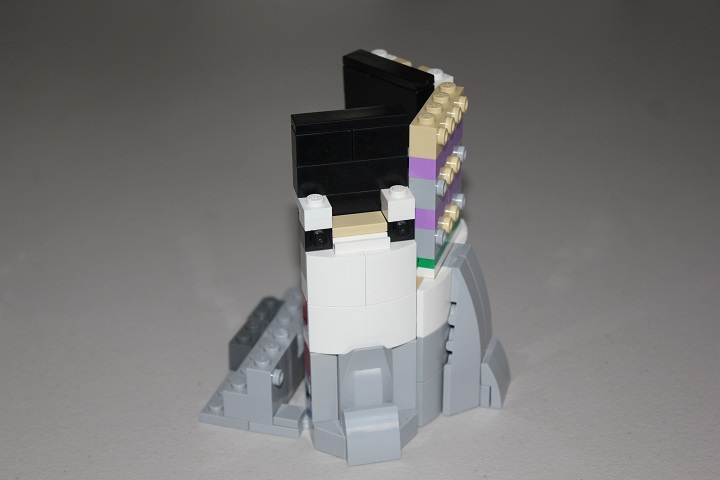
Now that the front portion of the tower is coming along, we should probably work on the back side a little bit. To create a smooth transition from the semi-circular front portion, to the rectangular back portion, we’re going to need some more brick modified with stud on one side, plates, and cheese slopes.
You can see the plates and cheese slopes in place on the backside of the tower here.

It’s just one plate thickness plus the cheese slopes, so double wide cheese are useful to connect multiple plates together.
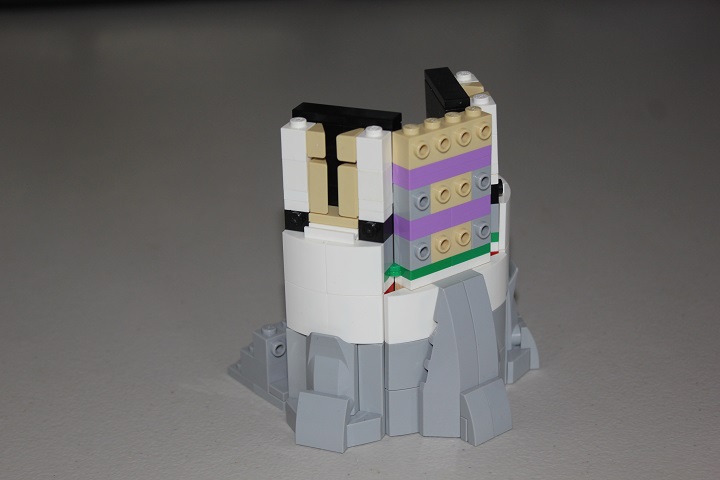
Repeat the same basic design for the second story of the tower.
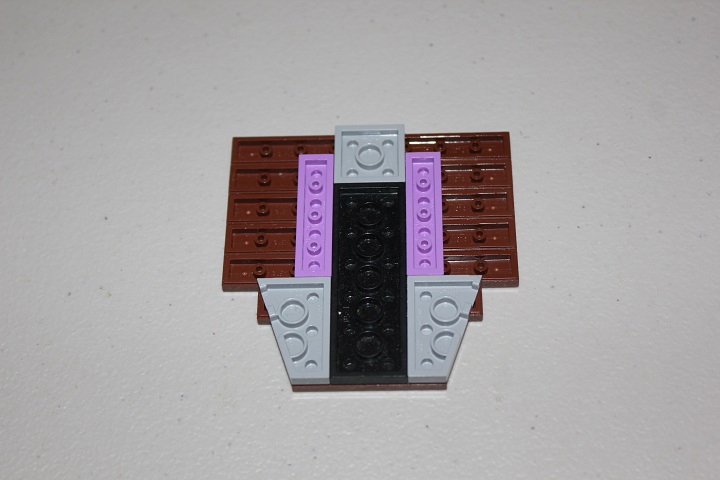
Putting the floor in is a little tricky, and involves putting tiles on top of the black brick stacks behind the window openings.

Those tiles will then help to fill in gaps beneath this floor, and also give it a solid place to rest on.
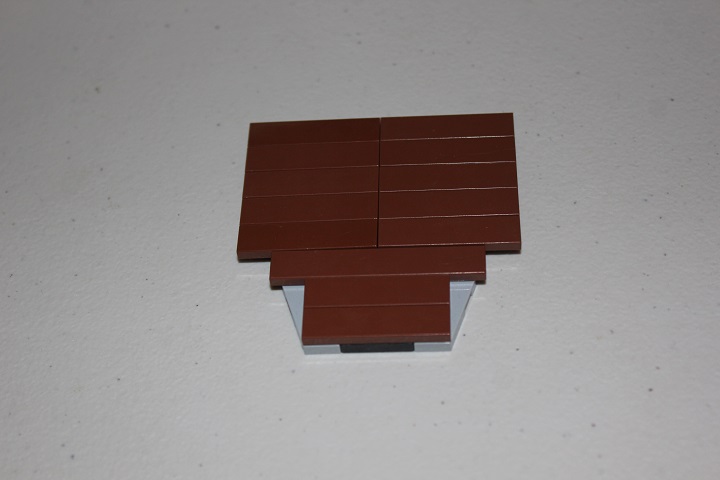
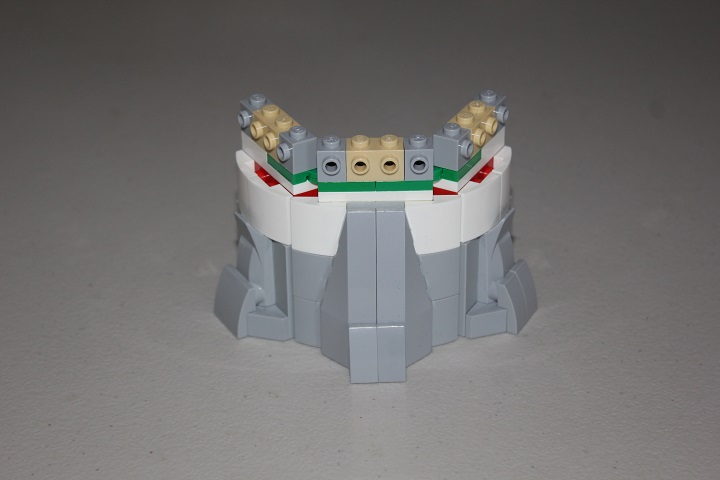
Here is the underside of the floor, which shows how all the tiles are connected and what size wedge plates are used.
The wedge plates rest nicely on the 1×4 tiles mentioned earlier.
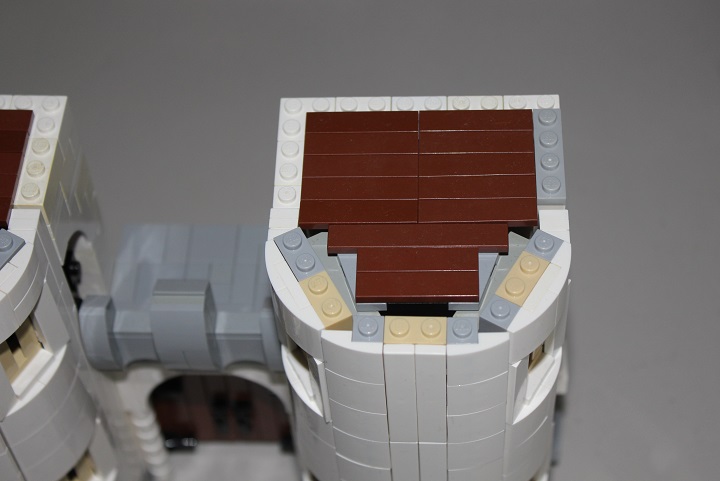
And then you can add some crenelations in whatever style you like.
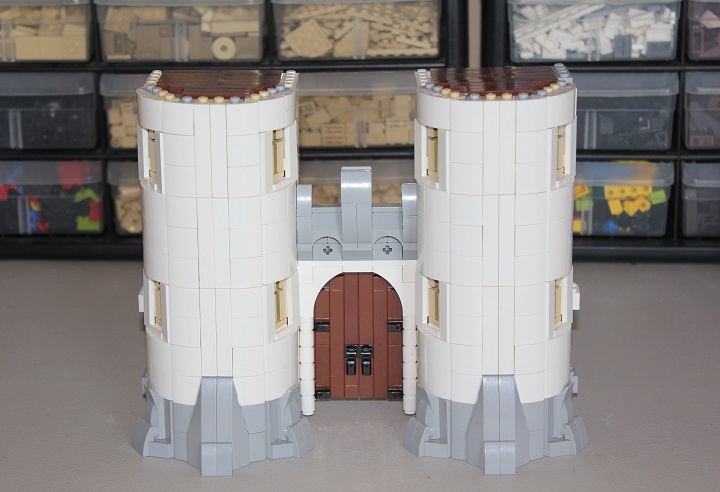
I came up with a technique that is rather similar for the largest completely round tower in my Minas Morgul build, and we will have a tutorial on that in the future as well. So stay tuned for lots more new creations, build logs, and tutorials to come!
In the meantime, feel free to leave a comment if you have any questions or want to see something specific in a future post.

