


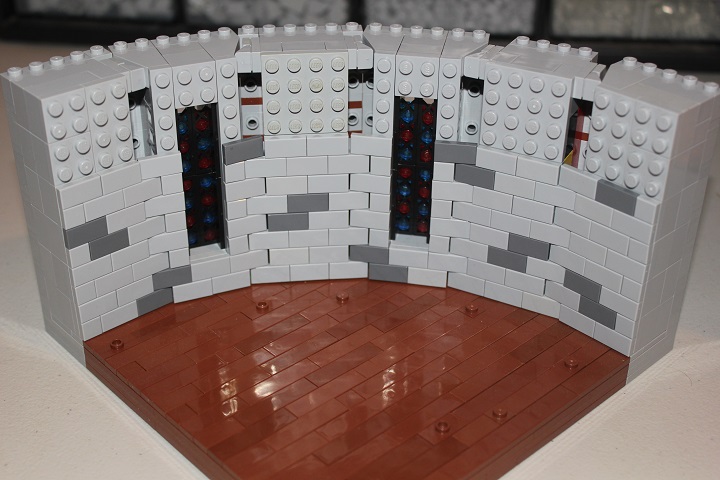
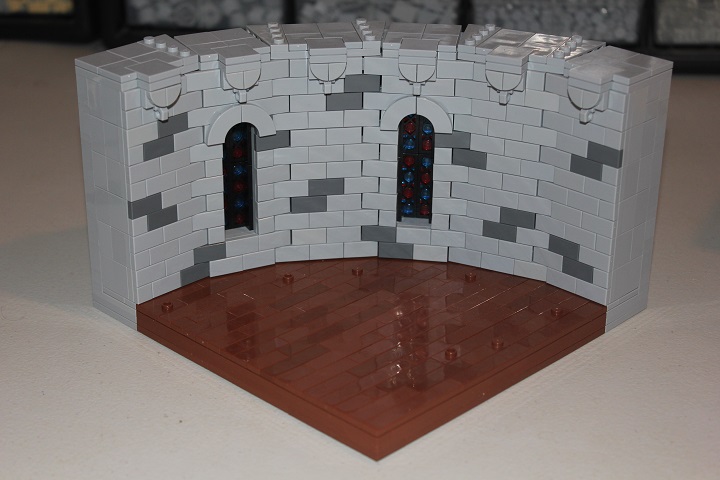
Here is a useful design when you want to build the interior of a rounded wall.
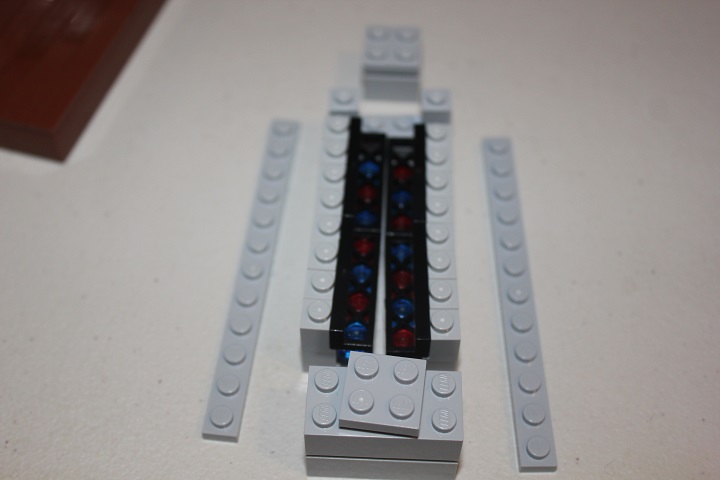
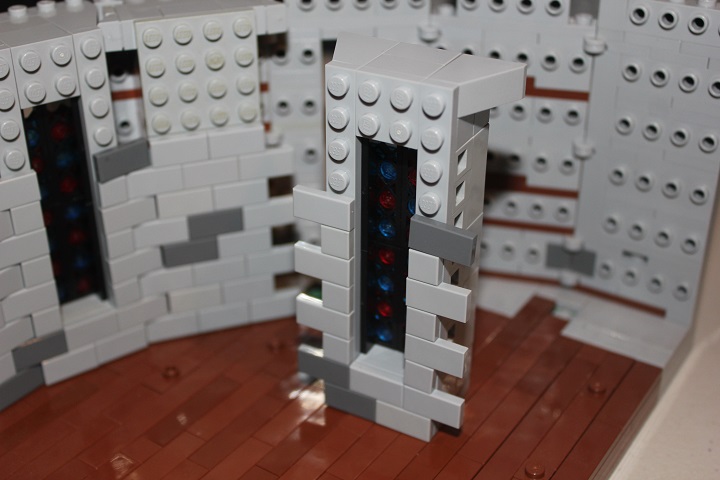
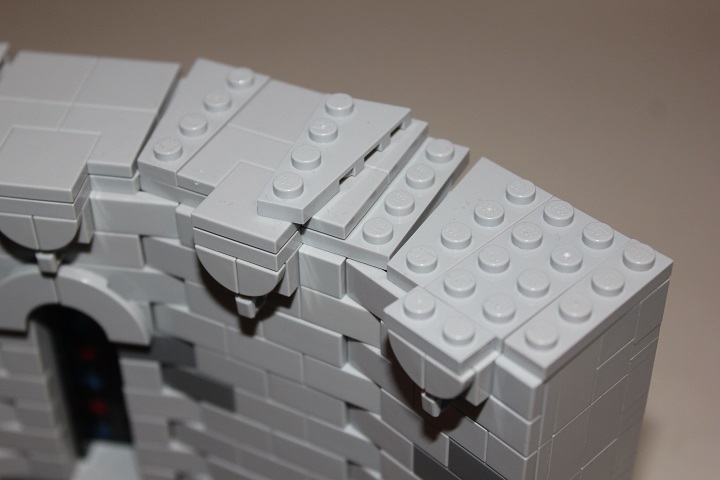
The basic structure is made of hinge plates and brick modified with stud. Typical sections are 6 studs long with the outermost portion on each end being only 5 studs long.

If you’re only focused on showing the interior of the scene, the floor won’t need to have a rounded edge. Instead a setup like the one shown lets the curved wall rest on top of the floor giving a smooth fit without any gaps.
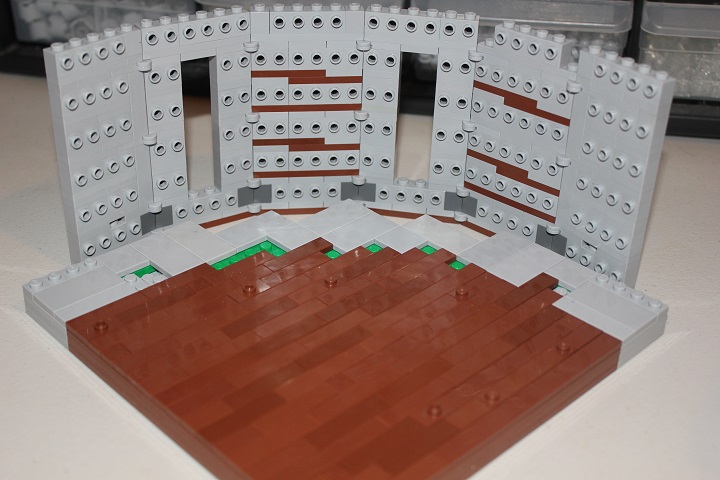
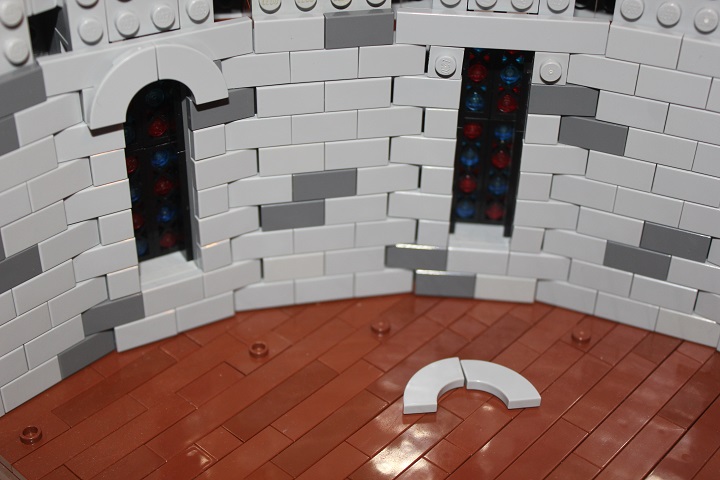
The two slots left in the wall will accommodate windows, but of course you could keep those solid if you preferred.
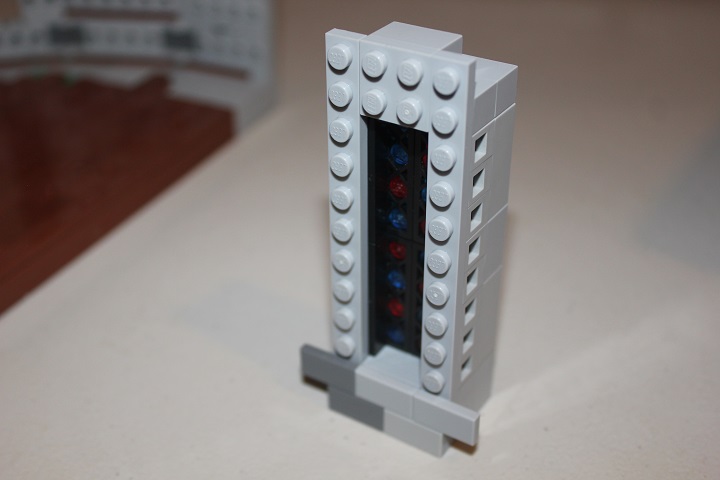
The windows themselves are made of 1×4 lattices with transparent 1×1 plates for stained glass. Headlight bricks hold them in position.

Each interior wall section will only be four studs wide, and two bricks plus one plate thick.
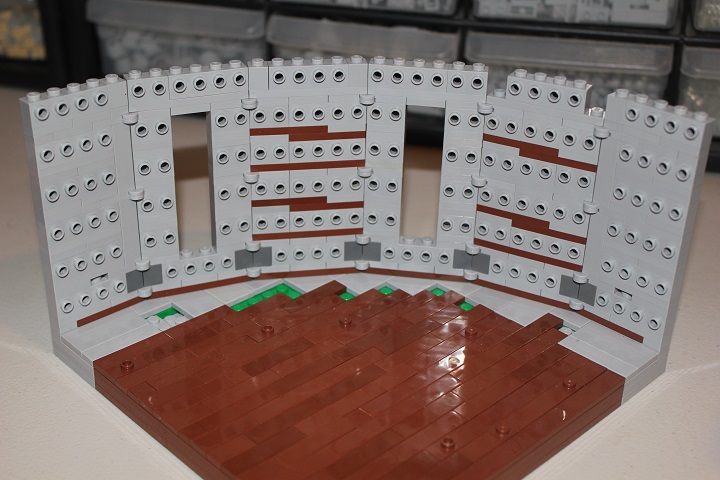
I chose to make my walls 12 studs tall. It’s important to make sure all the elements immediately around the windows match the wall color.
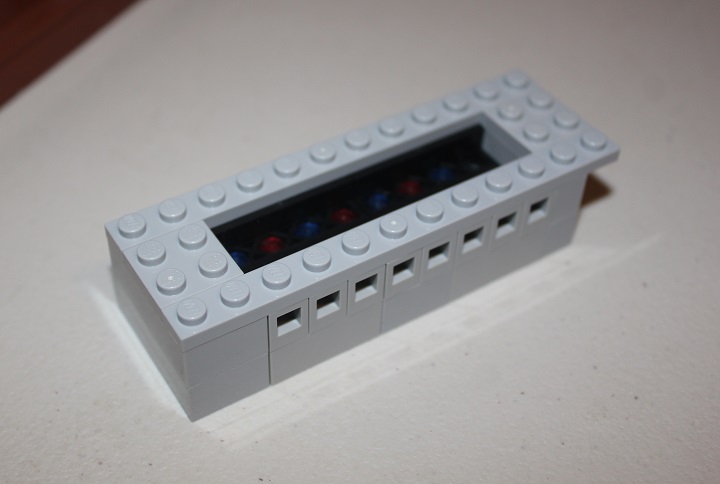
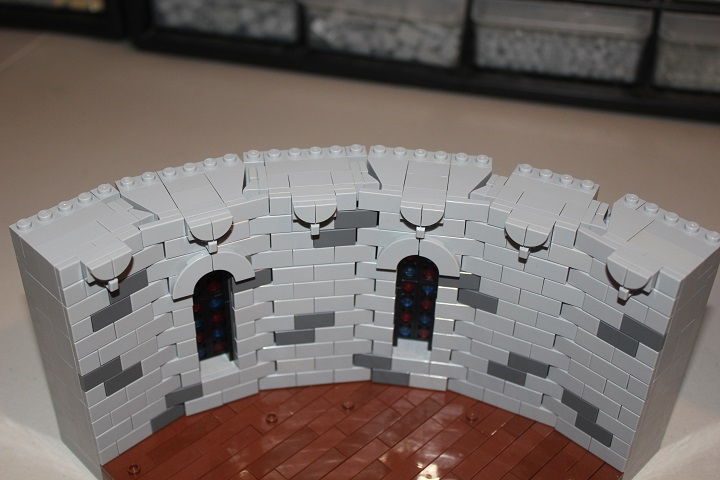
Once you have the window section assembled it’s a simple matter to add tiles.
The interlocking 1×2 tile pattern looks much better than a straight line division between sections would.
The solid wall sections are also two bricks plus a plate deep underneath the tiles.
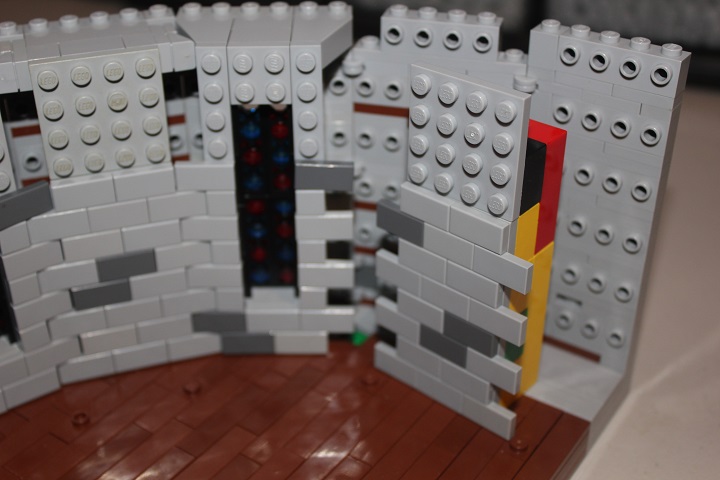
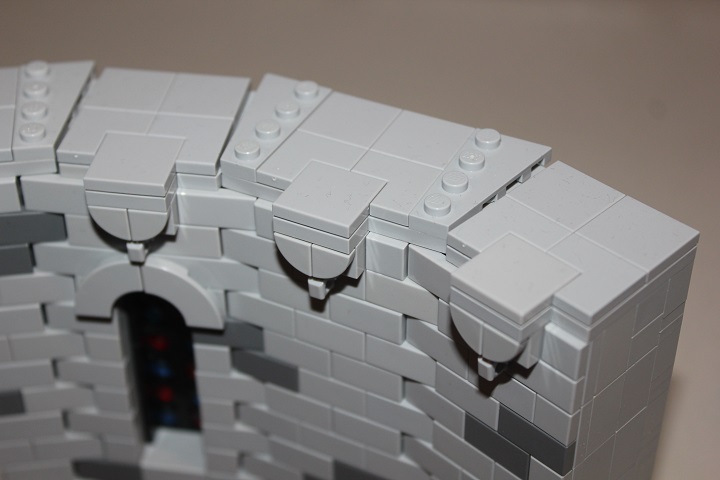
At the top of the wall sections I used some slopes and SNOT elements to try and fill the gap a bit. Though this isn’t really necessary as I later found a better solution using studs up wedge plates.
Over the windows I used macaroni tiles attached to 1×1 plates to make an arch.
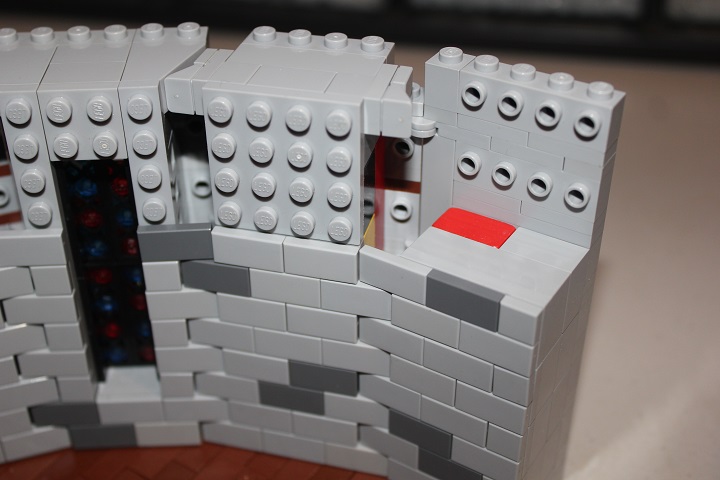
Here’s how the complete wall looks without the final studs up cap.
2×4 wedge plates on every other wall section give a nice clean joint.

And to make absolutely sure there are no significant gaps you can add another layer of wedge plates alternating which wall section they are on.
Hopefully this guide is helpful, and let us know if you have any questions about the design!


This is such a sophisticated solution to an age old lego problem – curved walls. Everything about this amazes me. Tutorial bookmarked! Cheers!
Thank you, great to hear you found it helpful!