


In this build log, we’ll take a look at the design process for The Streets of Daydelon. One of my most popular models of 2017, this winter scene came together pretty quickly. It was an entry into the Village Life category of the Colossal Castle Contest, which meant the base needed to fit on a 48×48 or 32×64 layout. I chose to go with an irregular base that fit on a 48×48 baseplate.
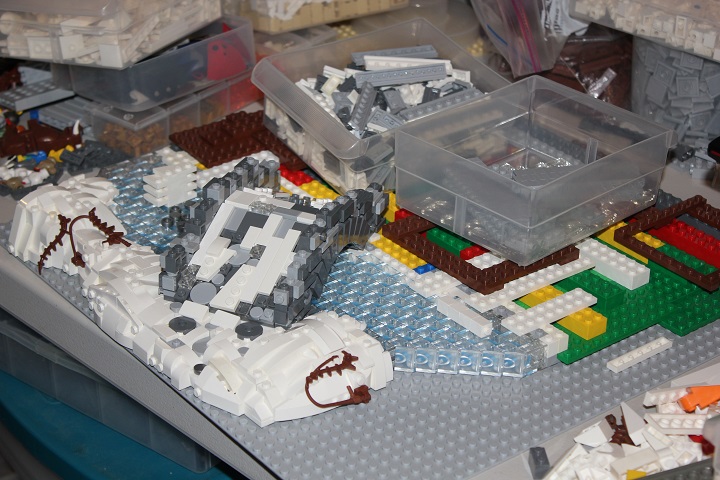
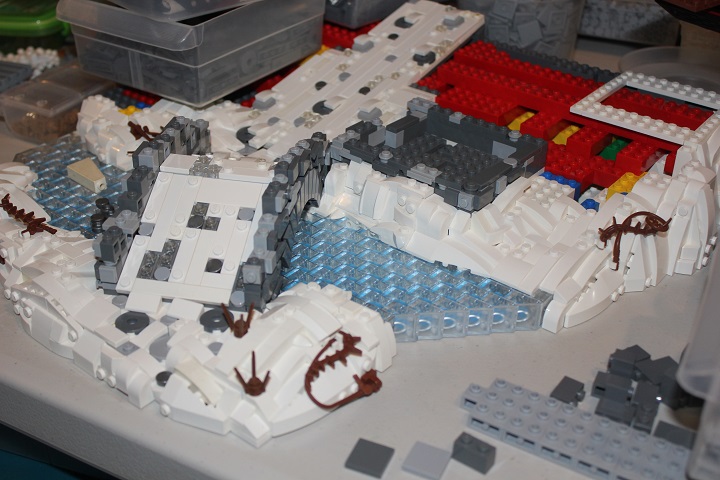
Starting off, I knew I wanted a river going across the front of the build, and started with that. I fiddled some with the size and setup of the river, though I had decided on using this SNOT design for sure. Simple plates and bricks were used to make the base of the build. I chose to only have an irregular edge on the front two sides, in order to gain more space.
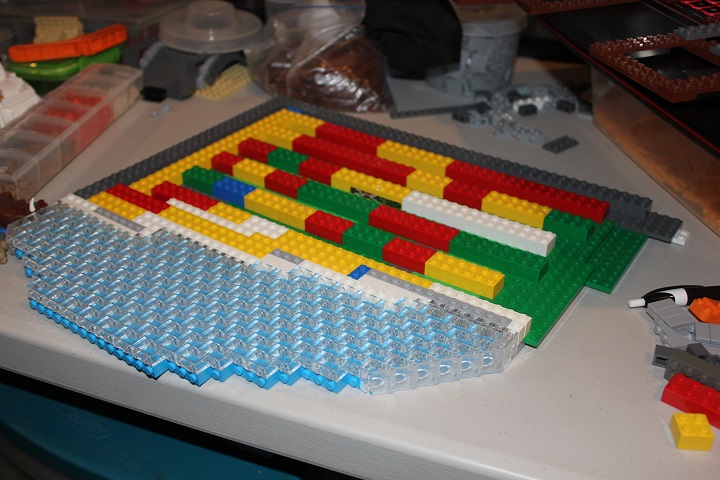
So river and base size put together, what’s next? A bridge in this case, and also deciding how to lay out the village buildings. I wanted as many houses as possible, though space was rather limited. I ended up going with a 5 building format, that was roughed out with plates as shown below. This allowed me to easily see the size and spacing of the houses.
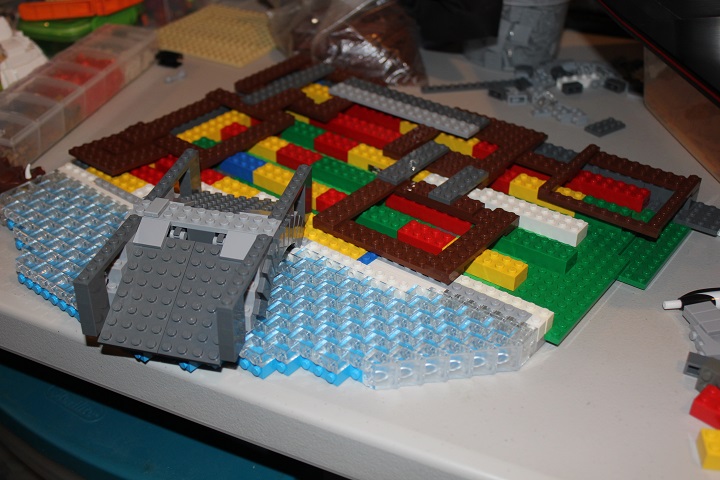
Next I built the walls of the bridge, and started on the first section of snow. Around the edges I used some SNOT slopes where they fit well, and also incorporated some reddish brown whips and spiky vines to break up all the white some. One interesting thing to note here, is that I used just the SNOT water to attach the front section of landscape. The top studs of the SNOT water go into some technic bricks. I was a little worried that the whole front portion might snap off when being carried, so I used brick with stud and plate with stud to get as many attachment points as possible on the village side.
Building this irregular edge was trickier than usual, due to the tight size constraints. Particularly along this front edge, where there is a relatively straight line. Which I would generally try to avoid, instead stepping it in or out to get a more visually interesting shape, and have more flexibility on using parts without them looking repetitive. I continued work on the bridge, moving onto the actual walking surface. I thought using white wedge plates and tiles over a base of bley and dark bley cobblestone would look nice, but it ended up being a bit messy.
Once the front chunk of landscape was complete, the river really started to look nice. And I felt like the build was coming together well. Still a long way to go though!
Next I started putting in ‘foundations’ for the buildings. I wanted the village set on a slight hill, so I raised buildings in the rear a few bricks. As I figured out where the buildings were located, I could build the snow around them.
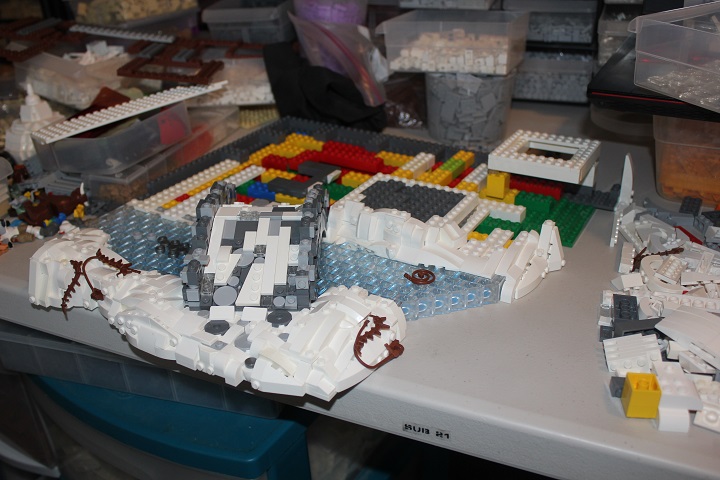
And quickly finished off the irregular border edge. The long 6 wide white plate you can see lying past the bridge was being used to gain rough estimate of the main street’s slope (though it had fallen off it’s little temporary support in this picture).
I kept my preliminary village layout together during this whole time, so that I could quickly and easily verify I was putting the house foundations in the proper location.
Since I knew exactly where each building would go, I could build the sloped street with cutouts to fit nicely around the houses. I used a lot more white tiles and slopes than cobblestone on the street here, as I realized the way I had done the bridge did not work well. And adjusted that as well, as you can see below.For the stonework in this creation, I was mixing bley and dark bley fairly evenly. Plate with rail, 1×1 round plate, and SNOT tiles were used for texture. We will have a tutorial on this style of stonework in the future, so keep an eye out for that.
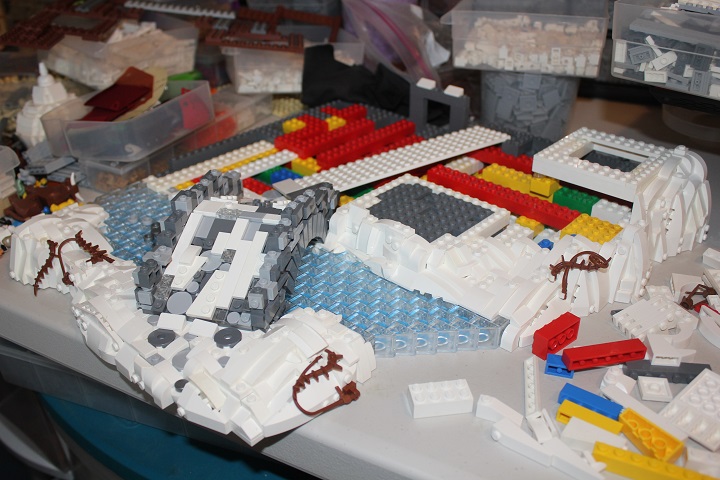
I only did one of the houses, and the clock tower to start, as I wanted to make sure the designs I had in mind would work well before using them on every building.
The designs did work well, so I got ready to move onto the other houses and shops. After the first house I had realized chimneys would be a logical, and pretty addition to the buildings, so I also planned where those would be located. And for the other 4 houses, that was almost decided for me as they could not have chimneys on the back side (would be over the size limit), and chimneys on the street side wouldn’t have made sense or looked good.

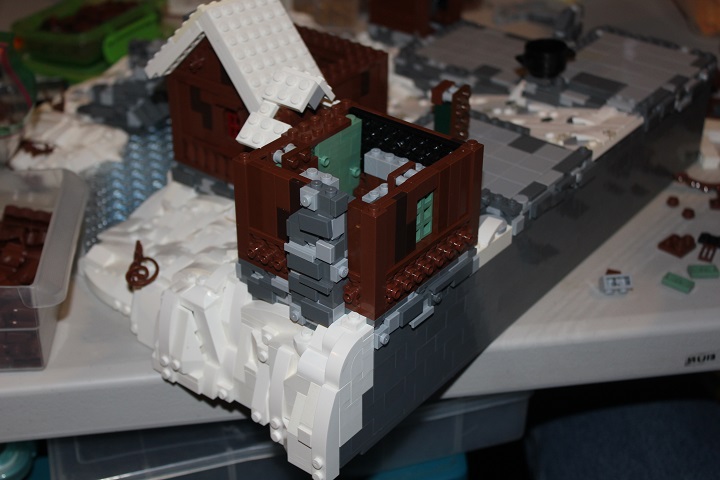
I built the stone foundation separate from the wood portion of each house, with a tiled surface so I could use the pull out room design. From the start I knew I wanted stone foundations, but they ended up working perfectly to accommodate pull out rooms, as the height of the stone bases allowed the rooms to clear the snow.
The wooden wall design for the houses was two studs thick to allow for the SNOT tile paneling, and also still have a complete interior. Only downside to this being that it severely cut into interior space, which was already pretty tight.
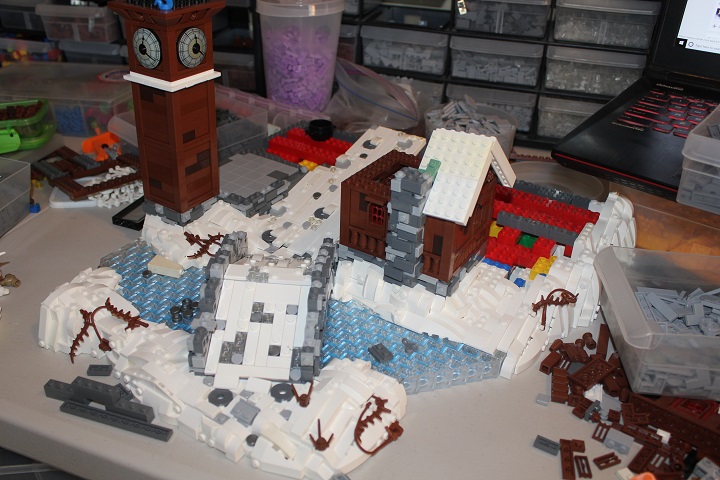
Here you can see all of the stone foundations in place! And only a tiny portion of snow-scape still to be built. Notice the plate and half stud offset jumpers in white on the clock tower: this was meant to represent small snow covered ledge, but didn’t end up looking very good with this design.
Progress made on the second house, which had the smallest foot print of any in the village. Due to that, and using the 1×1 SNOT brick window design on the first floor, I decided not to try and fit any interior in this particular building. Each of the 5 buildings had a different accent color that was used for both the windows and door. Dark red for the first building, and sand green for this one.
I also adjusted the wood detailing slightly among the different houses, here I used SNOT friends flowers instead of the cones design from the first.
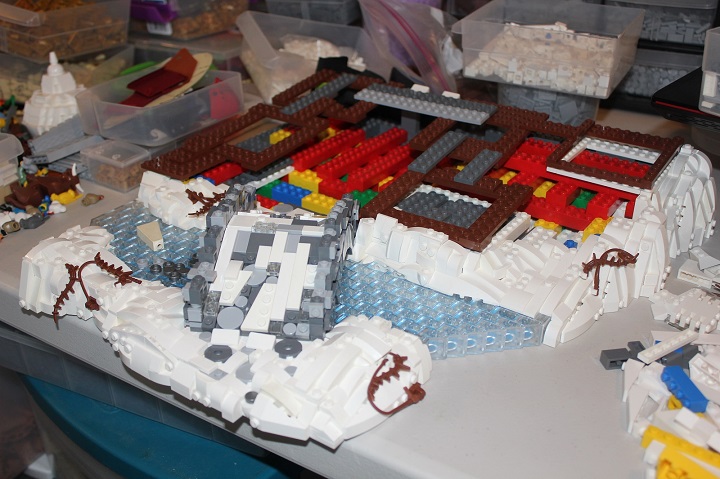
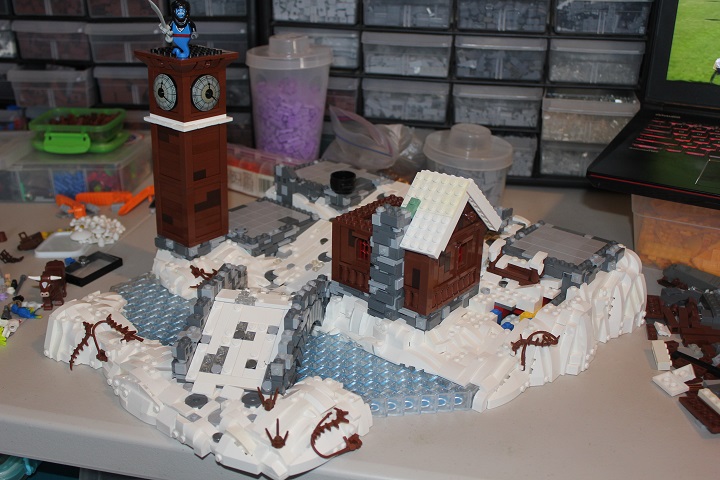
At this point the model seemed to come together super quick, though it really maintained a pretty steady pace throughout the build process. Finishing a house has more visual impact than completing some snow. The toy shop used medium blue for the accent color, and had some large windows facing the street so that those who walk by could easily see the toys inside.
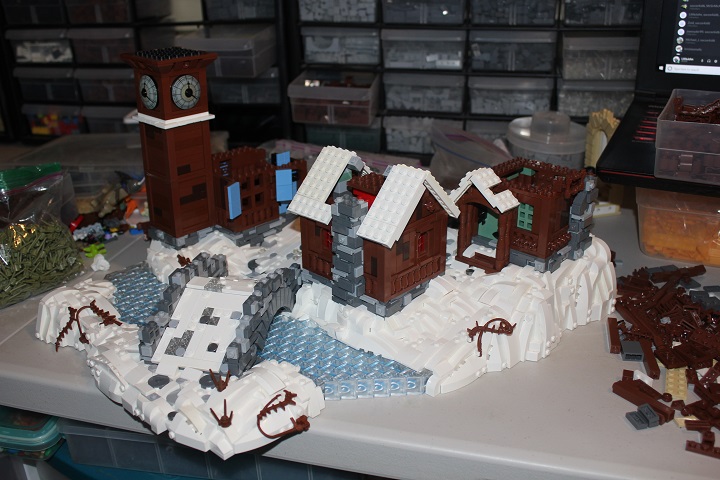
I like to have things in the back of builds be taller than those in the front, so I had the rear buildings be two-story, while the very front one is just a single story. The right most building was almost a story and a half tall. All of the standard house roofs in the village were 45° slopes, using plates attached to each other via brick with stud. As you can see, I started by just roughing out one end of the roofs so I could get an idea of how they looked and where they fit.
When a building had a second story, I used SNOT round bricks and plates, or inverted slopes to extend it out a stud or two over the street. Each of the three largest buildings is a store, which meant they also got a shop sign, and display windows if possible. The final two buildings used dark blue and dark green respectively as their accent colors. Using sand and dark colors gave some nice pop to the scene, without making it overly bright.
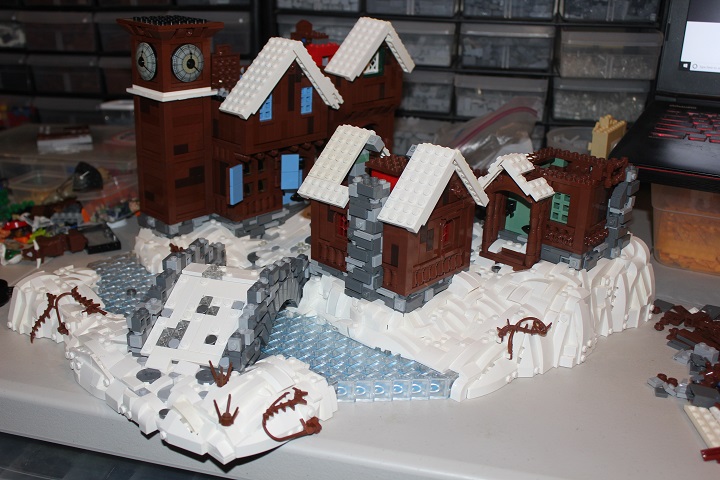
Finishing the roofs was pretty simple: lots of curved slopes and tiles, along with a few plates to give a heavy drifted look. The only real challenge for the roofs, was working around the dormers of the general goods store in the back corner. A few wedge plates held together by a brick with stud ended up fitting in nicely behind the prefab windows, and matched the slope of the roof well too.
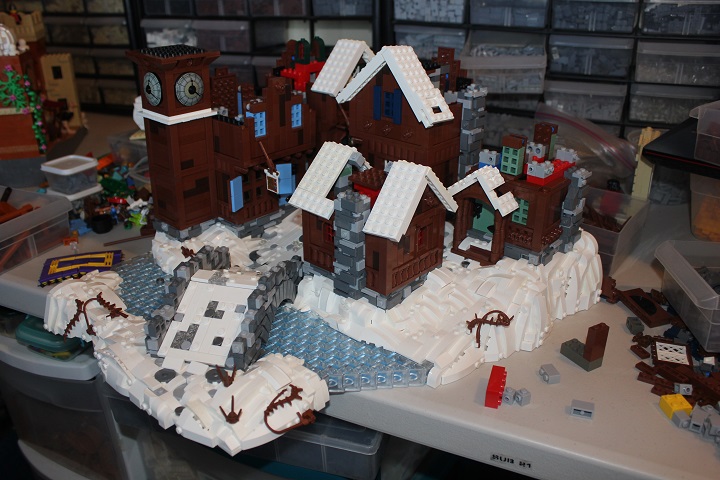
The bell tower roof came together easier than I had expected, and uses 6 long bars to fill in where gaps otherwise would have been between the sloping wedge plates. Now I was getting really close to done! Which meant adding some more landscape details like the snowy pine trees and bushes.
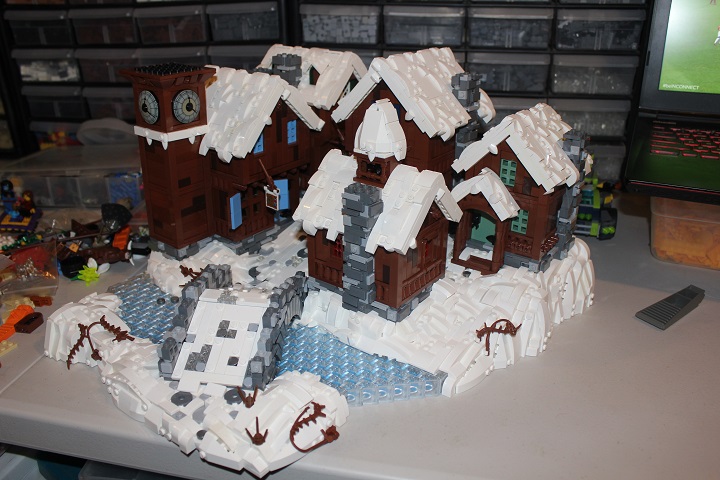
I had been sharing WIPs with InnovaLUG throughout the build process, and people still were a bit unsure about the bridge pathway. Geneva asked about making it curved instead of straight slopes, and while I was skeptical at first, some quick research showed that most stone bridges do have curved walking surfaces. Once I tried it, I realized it looked way better too! Besides that adjustment, I added lots of minifigures busy with various winter activities, and some animals to liven up the scene as well.
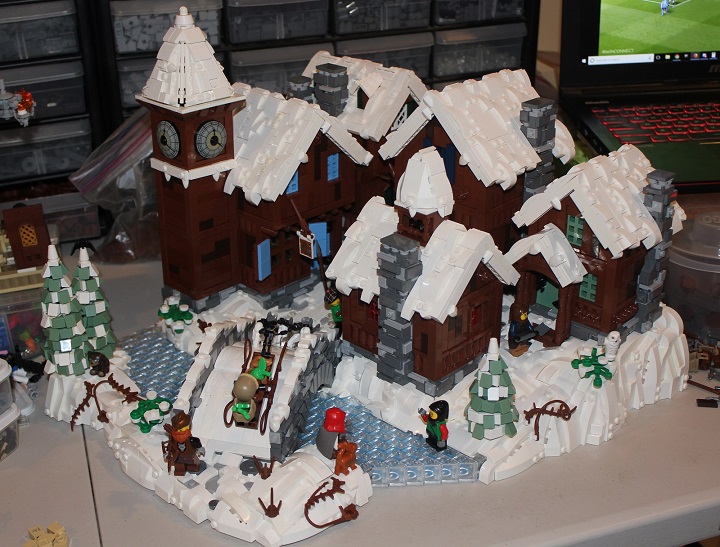
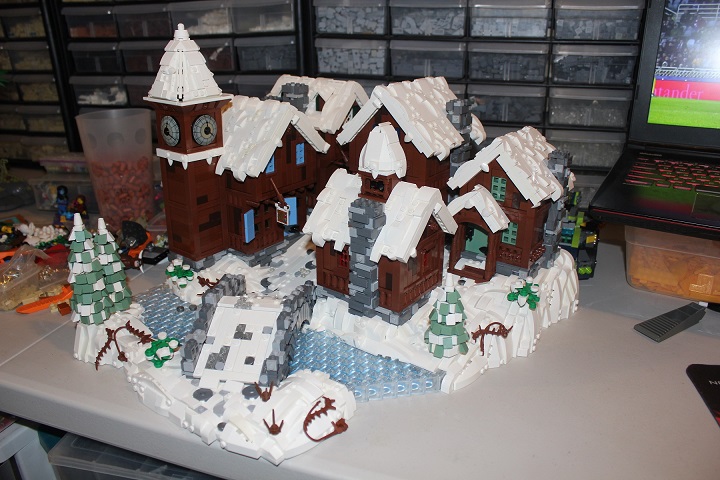
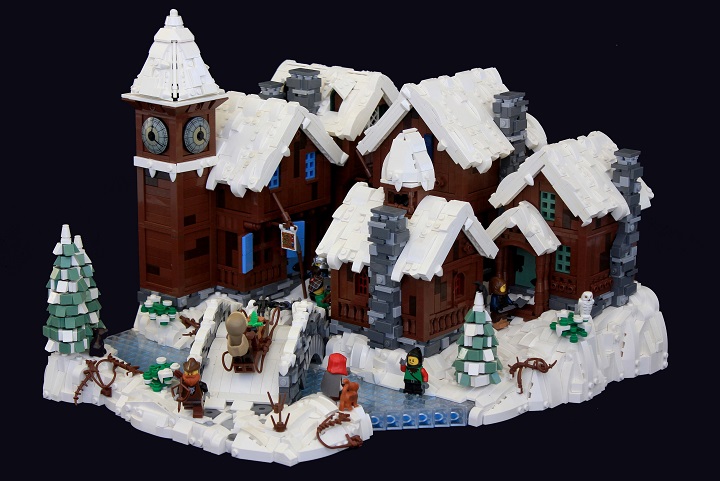
Finished model:
I hope you enjoyed that look into the build process for this winter village, and feel free to leave a comment if you have any questions.


It must of been hard to make the roof of the houses all line up. Looks great.